How to Build Concrete Kitchen Cabinets
Concrete kitchen cabinets are a unique and modern addition to any home. They offer durability, fire resistance, and a distinctive industrial aesthetic that can transform the look and feel of your kitchen. While they might seem intimidating to build, the process is achievable with careful planning and the right tools. This guide will provide a step-by-step approach to constructing your own concrete kitchen cabinets, from design to installation.
1. Planning and Design
The first step in building concrete cabinets is careful planning and design. This involves determining the size, configuration, and functionality of your cabinets. Consider factors like the layout of your kitchen, the available space, and your desired storage needs. Decide on the number of cabinets, their dimensions, and any special features like drawers, shelves, or doors.
Create detailed plans for each cabinet, including measurements for the base, sides, top, and any internal components. You'll need to account for the thickness of your concrete forms and the desired depth of the cabinets. Consider the style of the cabinet doors and hardware you want to incorporate into your design.
Before proceeding, create a list of materials needed for this project. This includes concrete mix, formwork materials (plywood, lumber), concrete sealer, screws, and glue for assembly. You may also need additional tools such as a saw, drill, sander, level, and a concrete mixer. The exact quantities of materials will depend on the size and complexity of your cabinets.
2. Constructing the Forms
Once your design is finalized, you'll need to build the forms that will hold the concrete for your cabinets. The formwork serves as a mold that shapes the concrete into the desired dimensions. Use plywood or lumber to construct a sturdy frame for each cabinet.
The forms should be precise and tightly sealed to prevent leaks during pouring. Ensure that the forms are level and square to guarantee the cabinets are straight and even. You can use braces or supports to keep the forms stable while the concrete cures.
Consider designing the forms with removable panels to allow for easy access to the interior of the cabinet once the concrete is cured. This will make it easier to install shelves, dividers, or other features. If you plan to have a countertop, carefully plan the formwork to create a seamless transition between the cabinet and the countertop.
3. Mixing and Pouring Concrete
With the forms ready, it's time to mix and pour the concrete. Follow the instructions on your concrete mix bag carefully. You may need a mixer to ensure the concrete is thoroughly combined. The consistency of the mixture should be workable, allowing you to pour it into the forms without excessive slumping.
Pour the concrete into the forms, starting from the bottom and working your way up. Use a trowel or a flat board to level the concrete and remove any air bubbles. If needed, you can use a vibrator to compact the concrete and prevent voids. Allow the concrete to cure for the recommended time, typically a few days.
During curing, keep the concrete moist to prevent cracking. You can cover the forms with plastic sheeting or spray water periodically. It's important to let the concrete reach its full strength before removing the forms.
4. Finishing and Installation
Once the concrete has cured, remove the forms and inspect the cabinets for any imperfections. You can use a sander to smooth out any rough edges or uneven surfaces. Apply a concrete sealer to protect the cabinets from water damage and staining.
Install any hardware like hinges, handles, and drawer slides. You can pre-drill holes to help with installation. Consider using a sealant around the joints and seams to prevent water infiltration. Once the cabinets are finished, you can install them in your kitchen according to your design plan.
When installing the cabinets, ensure they are level and secure. Use screws or anchors to attach them to the walls or floor. You may need to adjust the cabinet height to accommodate the countertop. Before installing the countertop, make sure the cabinets are securely fixed and properly aligned.

Concrete Kitchen Table Monolithic How To Construction New Looks Stylish Design

Manual Construction Techniques Building Concrete Kitchen Cooking Table

Advantages Of Concrete As A Kitchen Countertop Material

Amazing Smart Construction Techniques Building Concrete Kitchen Cooking Table

Diy Concrete Countertops Part 2 Of The Total Kitchen Series

Diy Concrete Countertop Gray House Studio

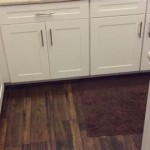
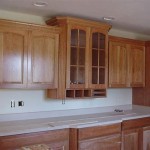
Diy Self Build Kitchen Concrete Blocks Units Cupboards Cabinets

Amazing Construction Reinforced Concrete Kitchen Table Install With Ceramic Tile Tiles

Homemade Modern Ep87 Concrete Kitchen Countertops

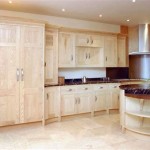
Eight Concrete Kitchens With Raw And Tactile Surfaces
Related Posts