How to Build Wood Outdoor Kitchen Cabinets
Building outdoor kitchen cabinets from wood is a great way to add functionality and style to your outdoor living space. With a little planning and effort, you can create custom cabinets that will meet your specific needs and complement your existing décor.
Here is a step-by-step guide to help you build wood outdoor kitchen cabinets:
1. Plan your cabinets
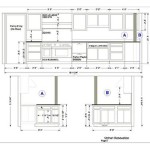
The first step is to plan your cabinets. This includes determining the size, shape, and style of the cabinets, as well as the materials you will use. Consider the following factors when planning your cabinets:
- The size of your outdoor kitchen
- The location of the cabinets
- The purpose of the cabinets
- The materials you want to use
Once you have a plan, you can begin to gather the materials you need.
2. Gather your materials
The following materials are required to build wood outdoor kitchen cabinets:
- Wood (such as cedar, redwood, or treated pine)
- Plywood or MDF for the cabinet backs and shelves
- Hardware (such as hinges, screws, and nails)
- Countertop material (such as granite, marble, or tile)
- Tools (such as a saw, drill, and sander)
Once you have gathered your materials, you can begin to build your cabinets.
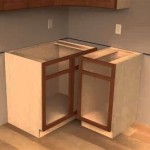
3. Build the cabinet frames
The first step is to build the cabinet frames. To do this, cut the wood to the desired size and shape. Then, join the pieces together using screws or nails. Be sure to square the frames before attaching the backs.
4. Attach the cabinet backs
Once the frames are built, you need to attach the backs. To do this, cut the plywood or MDF to the size of the cabinet backs. Then, attach the backs to the frames using screws or nails.
5. Install the shelves
If you want shelves in your cabinets, now is the time to install them. To do this, cut the plywood or MDF to the size of the shelves. Then, attach the shelves to the cabinet frames using screws or nails.
6. Install the doors and drawers
The next step is to install the doors and drawers. To do this, cut the wood to the desired size and shape. Then, attach the doors and drawers to the cabinet frames using hinges and drawer slides.
7. Finish the cabinets
The final step is to finish the cabinets. To do this, you can apply a stain or paint to the cabinets. You can also add a clear finish to protect the cabinets from the elements.
8. Install the countertop
Once the cabinets are finished, you can install the countertop. To do this, cut the countertop material to the size of the cabinets. Then, attach the countertop to the cabinets using adhesive or screws.
9. Enjoy your new outdoor kitchen!
Your new wood outdoor kitchen cabinets are now complete. Enjoy cooking and entertaining in your new outdoor space!
Additional tips:
- Use treated wood if you plan on using your cabinets outdoors.
- Apply a sealant to the cabinets to protect them from the elements.
- Add hardware to the cabinets to give them a custom look.
- Consider adding lighting to the cabinets to make them more functional at night.

How To Build An Outdoor Kitchen Cabinet Part 2

Outdoor Kitchen Construction Build An Landscaping Network

How To Build An Outdoor Kitchen With Pictures Wikihow

How To Build Outdoor Kitchen Cabinets

How To Make An Outdoor Kitchen For Deck Or Patio Ron Hazelton
Building Outdoor Cabinets Jlc

6 Ideas To Build An Outdoor Kitchen On A Budget Rona

How To Build An Outdoor Kitchen With Pictures Wikihow

Outdoor Kitchen Island Build Plans Houseful Of Handmade

How To Build Outdoor Kitchen Cabinets
Related Posts


