How to Build Your Own Kitchen Island
A kitchen island is a versatile addition to any kitchen, offering extra counter space, storage, and seating. While purchasing a pre-made island is an option, building your own can be a rewarding and cost-effective project. With careful planning and execution, you can construct a custom island that perfectly suits your needs and style.
1. Determine Size and Shape
The first step is to determine the desired dimensions and shape of your island. Consider the available space in your kitchen, the intended use, and the overall flow of the room. A standard island width ranges from 36 to 42 inches, but it can be adjusted based on your requirements. For seating, allow at least 24 inches per person around the island.
The shape of the island can also influence the functionality. A rectangular island is a classic choice, providing ample counter space and seating. A curved or L-shaped island can add a unique touch and better utilize corner spaces. Consider the overall layout of your kitchen and the flow of traffic when deciding on the shape.
2. Design and Materials
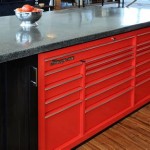
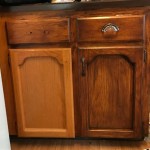
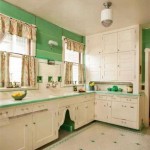
Once you have determined the size and shape, it's time to design the island and choose the materials. Consider the existing cabinetry and countertops in your kitchen to ensure consistency. For the frame, you can use solid wood, plywood, or even metal. The countertop can be made from various materials, including granite, quartz, butcher block, or laminate.
Consider the style and functionality you desire. You can incorporate features like drawers, shelves, a sink, or a built-in cooktop. If you plan to add seating, incorporate an overhang or a built-in bar top. Remember to take into account the weight of the materials and ensure that the frame is sturdy enough to support them.
3. Construction Steps
Once the design and materials are finalized, you can start building the island. The construction process typically involves the following steps:
a. Build the frame: Cut and assemble the frame using the chosen materials. Ensure that the frame is square and level.
b. Add supports: If necessary, install additional supports for shelves, drawers, or countertops.
c. Install the countertop: Cut and attach the countertop to the frame, ensuring it is flush and securely fastened.
d. Add finishing touches: Install any desired features, such as drawers, shelves, a sink, or a cooktop.
e. Sand and finish: Sand the island smooth and apply the desired finish, such as paint, stain, or varnish.
4. Safety and Considerations
Building a kitchen island requires attention to safety and certain considerations. Ensure that you use proper safety gear, such as eye protection, gloves, and a respirator.
Also, consider the following:
a. Weight: Choose materials that are lightweight but still sturdy. Distribute the weight evenly throughout the island for stability.
b. Electrical wiring: If you are incorporating electrical features, ensure that the wiring is done correctly and that the outlets are properly grounded. Consult a licensed electrician if needed.
c. Plumbing: If you are installing a sink, ensure that the plumbing is done correctly and that the sink is properly installed.
d. Ventilation: If you are incorporating a cooktop, ensure that there is adequate ventilation to prevent smoke and fumes from accumulating.
Building your own kitchen island offers a rewarding opportunity to customize your kitchen space and add a personal touch. By following these steps and considering important considerations, you can create a functional and attractive island that enhances the beauty and functionality of your kitchen.

15 Diy Kitchen Islands Unique Island Ideas And Decor

Build A Diy Kitchen Island Basic

Diy Build Your Own Kitchen Island The May Daily

How To Create A Kitchen Island Build Diy

6 Easy Diy Kitchen Island Ideas For Maximum Style

Build A Diy Kitchen Island Basic

Two Simple Diy Kitchen Island Designs Build Building A

40 Diy Kitchen Island Ideas That Can Transform Your Home

Build Your Own Diy Kitchen Island Tutorial Step By Building Plans

Diy Kitchen Island Free Plans