How to Transform Your Kitchen Cabinets with Chalk Paint: A Step-by-Step Guide to Achieve a Stunning White Finish
Chalk painting has become a popular technique for restoring and refreshing furniture, and kitchen cabinets are no exception. This guide will provide a comprehensive overview of the essential aspects involved in chalk painting kitchen cabinets white, enabling DIY enthusiasts to embark on this rewarding project with confidence.
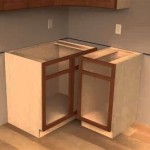
1. Preparing the Cabinets: A Clean Slate for Transformation
Before applying chalk paint, it is crucial to prepare the cabinets thoroughly. This includes removing all hardware, such as handles and knobs, and cleaning the surfaces with a degreaser to remove dirt and grease. Any existing finishes should be lightly sanded to create a smooth base for the paint.
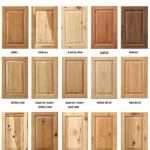
2. Choosing the Right Chalk Paint: Achieving the Perfect White
Chalk paint comes in various brands and formulations, and selecting the appropriate one for your kitchen cabinets is essential. Opt for a high-quality paint specifically designed for furniture, ensuring durability and a smooth finish. White chalk paint is available in different shades, so choose the one that best complements your kitchen decor.
3. Applying the First Coat: Laying the Foundation
Use a high-quality brush or roller to apply the first coat of chalk paint evenly, working in the direction of the wood grain. Allow the first coat to dry completely before proceeding with the next step.
4. Sanding Between Coats: Creating a Distressed Look
Once the first coat has dried, lightly sand the surface with fine-grit sandpaper. This step creates a subtle distressed look and helps to smooth out any rough edges or brushstrokes. If a more pronounced distressed effect is desired, additional sanding can be done after subsequent coats.
5. Applying Additional Coats: Achieving the Desired Coverage
Repeat steps 3 and 4 until you achieve the desired coverage and finish. Typically, two or three coats should be sufficient, but more coats may be necessary depending on the condition of the cabinets and the desired level of opacity.
6. Sealing the Paint: Protecting Your Masterpiece
Once the final coat of chalk paint has dried completely, apply a clear wax or polyurethane finish to protect the paint and enhance its durability. Wax finishes provide a matte or satin sheen, while polyurethane offers a glossy finish. Choose the finish that best suits your taste and the style of your kitchen.
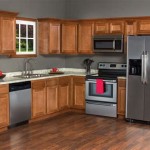
7. Finishing Touches: Restoring Functionality
Once the paint has been sealed, reattach the hardware to complete the transformation. Your newly painted kitchen cabinets are now ready to enhance the beauty and functionality of your kitchen for years to come.

Painting Kitchen Cabinets With Chalk Paint Simply Today Life

How To Paint Kitchen Cabinets White Let S Furniture

Step By Kitchen Cabinet Painting With Annie Sloan Chalk Paint Jeanne Oliver

Chalk Painted Kitchen Cabinets Two Years Later Our Storied Home

Stunning Kitchen Cabinets Painted In Annie Sloan Chalk Paint

Painting Kitchen Cabinets With Chalk Paint Simply Today Life

Step By Kitchen Cabinet Painting With Annie Sloan Chalk Paint Jeanne Oliver

Chalk Paint Furniture Kitchen Cabinets Painting Remodel

Old White Distressed Kitchen By Agnieszka Krawczyk Annie Sloan

Painted Kitchen Cabinets Chalk Paint Well Groomed Home
Related Posts