How To Change Kitchen Cabinet Color
The kitchen is often considered the heart of the home. As such, its aesthetic appearance significantly impacts the overall ambiance and perceived value of a residence. One of the most impactful visual elements within a kitchen is the cabinetry. While kitchen cabinets are built to last for a considerable duration, their color may become outdated or may simply no longer align with evolving tastes. Instead of opting for a complete cabinet replacement, which can be a costly and disruptive undertaking, changing the color of existing kitchen cabinets represents a viable and often more economical alternative.
Changing the color of kitchen cabinets is a project that can be undertaken by homeowners with moderate DIY skills, or it can be entrusted to professional painters or contractors. Regardless of who performs the work, a successful color transformation necessitates meticulous planning, diligent preparation, and the proper application of suitable materials. The following article will outline the essential steps involved in changing the color of kitchen cabinets, offering guidance on surface preparation, paint selection, and application techniques to achieve a professional-looking result.
Preparing the Cabinets for Painting
Proper surface preparation is paramount for achieving a durable and visually appealing finish when changing the color of kitchen cabinets. This process involves several key steps designed to remove contaminants, create a suitable surface for adhesion, and address any existing imperfections.
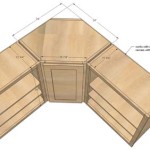
1. Removal of Hardware and Doors/Drawers: The initial step involves removing all cabinet doors and drawers from their frames. This allows for easier access to all surfaces and ensures a more uniform and consistent paint application. All knobs, pulls, hinges, and other hardware must be detached and carefully stored. Labeling each piece of hardware and its corresponding location on the cabinet frame is highly recommended to facilitate reassembly. It is advisable to replace old, worn, or outdated hardware with new pieces to complement the new paint color and enhance the overall aesthetic of the cabinetry.
2. Cleaning and Degreasing: Kitchen cabinets are often coated with grease, grime, and food splatters. These contaminants must be thoroughly removed to ensure proper paint adhesion. A degreasing cleaner, such as trisodium phosphate (TSP) or a TSP substitute, is suitable for this purpose. The cleaner should be mixed according to the manufacturer's instructions and applied to all surfaces of the cabinets, doors, and drawers. Scrubbing with a non-abrasive sponge or cloth will help to loosen and remove embedded contaminants. After cleaning, the surfaces must be rinsed thoroughly with clean water and allowed to dry completely.
3. Sanding: Sanding is a critical step in preparing the cabinets for painting. It roughens the existing surface, providing a "tooth" for the new paint to adhere to. The appropriate grit sandpaper will depend on the existing finish of the cabinets. For cabinets with a glossy finish, a medium-grit sandpaper (120-180 grit) should be used to dull the surface. For cabinets with a previously painted or stained finish, a finer grit sandpaper (220-320 grit) may be sufficient. Sand all surfaces lightly, paying particular attention to edges and corners. Avoid applying excessive pressure, as this can create unevenness. After sanding, thoroughly remove sanding dust with a tack cloth or a vacuum cleaner with a brush attachment.
4. Filling Imperfections: Examine the cabinets for any imperfections, such as scratches, dents, or chips. These imperfections should be filled with wood filler. Apply the wood filler according to the manufacturer's instructions, ensuring that it is flush with the surrounding surface. Allow the wood filler to dry completely, and then sand it smooth with fine-grit sandpaper (220-320 grit). Remove any sanding dust.
5. Priming: Applying a primer is essential for achieving a uniform and durable finish. Primer seals the existing surface, creating a smooth base for the paint to adhere to. It also helps to block stains and prevent the existing color from bleeding through the new paint. Choose a high-quality primer that is compatible with the type of paint being used. Apply the primer evenly to all surfaces of the cabinets, doors, and drawers. Allow the primer to dry completely according to the manufacturer's instructions. Lightly sand the primed surface with fine-grit sandpaper (320-400 grit) to remove any imperfections and create a smooth surface for the paint. Remove any sanding dust.
Selecting the Right Paint and Application Method
Choosing the appropriate paint and application method is crucial for achieving a desired aesthetic and ensuring long-lasting durability. The paint's formulation, sheen, and application technique all contribute to the final appearance and performance of the painted cabinets.
1. Paint Type: Several types of paint are suitable for kitchen cabinets, each with its own advantages and disadvantages. Acrylic latex paint is a popular choice due to its durability, ease of application, and water-based cleanup. Oil-based paint offers a harder, more durable finish, but it requires mineral spirits for cleanup and has a longer drying time. Alkyd paint is a hybrid between acrylic latex and oil-based paint, offering a good balance of durability and ease of use. Consider the specific requirements of the project, such as the level of durability needed and the ease of application desired when selecting the paint type.
2. Paint Sheen: The sheen of the paint refers to its level of reflectivity. Different sheens offer different aesthetic qualities and levels of durability. High-gloss paint is the most reflective and durable, but it can also highlight imperfections. Semi-gloss paint is less reflective than high-gloss paint, but it is still durable and easy to clean. Satin paint has a soft, velvety appearance and is a good compromise between durability and aesthetics. Matte paint is the least reflective and the least durable, but it can hide imperfections well. For kitchen cabinets, a semi-gloss or satin sheen is generally recommended due to its durability and ease of cleaning.
3. Application Method: Several methods can be employed to apply paint to kitchen cabinets, each producing a different result. Brushing is the most common method, but it can leave brush strokes if not done carefully. Rolling can also be used, but it can leave a textured finish. Spraying, using either an airless sprayer or a HVLP (high-volume, low-pressure) sprayer, produces the smoothest, most professional-looking finish. However, spraying requires more preparation and skill than brushing or rolling. Regardless of the application method chosen, it is essential to apply thin, even coats of paint and allow each coat to dry completely before applying the next.
If using a brush, choose a high-quality brush designed for the type of paint being used. Apply the paint in long, even strokes, following the grain of the wood. Avoid applying too much paint at once, as this can lead to drips and runs. If using a roller, choose a roller with a nap that is appropriate for the type of paint being used. Apply the paint in a thin, even layer, overlapping each stroke slightly. If using a sprayer, thin the paint according to the manufacturer's instructions. Practice spraying on a piece of cardboard before applying the paint to the cabinets. Hold the sprayer at a consistent distance from the surface and overlap each stroke slightly.
4. Number of Coats: Typically, two coats of paint are required to achieve full coverage and a durable finish. Allow each coat to dry completely according to the manufacturer's instructions before applying the next. Lightly sand the first coat of paint with fine-grit sandpaper (320-400 grit) to remove any imperfections and create a smooth surface for the second coat. Remove any sanding dust.
Reassembly and Finishing Touches
Once the paint has dried completely, the cabinets can be reassembled. This involves reattaching the hardware and reinstalling the doors and drawers. The reassembly process should be performed with care to avoid scratching or damaging the new paint finish. Attention to detail during this final phase will contribute to the overall polished aesthetic of the project.
1. Hardware Reinstallation: Carefully reattach all knobs, pulls, hinges, and other hardware to the cabinet doors and drawers. Ensure that the hardware is properly aligned and tightened securely. If new hardware is being installed, follow the manufacturer's instructions for installation.
2. Door and Drawer Reinstallation: Reinstall the cabinet doors and drawers onto the cabinet frames. Ensure that the doors and drawers are aligned properly and that they open and close smoothly. Adjust the hinges as needed to achieve proper alignment. If the doors or drawers stick or bind, check for obstructions or misaligned hardware.
3. Touch-Ups: Inspect the cabinets for any imperfections or areas that need touch-up. Use a small brush to apply paint to any areas that are scratched or chipped. Allow the touch-up paint to dry completely. A clear topcoat can be applied for added protection and durability. This is particularly useful in high-use areas around sinks and stoves.
4. Cleaning and Polishing: Once the cabinets have been reassembled and any touch-ups have been completed, clean the surfaces with a mild detergent and water. Polish the hardware with a metal polish to restore its shine. The newly painted kitchen cabinets will revitalize the space and offer a renewed aesthetic that will enhance the overall appeal of the kitchen.
Changing the color of kitchen cabinets can be a rewarding project that significantly transforms the look and feel of a kitchen. By following the steps outlined in this article, one can achieve a professional-looking finish that is both durable and aesthetically pleasing. Careful planning, diligent preparation, and the proper application of suitable materials are key to a successful cabinet color transformation.

Quick Guide On How You Can Change Color Effects Of The Kitchen

How To Do It Yourself Kitchen Cabinet Color Change No Stripping And Refinishing

Change The Material Or Color On Kitchen Cabinets And Countertops Roomsketcher Help Center

Kitchen Cabinet Refinishing Cabinets Colors

How To Paint Kitchen Cabinets Like The Pros

9 Examples Of How The Color Cabinet Doors Can Change Old Kitchen

How To Change Kitchen Cabinet Color An Innovative Approach Infinity

Cabinet Color Change N Hance Of Lowcountry

The Best Ways To Change Color Of My Cabinets

Repainting Cabinets In Photo And Elements Photolesa Com
Related Posts