How to Change Kitchen Cupboard Fronts: A Comprehensive Guide
Revamping your kitchen can be a rewarding experience, and one of the most impactful ways to refresh its look is by changing the cupboard fronts. While this may seem like a daunting task, it's actually quite achievable with the right approach and a little bit of effort. This guide will provide you with all the essential steps and considerations for a successful kitchen cupboard front makeover.
1. Planning and Preparation
Before diving into the project, it's crucial to plan and gather your materials. Measure your existing cupboard fronts to determine the size and quantity of new fronts you need. Choose a material that complements your kitchen's style and functionality, such as wood, laminate, or acrylic. Determine the hinge type and hardware you will require and purchase them accordingly.
2. Removing the Old Cupboard Fronts
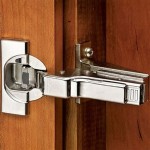
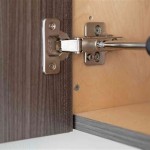
Start by emptying the cupboards and removing any handles or knobs. Using a screwdriver, carefully unscrew the hinges that attach the fronts to the frames. Support the fronts and gently lift them off the hinges. If your cupboards have nails or other fasteners, use a nail gun or hammer to remove them.
3. Preparing the Cupboard Frames
Once the old fronts are removed, inspect the cupboard frames for any damage or imperfections. If any repairs are necessary, make them before installing the new fronts. Use a cleaning solution to remove any dust or debris from the frames to ensure a clean and secure bond for the new fronts.
4. Attaching the New Cupboard Fronts
Align the new cupboard fronts with the frames and carefully line up the hinges. Secure the fronts to the frames using the screws provided with the hinges. Make sure the fronts are level and securely fastened. If necessary, adjust the hinges to ensure proper alignment and operation.
5. Installing Handles and Knobs
Once the fronts are attached, install the handles or knobs. Determine the best placement based on the size of the fronts and your personal preferences. Drill pilot holes for the screws and securely tighten the hardware. Ensure the handles and knobs are properly aligned and easy to operate.
6. Final Adjustments and Cleaning
After everything is installed, check the alignment of the cupboard fronts and make any necessary adjustments. Refill the cupboards and ensure that the doors open and close smoothly. Use a cleaning solution to wipe down the new fronts and remove any fingerprints or smudges. Your kitchen cupboard makeover is now complete, giving your kitchen a refreshed and updated appearance.
Tips for Success
- Use a level to ensure the cupboard fronts are aligned correctly.
- Be patient and take your time, especially when attaching the new fronts.
- If you encounter any difficulties, don't hesitate to seek professional help.
- Consider using a light-colored material for the new fronts to brighten up the kitchen.
- Add decorative elements, such as moldings or trims, to enhance the overall look.
By following these steps and considerations, you can successfully change your kitchen cupboard fronts and give your kitchen a stunning new look. This cost-effective and practical upgrade will enhance both the functionality and aesthetic appeal of your kitchen space.

Best Kitchen Cabinet Refacing For Your Home The Depot

How Can I Change The Look Of My Kitchen Cabinet Doors Now

Reface Or Replace Your Kitchen Units Dream Doors

Cabinet Doors Drawers Replacement Revelare Kitchens

Reface Or Replace Your Kitchen Units Dream Doors

10 Simple Ideas To Update Your Kitchen Cabinets Jenna Sue Design

Reface Or Replace Your Kitchen Units Dream Doors

How To Add Glass Cabinet Doors Confessions Of A Serial Do It Yourselfer

10 Simple Ideas To Update Your Kitchen Cabinets Jenna Sue Design

Things To Consider When Replacing Kitchen Cupboard Doors My Beautiful Adventures
Related Posts

