How To Change Laminate Kitchen Cabinets: A Comprehensive Guide
Laminate kitchen cabinets are a popular choice for homeowners due to their durability and affordability. However, over time, these cabinets can start to look outdated or worn out. If you're looking to update your kitchen without breaking the bank, changing the laminate on your cabinets is a great option.
Materials You'll Need:
- New laminate sheets
- Contact cement
- Trim pieces (if necessary)
- Utility knife
- Straight edge
- J-roller
- Sandpaper or sanding sponge
Step-by-Step Instructions:
Step 1: Remove the Existing Laminate
Using a utility knife, carefully score the edges of the existing laminate. Then, use a straight edge to pry the laminate away from the cabinet. Be careful not to damage the wood underneath.
Step 2: Prepare the Cabinet Surface
Sand the cabinet surface using sandpaper or a sanding sponge to remove any glue residue or imperfections. Wipe the surface clean with a damp cloth.
Step 3: Apply Contact Cement
Apply a thin, even layer of contact cement to the cabinet surface and the back of the new laminate sheet. Allow the cement to dry for the amount of time specified by the manufacturer.
Step 4: Adhere the Laminate
Carefully align the new laminate sheet with the cabinet and press it into place. Use a J-roller to apply pressure along the edges and ensure a tight bond.
Step 5: Trim Excess Laminate
Use a utility knife and straight edge to trim any excess laminate around the edges of the cabinet. Be sure to wear safety glasses when doing this.
Step 6: Install Trim Pieces (Optional)
If desired, you can install trim pieces around the edges of the laminate to give it a more finished look. Use contact cement to adhere the trim pieces in place.
Step 7: Allow the Laminate to Cure
Allow the laminate to cure for at least 24 hours before using the cabinets. This will give the contact cement time to fully set.
Tips:
- Use a laminate that is specifically designed for kitchen cabinets.
- Make sure the cabinet surface is clean and dry before applying the laminate.
- Apply contact cement evenly and thinly.
- Press the laminate into place firmly using a J-roller.
- Trim excess laminate carefully and wear safety glasses.
- Allow the laminate to cure for at least 24 hours before using the cabinets.
Conclusion:
Changing the laminate on your kitchen cabinets is a relatively easy and affordable way to update your kitchen without breaking the bank. By following these step-by-step instructions, you can give your cabinets a new look that will last for years to come.

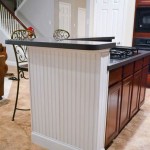
How To Add Trim And Paint Your Laminate Cabinets

How To Paint Laminate Kitchen Cabinets Perfect Finish Tips

How To Add Trim And Paint Your Laminate Cabinets

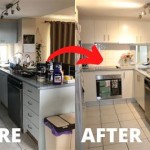
Easy And Affordable Kitchen Makeover Update 80s Laminate Cabinets Change The Look Of Your Kitc Renovation Home Kitchens

How To Paint Laminate Kitchen Cabinets Perfect Finish Tips

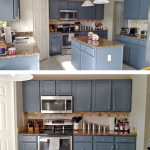
How To Update Your Kitchen Cabinets Without Replacing Them Real Estate U S News

How To Add Trim And Paint Your Laminate Cabinets

Re Laminate Over Existing Cabinet Jennings

Diy Cabinet Refacing Budget Friendly Made Easy Wisewood

How To Paint Laminate Cabinets Everything You Need Know
Related Posts