How To Clean Factory Painted Kitchen Cabinets
Maintaining the pristine appearance of factory-painted kitchen cabinets requires consistent cleaning and care. Unlike refinished or custom-painted cabinets, factory finishes are engineered for durability and ease of maintenance. However, neglecting regular cleaning can lead to the accumulation of grease, grime, and dust, diminishing their aesthetic appeal and potentially damaging the finish over time. This article provides a comprehensive guide on how to effectively and safely clean factory-painted kitchen cabinets, ensuring their longevity and preserving their original luster.
Before embarking on any cleaning process, it is crucial to understand the type of paint and finish applied to the cabinets. This information is typically available in the manufacturer's documentation or on the cabinet specification sheet. Common factory finishes include lacquer, varnish, and conversion varnish, each requiring specific cleaning approaches. Understanding the finish will prevent the use of inappropriate cleaning agents that could damage the surface, leading to discoloration, peeling, or other forms of deterioration. Avoid highly abrasive cleaners or tools that can scratch or dull the factory finish.
Regular cleaning is essential for preventing the buildup of stubborn residues. Ideally, factory-painted kitchen cabinets should be wiped down weekly. This proactive approach minimizes the need for harsh chemicals and intensive scrubbing. A simple weekly cleaning routine significantly contributes to maintaining the cabinets' aesthetic appeal and extending their lifespan. The frequency of cleaning may need to be adjusted based on cooking habits and the amount of grease and grime that accumulates in the kitchen.
Gathering the necessary supplies is the first step in preparing for the cleaning process. Essential materials include: soft microfiber cloths, a bucket, warm water, a mild dish soap (ensure it is non-abrasive), a spray bottle (optional), and a soft-bristled brush (for scrubbing stubborn spots). Avoid using abrasive sponges, scouring pads, or steel wool, as these can scratch and damage the painted surface. A small amount of baking soda can be used for particularly stubborn stains, but it should be applied with caution and tested in an inconspicuous area first.
Initial Preparation and Safety Precautions
Prior to beginning the cleaning process, conduct a thorough visual inspection of the cabinets. Identify areas with significant grease accumulation, food splatters, or other types of stains. Photographing these areas can be helpful for tracking progress and ensuring all areas are adequately addressed. Remove all items from the countertops and clear the surrounding area to facilitate unrestricted access to the cabinets. Protecting the floor beneath the cabinets with a drop cloth or old towels is advisable to prevent water damage and capture any drips or spills.
Safety should always be a primary concern. Wear appropriate personal protective equipment, such as rubber gloves, to protect your hands from cleaning solutions. Ensure the kitchen is well-ventilated by opening windows or turning on the exhaust fan. This will help to dissipate any fumes from the cleaning agents. If using any cleaning solutions other than soap and water, consult the manufacturer's safety data sheet (SDS) for specific handling precautions. Keep children and pets away from the cleaning area to prevent accidental exposure to chemicals.
Dusting cabinets before washing is a crucial step often overlooked. Removing loose dust and debris prevents it from being spread around during the cleaning process, which could create a muddy or streaky finish. Use a dry microfiber cloth or a soft brush attachment on a vacuum cleaner to thoroughly dust all surfaces, including cabinet doors, drawers, frames, and hardware. Pay particular attention to crevices, corners, and decorative moldings where dust tends to accumulate.
Test cleaning solutions in an inconspicuous area prior to applying them to the entire cabinet surface. This precaution ensures that the solution does not cause discoloration, streaking, or damage to the finish. Choose a spot inside a cabinet or on the back of a door to test the solution. Apply a small amount of the solution, let it sit for a few minutes, and then wipe it away with a clean cloth. Observe the area for any adverse reactions before proceeding with the full cleaning process. This step is particularly important when using any cleaning products other than mild soap and water.
Cleaning Techniques for Factory Painted Cabinets
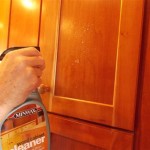
Prepare a cleaning solution by mixing a small amount of mild dish soap with warm water. Avoid using excessive amounts of soap, as this can leave a residue on the cabinet surfaces. A ratio of approximately one teaspoon of soap per gallon of water is generally sufficient. Stir the solution gently to avoid creating excessive suds. For stubborn grease stains, a slightly stronger solution can be used, but always test it in an inconspicuous area first. A spray bottle can be used to apply the cleaning solution, but it is important to avoid saturating the wood or allowing the solution to drip down the cabinets.
Dampen a clean microfiber cloth with the cleaning solution and gently wipe down the cabinet surfaces. Use a circular motion to loosen dirt and grime. Avoid applying excessive pressure, as this can damage the finish. Pay particular attention to areas around handles and knobs, as these tend to accumulate grease and fingerprints. Regularly rinse the microfiber cloth with clean water to remove any dirt or soap residue. Periodically replace the cleaning solution to ensure it remains clean and effective.
For stubborn stains and grease buildup, a soft-bristled brush can be used to gently scrub the affected areas. Avoid using abrasive brushes or scouring pads, as these can scratch the painted surface. Apply a small amount of the cleaning solution to the brush and gently scrub the stained area in a circular motion. Rinse the area thoroughly with clean water to remove any soap residue. If the stain persists, repeat the process or try using a paste made from baking soda and water. Apply the paste to the stain, let it sit for a few minutes, and then gently scrub it away with a soft cloth.
Rinse the cabinets thoroughly with clean water after cleaning them with the soap solution. Use a clean, damp microfiber cloth to wipe down the surfaces and remove any remaining soap residue. It is important to remove all traces of soap, as it can attract dirt and leave a dull film on the cabinets. Ensure the cloth is wrung out well to avoid saturating the wood. Repeat the rinsing process as needed to ensure all soap residue is removed.
Dry the cabinets immediately after rinsing them to prevent water spots and potential damage to the finish. Use a clean, dry microfiber cloth to thoroughly dry all surfaces. Pay particular attention to seams, edges, and corners where water tends to accumulate. Buff the cabinets with the dry cloth to restore their shine. Allowing water to sit on the cabinets for extended periods of time can lead to discoloration, peeling, or other forms of damage.
Addressing Specific Cleaning Challenges
Grease buildup is a common problem in kitchens, particularly around the stove and cooktop. To remove grease from factory-painted cabinets, start by applying a degreasing agent specifically designed for kitchen surfaces. Many commercially available degreasers are effective at breaking down grease and grime. Follow the manufacturer's instructions carefully and test the degreaser in an inconspicuous area before applying it to the entire cabinet surface. Alternatively, a paste made from baking soda and water can be used as a natural degreaser. Apply the paste to the grease stains, let it sit for a few minutes, and then gently scrub it away with a soft cloth.
Food splatters and stains can be challenging to remove, especially if they have dried and hardened. To address these stains, start by softening them with a warm, damp cloth. Allow the cloth to sit on the stain for a few minutes to loosen the residue. Then, gently wipe the area with a mild soap solution or a paste made from baking soda and water. For stubborn stains, a small amount of white vinegar diluted with water can be used. Apply the vinegar solution to the stain, let it sit for a few minutes, and then wipe it away with a clean cloth. Avoid using harsh chemicals or abrasive cleaners, as these can damage the painted surface.
Hard water stains can appear as white or cloudy spots on cabinets, particularly around the sink area. To remove hard water stains, use a solution of equal parts white vinegar and water. Apply the solution to the affected areas, let it sit for a few minutes, and then wipe it away with a clean cloth. For persistent stains, try making a paste from baking soda and water and gently scrubbing the affected area. Rinse the area thoroughly with clean water and dry it with a clean microfiber cloth. Preventing hard water stains can be achieved by drying the cabinets immediately after they come into contact with water.
Preventive measures significantly reduce the frequency and intensity of cleaning required. Regular wiping of spills and splatters immediately after they occur prevents them from drying and becoming more difficult to remove. Using placemats and coasters on countertops helps to protect the cabinet surfaces from stains and water damage. Installing a backsplash behind the cooktop and sink can prevent grease and water from reaching the cabinets. Regularly ventilating the kitchen while cooking helps to reduce the accumulation of grease and grime on the cabinets.
Maintaining the hardware on factory-painted kitchen cabinets contributes to their overall appearance. Regularly clean the handles, knobs, and hinges with a mild soap solution and a soft cloth. Avoid using abrasive cleaners or metal polishes, as these can damage the finish. If the hardware is tarnished or corroded, consider replacing it with new hardware. Ensure the new hardware is compatible with the existing cabinet holes and style. Tightening loose screws can prevent the hardware from damaging the cabinet surfaces.

How To Clean Prep Wood Kitchen Cabinets Before Painting Do Dodson Designs

How To Clean Prep Wood Kitchen Cabinets Before Painting Do Dodson Designs

How To Clean Prep Wood Kitchen Cabinets Before Painting Do Dodson Designs

How To Clean Your Kitchen Cabinets

How To Fix A Bad Kitchen Cabinet Paint Job The Wood Whisperer

8 Tips For A Professional Looking Finish On Your Cabinets Cabinetdoors Com

How To Clean Prep Wood Kitchen Cabinets Before Painting Do Dodson Designs

Caring For And Cleaning Your Painted Kitchen Cabinets Cliqstudios

How To Paint Kitchen Cabinets A Step By Guide Confessions Of Serial Do It Yourselfer

How To Clean Your Painted Kitchen Cabinets
Related Posts


