How to Clean Greasy Cabinets in the Kitchen
Kitchen cabinets, especially those in close proximity to the stovetop and oven, are prone to accumulating a layer of grease and grime. This buildup can make your kitchen look unkempt and can be challenging to remove. However, with the right techniques and cleaning solutions, you can restore your cabinets to their former glory.
Cleaning greasy kitchen cabinets requires a multi-faceted approach that combines effective cleaning agents with proper techniques. This article provides a comprehensive guide, outlining the best methods and solutions to tackle this common kitchen cleaning challenge.
Step 1: Gather Your Supplies
Before embarking on your cleaning journey, ensure you have the necessary tools and solutions at hand. This will streamline the process and prevent unnecessary interruptions. Here's what you'll need:
- Microfiber cloths: These cloths are highly absorbent and effective at removing grease and grime without leaving behind any lint.
- Sponges: A soft sponge will be useful for applying cleaning solutions and scrubbing away stubborn grease.
- Buckets: Use two buckets, one for clean water and one for mixing cleaning solutions.
- Warm water: Warm water is essential for dissolving grease and loosening grime.
- Dish soap: Dish soap is a gentle yet effective cleaning agent for kitchen surfaces.
- Baking soda: Baking soda is a natural abrasive that helps loosen grease and deodorize surfaces.
- White vinegar: White vinegar is a natural degreaser and disinfectant.
- Optional: Rubber gloves, a spray bottle, and a cleaning brush.
Step 2: Prepare the Cabinets
Before you begin cleaning, it's essential to prepare the cabinets for a thorough cleaning process. This includes removing any obstacles and clearing the surrounding area.
- Empty the cabinets: Remove all contents from the cabinets to allow for easy cleaning access.
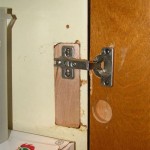
- Remove cabinet doors: If possible, remove the cabinet doors to simplify cleaning and provide better access to all surfaces.
- Clear the surrounding area: Move any items or appliances away from the cabinets to prevent them from being accidentally splashed with cleaning solutions.
Step 3: Clean the Cabinets
Now that the cabinets are ready, you can begin the cleaning process. This involves using the right cleaning solutions and applying the appropriate techniques to effectively remove grease and grime.
- Dish soap and water: For lightly soiled cabinets, a simple solution of dish soap and warm water can be quite effective. Mix a few drops of dish soap into a bucket of warm water. Dip a sponge into the solution and wring out excess water. Gently scrub the cabinet surfaces with the sponge, paying extra attention to areas with visible grease buildup.
- Baking soda paste: For more stubborn grease, create a paste by combining baking soda with a small amount of water to form a thick consistency. Apply the paste to the greasy areas and let it sit for a few minutes to loosen the grease. Use a damp sponge to gently scrub the paste, then rinse with clean water.
- Vinegar solution: White vinegar is a natural degreaser and disinfectant. Fill a spray bottle with equal parts white vinegar and water. Spray the solution onto the cabinet surfaces and let it sit for a few minutes. Use a damp sponge to wipe away the solution and any remaining grease.
Step 4: Rinse and Dry
Once you've finished cleaning the cabinets, it's crucial to rinse away any leftover cleaning solutions and allow the cabinets to dry completely. This prevents streaks and ensures a clean finish.
- Rinse with clean water: Rinse the cleaned cabinet surfaces thoroughly with clean water to remove any traces of cleaning solution and grease.
- Wipe dry: Use a clean microfiber cloth to wipe the cabinets dry, paying special attention to any crevices or corners where water might accumulate.
- Air dry: Allow the cabinets to air dry completely before reinstalling the doors and restocking them. This prevents moisture from becoming trapped and causing mildew growth.
Step 5: Repeat as Needed
To maintain clean and grease-free cabinets, it's recommended to clean them regularly, ideally once a month or as needed. This proactive approach prevents grease buildup from becoming too stubborn and makes future cleaning sessions easier.
By following these steps and using the recommended cleaning solutions, you can effectively remove grease from your kitchen cabinets, restoring their shine and enhancing the overall cleanliness of your kitchen. Regular maintenance will help prevent future grease buildup and ensure your cabinets remain clean and presentable.

How To Clean Grimy Kitchen Cabinets With 2 Ingredients

Clean Kitchen Cabinets Off With These Tips And Hints

How To Clean Sticky Grease Off Kitchen Cabinets Ovenclean

We Tried 5 Methods To Clean Greasy Wood Cabinets And The Winner Is Ridiculously Effective Kitchn Cleaning Kitchen

Get Grease Off Kitchen Cabinets Easy And Naturally

How To Remove Grease From Kitchen Cabinets 3 Methods Bob Vila

How To Clean Kitchen Cabinets Everyday Skate

Best 4 Ways To Clean Greasy Kitchen Cabinets Rosene Toronto On

Best Ways To Clean Grease Stains Off Kitchen Cabinets

How To Clean Greasy Cabinets In Your Kitchen
Related Posts


