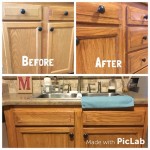
How to Clean Old Oak Kitchen Cabinets
Oak kitchen cabinets, prized for their durability and timeless aesthetic, often become focal points in homes. However, over time, they accumulate grease, grime, and dust, diminishing their original luster. Properly cleaning old oak cabinets requires a careful approach to avoid damaging the wood finish and preserving their inherent character. This article provides a comprehensive guide on how to effectively clean old oak kitchen cabinets, ensuring their longevity and maintaining their beauty.
Before commencing any cleaning process, it's crucial to assess the condition of the cabinets. Examine the finish for signs of wear, damage, or peeling. Identify areas with heavy grease buildup or stubborn stains. This preliminary assessment will inform the choice of cleaning solutions and techniques, preventing further damage and maximizing cleaning effectiveness.
Gather the necessary supplies. A basic cleaning toolkit should include: soft cloths (microfiber is ideal), a soft-bristled brush (an old toothbrush works well for tight corners), warm water, mild dish soap, white vinegar, baking soda, mineral oil or wood polish, and protective gloves.
Preparing for Cleaning: A Gentle Approach
The initial step involves removing loose debris. Use a soft, dry cloth to wipe down the cabinet surfaces, removing dust, crumbs, and other loose particles. This prevents these particles from scratching the finish during subsequent cleaning steps.
For cabinets with intricate detailing or textured surfaces, a soft-bristled brush can be used to dislodge dust and debris from crevices. Gently brushing in the direction of the wood grain minimizes the risk of scratching.
Test any cleaning solution on an inconspicuous area of the cabinet, such as the inside of a door or a low corner. This allows you to observe how the finish reacts to the solution and ensure it doesn't cause discoloration or damage. Allow the test area to dry completely before proceeding with the full cleaning.
Avoid using abrasive cleaners, scouring pads, or harsh chemicals. These can scratch the finish, strip the wood, or cause irreversible damage. Opt for gentle, non-toxic cleaning solutions specifically designed for wood surfaces.
Cleaning Solutions: Choosing the Right Formula
A mixture of warm water and mild dish soap is often sufficient for removing light dirt and grime. Prepare a solution by adding a few drops of dish soap to a bowl of warm water. Dip a soft cloth into the solution, wring it out thoroughly, and gently wipe down the cabinet surfaces. Rinse the cloth frequently and use a clean, damp cloth to remove any soap residue.
For more stubborn grease and grime, a solution of white vinegar and water can be effective. Mix equal parts white vinegar and warm water in a spray bottle. Lightly spray the solution onto the affected areas and let it sit for a few minutes. Wipe away the solution with a clean, damp cloth. The acidity of the vinegar helps to break down grease and grime, while the water dilutes it to prevent damage to the wood finish. It is important to note that while vinegar is a natural cleaner, prolonged or undiluted use can damage certain wood finishes.
Baking soda can be used as a mild abrasive for tackling particularly tough stains. Create a paste by mixing baking soda with a small amount of water. Apply the paste to the stain and gently rub it in a circular motion with a soft cloth. Rinse thoroughly with a clean, damp cloth and dry completely.
Always test any cleaning solution, including natural solutions like vinegar and baking soda, in an inconspicuous area before applying it to the entire cabinet. This will help to ensure that the solution does not damage the finish.
Cleaning Techniques: Maximizing Effectiveness and Minimizing Damage
When cleaning, always work in the direction of the wood grain. This helps to prevent scratches and ensures even cleaning. Apply gentle pressure and avoid scrubbing aggressively.
For areas with heavy grease buildup, consider using a degreasing cleaning solution specifically designed for kitchen cabinets. Follow the manufacturer's instructions carefully and test the solution on an inconspicuous area before applying it to the entire cabinet. These solutions are often stronger than dish soap and water, so caution is necessary.
Use a soft-bristled brush to clean around hardware, such as knobs and handles. This will help to remove dirt and grime from these hard-to-reach areas. Consider removing the hardware completely to facilitate thorough cleaning.
Pay special attention to areas around the stove and sink, as these are more prone to grease buildup and water damage. Clean these areas frequently to prevent grime from accumulating and potentially damaging the cabinets.
After cleaning, always dry the cabinets thoroughly with a clean, dry cloth. Water can damage the wood finish if left to sit on the surface. Pay particular attention to seams and edges, where water can easily seep in.
For cabinets with raised panel doors, be sure to clean the inside edges of the panels, as these are often overlooked and can accumulate dust and grime.
Avoid using too much water when cleaning. Excessive moisture can damage the wood and cause it to warp or swell. Always wring out cloths thoroughly before wiping down the cabinets.
If the cabinets have glass inserts, use a glass cleaner specifically designed for windows and mirrors. Avoid spraying the cleaner directly onto the wood frame, as this can damage the finish. Spray the cleaner onto a cloth and then wipe the glass.
Restoring and Maintaining Oak Cabinets: Preserving the Finish
Once the cabinets are clean and dry, consider applying a coat of mineral oil or wood polish to restore their shine and protect the finish. Mineral oil helps to moisturize the wood and prevent it from drying out and cracking. Wood polish helps to create a protective barrier against dirt and grime.
Apply a small amount of mineral oil or wood polish to a soft cloth and rub it into the cabinets in a circular motion. Allow the oil or polish to sit for a few minutes and then buff it off with a clean, dry cloth. Follow the manufacturer's instructions carefully.
Regular cleaning and maintenance are essential for preserving the beauty and longevity of oak kitchen cabinets. Wipe down the cabinets regularly with a soft, dry cloth to remove dust and debris. Clean up spills immediately to prevent stains from setting in.
Consider using coasters and placemats to protect the cabinets from water damage and scratches. Avoid placing hot pots and pans directly on the cabinets, as this can damage the finish.
Periodically inspect the cabinets for signs of wear or damage. Touch up any scratches or chips promptly to prevent further damage. Consult with a professional wood restorer for more significant repairs.
Proper ventilation in the kitchen can help to reduce the buildup of grease and grime on the cabinets. Use the range hood when cooking to remove steam and odors from the air.
Avoid using harsh chemicals or abrasive cleaners on the cabinets. These can damage the finish and shorten their lifespan.
By following these guidelines, homeowners can effectively clean and maintain old oak kitchen cabinets, preserving their beauty and ensuring their longevity for years to come.

How To Clean Kitchen Cabinets Everyday Skate

How To Clean Prep Wood Kitchen Cabinets Before Painting Do Dodson Designs

4 Proven Ways To Clean Sticky Wood Kitchen Cabinets Lovetoknow

How To Clean Prep Wood Kitchen Cabinets Before Painting Do Dodson Designs

How To Clean Wood Kitchen Cabinets Like A Boss Shelfgenie

How To Properly Clean Your Wood Cabinets So They Shine Trends Finishing

How To Clean Wood Cabinets

How To Deep Clean Kitchen Cabinets And Keep Them Looking Gorgeous Everyday Skate

Tips Tricks To Paint Honey Oak Kitchen Cabinets Cottage Living And Style

How To Clean Kitchen Cabinets 9 Basics Bob Vila
Related Posts

