How to Clean Up Kitchen Cabinets: A Comprehensive Guide
Kitchen cabinets, subjected to grease, grime, and spills, require regular cleaning to maintain their appearance and hygiene. The process, while seemingly daunting, can be broken down into manageable steps. This article provides a comprehensive guide on how to effectively clean kitchen cabinets, covering preparation, the cleaning process itself, and preventative measures to keep cabinets clean for longer periods.
Preparation is Key: Gathering Supplies and Protecting Surfaces
Before commencing the cleaning process, it is crucial to gather the necessary supplies and prepare the surrounding area. This preemptive step ensures efficiency and minimizes potential damage to countertops and floors.
The required cleaning supplies typically include:
- Warm water
- Mild dish soap
- Baking soda (optional, for stubborn stains)
- White vinegar (optional, for grease removal)
- Soft cloths (microfiber recommended)
- Non-abrasive sponge
- Spray bottle (optional, for applying cleaning solution)
- Old toothbrush or small brush (for tight corners and crevices)
- Bucket or large bowl
- Protective covering (e.g., drop cloth or old towels)
Protecting countertops and flooring is paramount. Place a drop cloth or old towels beneath the cabinets to catch drips and spills. This will prevent water damage and protect delicate surfaces from cleaning solutions. Removing any items from the countertops adjacent to the cabinets will further facilitate the cleaning process and prevent accidental contamination.
Consider opening windows to ventilate the kitchen. Cleaning solutions, even mild ones, can release fumes. Good ventilation will improve air quality and make the cleaning process more comfortable. Testing the cleaning solution in an inconspicuous area, such as the inside of a cabinet door, is also recommended. This ensures that the solution does not damage the cabinet's finish or cause discoloration.
The Cleaning Process: A Step-by-Step Approach
The cleaning process itself involves several stages, each designed to address specific types of grime and maintain the integrity of the cabinet material. The optimal process involves a systematic top-to-bottom approach.
The first step is to remove any visible debris, such as crumbs or dust. This can be accomplished using a dry cloth or a handheld vacuum with a brush attachment. Removing these loose particles prevents them from being smeared into the cabinet surface during the subsequent cleaning stages.
Next, prepare a cleaning solution. A simple and effective solution consists of warm water and a few drops of mild dish soap. Avoid using excessive amounts of soap, as it can leave a residue. For cabinets with stubborn grease or grime, a solution of equal parts white vinegar and water can be used instead. Baking soda can be mixed with water to form a paste for tackling particularly resistant stains.
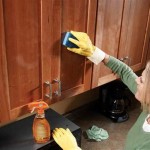
Dip a soft cloth or non-abrasive sponge into the cleaning solution and wring out the excess liquid. The cloth should be damp, not soaking wet. Gently wipe down the cabinet surfaces, paying particular attention to areas around handles and knobs, which tend to accumulate more dirt and grease. For tight corners and crevices, use an old toothbrush or a small brush to loosen grime.
After wiping down the cabinets with the cleaning solution, rinse them with a clean, damp cloth. This removes any remaining soap residue and prevents a sticky or dull finish. Ensure the cloth is well wrung out to avoid excessive moisture. Repeat the rinsing process if necessary.
Finally, dry the cabinets thoroughly with a clean, dry cloth. This prevents water spots and helps to maintain the cabinet's finish. Pay particular attention to edges and corners, where water can accumulate. A microfiber cloth is ideal for drying, as it is absorbent and lint-free.
For cabinets with specific finishes, such as painted or wood cabinets, additional considerations may be necessary. Painted cabinets, for example, may be more susceptible to damage from abrasive cleaners or excessive scrubbing. Wood cabinets may require periodic polishing with a wood cleaner or polish to maintain their luster and protect the wood from moisture.
Addressing Specific Stains and Grime
Certain types of stains and grime require specific treatment. Grease, for instance, is a common issue in kitchens, particularly around the stove and oven. Sticky residues, such as those from spills or fingerprints, can also be challenging to remove.
For grease removal, a solution of equal parts white vinegar and water is often effective. Apply the solution to the greasy area and let it sit for a few minutes before wiping it away with a clean cloth. For stubborn grease stains, a baking soda paste can be applied and gently scrubbed. Rinse thoroughly after applying the paste.
Sticky residues can often be removed with warm water and mild dish soap. If this is not effective, try using a solution of rubbing alcohol (isopropyl alcohol) diluted with water. Test the solution in an inconspicuous area first to ensure it does not damage the cabinet’s finish. A small amount of mineral oil can also be used to dissolve sticky residues, followed by wiping the area clean with a dry cloth.
Water stains can sometimes be removed with a mixture of equal parts vinegar and olive oil. Apply the mixture to the water stain, let it sit for a few minutes, and then wipe it away with a clean cloth. For more stubborn water stains, a paste of baking soda and water can be applied and gently scrubbed.
Mold and mildew can sometimes grow in damp areas of the kitchen, such as inside cabinets or around moisture-prone spots. A solution of bleach and water (1 part bleach to 10 parts water) can be used to kill mold and mildew. However, use bleach cautiously, as it can discolor or damage some cabinet finishes. Always test the solution in an inconspicuous area first. Wear gloves and eye protection when working with bleach. Ensure good ventilation when using bleach and rinse the area thoroughly after cleaning.
Preventative Measures: Keeping Cabinets Clean for Longer
Maintaining clean kitchen cabinets is not a one-time task but an ongoing process. Implementing preventative measures can significantly reduce the frequency and intensity of cleaning required and preserve the appearance of the cabinets long-term.
Regular wiping is the most effective preventative measure. Wipe down cabinets with a damp cloth after cooking or when spills occur. This prevents grease and grime from accumulating and becoming more difficult to remove. Pay particular attention to areas around the stove, sink, and food preparation areas.
Using a range hood while cooking can significantly reduce the amount of grease and steam that settles on kitchen cabinets. Range hoods vent cooking fumes and moisture to the outside, preventing them from accumulating on surfaces. Ensure the range hood is clean and functioning properly to maximize its effectiveness.
Placing shelf liners inside cabinets can protect the cabinet surfaces from spills and stains. Shelf liners are easy to clean or replace, making them a convenient way to maintain the cleanliness of the cabinet interior.
Avoid storing items on top of the cabinets that can accumulate dust and grime. If items are stored on top of the cabinets, cover them with a cloth or plastic wrap to protect them from dust and grease. Regularly dust or vacuum the tops of the cabinets to prevent the accumulation of dirt.
Be mindful of humidity levels in the kitchen. High humidity can promote the growth of mold and mildew, particularly in cabinets near the sink or dishwasher. Ensure proper ventilation in the kitchen and address any leaks or moisture problems promptly.
Consider applying a protective finish to the cabinets. A clear coat of polyurethane or varnish can protect the cabinet surfaces from scratches, stains, and moisture. Consult with a professional before applying any finish to ensure it is compatible with the cabinet material and finish.
Organizing the contents of the cabinets can also contribute to cleanliness. Avoid overcrowding cabinets, as this can make it difficult to clean and maintain them. Regularly declutter cabinets and dispose of expired or unused items. Keep frequently used items within easy reach to minimize spills and messes.
By following these preventative measures, it is possible to significantly extend the lifespan of kitchen cabinets and maintain their cleanliness and appearance with minimal effort. Regular maintenance, combined with prompt attention to spills and stains, is the key to keeping kitchen cabinets looking their best.

How To Clean Kitchen Cabinets 9 Basics Bob Vila

How To Clean Kitchen Cabinets Everyday Skate

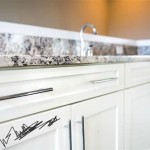
3 Super Easy Ways To Clean White Kitchen Cabinets And Avoid

How To Clean Sticky Grease Off Kitchen Cabinets Ovenclean

How To Clean Kitchen Cabinets Everyday Skate

Clean Kitchen Cabinets Off With These Tips And Hints
:max_bytes(150000):strip_icc()/ways-to-clean-wood-kitchen-cabinets-3017289-01-765f893e7cca49a1ab72d7c49efdf518.jpg?strip=all "Tips For Cleaning Food Grease From Wood Cabinets")
Tips For Cleaning Food Grease From Wood Cabinets

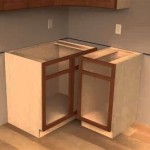
Kitchen Removing Base Cabinet Countertops Backsplash

How Often Should You Really Clean Your Kitchen Cabinets

How To Clean Prep Wood Kitchen Cabinets Before Painting Do Dodson Designs
Related Posts