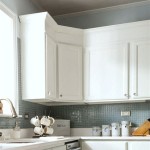
How To Cut Kitchen Plinth Without Chipping
Cutting kitchen plinth, also known as kickboard or toe-kick, requires precision to achieve a clean, chip-free finish. This seemingly simple task can be challenging without the proper tools and techniques. Chipping can detract from the overall aesthetic of the kitchen, so understanding how to avoid it is crucial.
The material of the plinth dictates the best cutting method. Common plinth materials include MDF (medium-density fiberboard), PVC (polyvinyl chloride), and wood. Each material reacts differently to cutting tools, and selecting the appropriate tool is the first step in preventing chipping.
For MDF and PVC plinths, a fine-toothed saw is recommended. A handsaw with at least 12 teeth per inch (TPI) will produce a smoother cut than a coarse-toothed saw. A miter saw, especially one equipped with a fine-toothed blade, offers greater accuracy and control for angled cuts, essential for corners and joins.
When using a handsaw, securing the plinth firmly is essential. Clamping it to a stable work surface prevents movement during the cutting process, minimizing the risk of chipping. Scoring the cut line with a utility knife before sawing can also help prevent chipping, especially on materials like PVC. The knife creates a shallow groove, guiding the saw blade and preventing it from wandering.
For wood plinths, the choice of saw depends on the wood's hardness. A fine-toothed handsaw or a miter saw with a sharp blade will suffice for softer woods. Harder woods may require a specialized saw, such as a backsaw, which has a reinforced back to prevent the blade from flexing and creating uneven cuts. Using a sharp chisel to refine the cut can also help achieve a precise finish.
Regardless of the material or saw used, the cutting technique is crucial. Slow, controlled strokes minimize vibrations that can lead to chipping. Avoid forcing the saw through the material. Let the blade do the work. Rushing the cut increases the risk of the blade binding or catching, resulting in a chipped edge.
Masking tape applied along the cut line provides an additional layer of protection against chipping. The tape supports the material's fibers, preventing them from tearing out during the cut. It also provides a clearer cutting line for improved accuracy.
When using power tools like a miter saw, ensure the blade is sharp. A dull blade will tear the material rather than cut it cleanly, increasing the likelihood of chipping. Adjust the saw's speed appropriately for the plinth material. Higher speeds are generally suitable for softer materials, while lower speeds are better for harder materials.
Supporting the plinth on both sides of the cut, especially when using a power saw, is crucial for preventing chipping. This support minimizes vibrations and prevents the offcut piece from tearing away as the cut is completed. A miter saw stand with adjustable fence and supports can greatly assist in achieving accurate and chip-free cuts.
After cutting, lightly sanding the cut edge with fine-grit sandpaper can remove any minor imperfections and ensure a smooth, finished look. This also helps to remove any remaining masking tape residue.
Beyond the cutting process itself, proper handling of the plinth material is essential. Avoid dropping or impacting the plinth, as this can create weak points that are more susceptible to chipping during cutting. Store plinths in a dry, temperature-controlled environment to prevent warping or damage that could affect the cut quality.
While specialized tools can improve the quality and efficiency of the cutting process, many of these techniques can be applied with standard tools found in most home workshops. The key to a successful, chip-free cut lies in careful preparation, proper tool selection, and a controlled cutting technique. By following these guidelines, one can achieve a professional-looking finish on their kitchen plinth installation.
Choosing the correct blade for the saw is as important as choosing the saw itself. Carbide-tipped blades are generally more durable and stay sharper longer than standard steel blades, making them a good choice for cutting harder materials. Specific blades designed for cutting PVC or MDF are also available and can further enhance the quality of the cut.
Practicing on scrap pieces of plinth material is highly recommended before making cuts on the final pieces. This allows one to become familiar with the chosen cutting method and adjust techniques as needed. It also provides an opportunity to test different blade types and speeds to determine the optimal settings for the specific material being used.

How To Scribe A Kitchen Plinth The Easy Way Shetland S Garden Tool Box

How To Scribe A Kitchen Plinth The Easy Way Shetland S Garden Tool Box

Fitting Kitchen Plinths The Carpenter S Daughter

A Diyers Guide To Cutting Mfc Melamine Faced Chipboard With No Chipping

How To Scribe A Kitchen Plinth The Easy Way Shetland S Garden Tool Box

Easiest Way To Remove A Kitchen Plinth Without Damaging It

How To Scribe A Kitchen Plinth The Easy Way Shetland S Garden Tool Box

A Diyers Guide To Cutting Mfc Melamine Faced Chipboard With No Chipping

Kitchen Fitting Plinths

Screeneze Cutting For Plinths
Related Posts