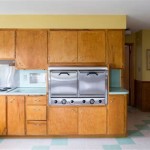
How To Decoupage Kitchen Cabinets
Decoupage is a versatile and visually appealing technique that can be used to transform a variety of surfaces, including kitchen cabinets. This technique involves adhering decorative paper, fabric, or other materials to a surface and then sealing it with a protective coating. Decoupage can be used to create a unique and personalized look, whether you want to add a touch of vintage charm, contemporary flair, or a splash of color to your kitchen.
Decoupage, while deceptively simple, is a labor of love, especially when tackling a large project like kitchen cabinets. Depending on the level of detail desired, it can be done in a day or strung out over several weeks. If you're looking to add a unique touch to your kitchen while saving on the cost of replacing cabinets, decoupage is a great option. This guide will cover the basics of decoupage and provide helpful tips for applying this technique to kitchen cabinets.
1. Preparation is Key
Before you begin decoupaging your kitchen cabinets, it's important to prepare the surface properly. This will ensure that the adhesive adheres well and that the finished product lasts longer. Here are some simple steps you can use to prepare your kitchen cabinets for decoupage:
Cleaning:
Begin by cleaning the cabinets thoroughly with a mild detergent and water. Remove any grease, dirt, or grime that may be present. Pay special attention to the areas around the handles and knobs, as these tend to accumulate more dirt.Sanding:
Once the cabinets are clean and dry, sand them lightly with fine-grit sandpaper. This will help to create a smooth surface for the adhesive to bond to and will also help to remove any imperfections. Sand lightly using a light circular motion, avoiding excessive pressure.
Priming:
After sanding, apply a primer specifically designed for decoupage. This will help to create a uniform surface for the adhesive and will also help to prevent bleeding through from the underlying surface. Follow the directions on the primer product label for drying time.
Choosing your decoupage paper:
There are many different types of paper that can be used for decoupage, so choose one that complements the style of your kitchen. Consider using: *Paper napkins:
These are affordable and come in a wide variety of patterns. Paper napkins are particularly popular for decoupage because they are thin and easy to work with.*
Scrapbook paper:
This is a more durable option that comes in a wide range of patterns and colors. Scrapbook paper requires a little more care in decoupage because it is thicker and more prone to wrinkling.*
Maps, sheet music, vintage fabric, or even book pages:
If you're looking for a unique look, consider using these materials. These can create wonderfully personal and vintage looks for kitchens.2. Application Techniques
Once the cabinets are properly prepared, you can begin the process of decoupaging them. This involves applying the decoupage paper or fabric to the surface and then sealing it with a protective coating. Here are a few tips for applying decoupage to kitchen cabinets:
Cut your paper:
Choose your paper designs and carefully cut them out using scissors or an X-acto knife. This will allow you to easily use the paper to create a unique design for your cabinets.
Apply adhesive:
Apply a thin layer of decoupage adhesive (mod podge) to the surface of your cabinet. Be sure to work in small sections, as the adhesive will dry quickly. You can also apply adhesive to the back of the paper and then apply it to the cabinet.
Apply the paper:
Once the adhesive is applied, carefully place the paper on the cabinet. Smooth out any air bubbles and make sure that the paper is lying flat. Gently press the paper into the adhesive. It can be helpful to use a small roller to smooth out the paper or use a damp cloth to smooth out air bubbles.
Seal the paper:
Once the paper is dry, seal it with a coat of decoupage sealer. This will protect the paper from damage and make it easier to clean. Repeat as needed to achieve the desired level of protection.3. Finishing Touches
Once the paper is sealed, you can add the finishing touches to your decoupaged cabinets. You can add a coat of paint, stain, or varnish to the cabinets to create a more polished look. You can also add hardware, such as new knobs or handles, to complete the look of your cabinets.
Add a layer of paint:
If you'd like to add a solid color to your cabinets, apply a layer of paint after the decoupage is sealed. You can also add a coat of paint to the back of the paper to add another layer of protection. You can apply additional patterns to the paper to complete the look.
Add a stain:
If you're looking for a more natural look, consider staining the cabinets after decoupage. A stain will enhance the wood grain and create a beautiful finish.
Apply a varnish:
To protect the decoupage and give the cabinets a finished look, apply a layer of varnish. This will protect the paper and make it easier to clean.Decoupage is a fun and innovative way to transform your kitchen cabinets. With a little time and effort, you can create a unique and personalized look that you'll love for years to come. By following these steps, you can easily decoupage your kitchen cabinets and add a touch of elegance to your space.

Newsprint Cabinets Aunt Peaches

Country Kitchen With Decoupaged Veggies And Stenciled Border On Cabinet Doors Outdoor Cabinets Cupboards Paint Tiles Design

Creative Kitchen Renovation Turn Your Cabinets Into Art Hometalk

Newsprint Cabinets Aunt Peaches

How To Decoupage Furniture With Fabric A Step By Guide Hometalk

Kitchen Cabinet Quick Fix Fabric Decoupage Living In A Nuts

Kitchen Counter Makeover Decoupage Recipe Color Me Thrifty

Kitchen Cabinet Quick Fix Fabric Decoupage Living In A Nuts

Kitchen Counter Makeover Decoupage Recipe Color Me Thrifty

Decoupage Kitchen Cabinets Jonathan Fong Style
Related Posts