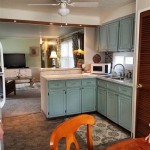
How To Distress Kitchen Cabinets White
Distressing white kitchen cabinets offers a charming, rustic, or vintage aesthetic. This technique involves strategically altering the cabinets' finish to create an aged, worn appearance. Achieving this look requires careful planning and execution. This article will guide you through the necessary steps to effectively distress white kitchen cabinets.
Preparing the Cabinets
Proper preparation is crucial for successful distressing. Skipping this step can lead to uneven results and potential damage to the cabinets.
- Remove Hardware: Begin by removing all cabinet hardware, including knobs, pulls, hinges, and catches. This prevents accidental damage to the hardware during the distressing process and allows for thorough surface treatment.
- Clean the Cabinets: Thoroughly clean the cabinet surfaces using a degreasing cleaner to remove grease, grime, and any residue. A clean surface ensures proper adhesion of primers and paints.
- Fill Holes (Optional): If desired, fill existing hardware holes with wood filler and allow it to dry completely. This step is necessary if new hardware with different placement will be used.
- Sand the Surface: Lightly sand the cabinet surfaces with fine-grit sandpaper (220-grit) to create a slightly rough surface for better paint adhesion. After sanding, wipe away any dust with a tack cloth.
Priming the Cabinets
Priming creates a uniform base for the subsequent paint layers and enhances paint adhesion. Choosing the right primer is essential for the desired outcome.
- Select a Primer: Choose a high-quality bonding primer suitable for wood surfaces. A tinted primer can enhance the coverage of the topcoat, particularly if a lighter color is being used.
- Apply the Primer: Apply a thin, even coat of primer using a brush, roller, or sprayer. Allow the primer to dry completely according to the manufacturer's instructions.
- Sand the Primer: Once dry, lightly sand the primed surface with fine-grit sandpaper (220-grit) to create a smooth base for the topcoat. Remove any sanding dust with a tack cloth.
Applying the Base Coat
The base coat provides the foundation for the distressed look. Selecting the right paint and application technique are important for achieving the desired effect.
- Choose the Paint: Select a high-quality white paint specifically formulated for cabinets. Consider using a satin or semi-gloss finish for easier cleaning and durability. Chalk paint is also a popular choice for distressed finishes.
- Apply the Base Coat: Apply two thin, even coats of the white base coat, allowing sufficient drying time between coats. Ensure thorough coverage for a consistent finish.
Creating the Distressed Effect
This stage involves techniques to create the aged, worn look. Several methods can be employed, each yielding a slightly different result.
- Sanding Technique: Using medium-grit sandpaper (100-150-grit), strategically sand along edges, corners, and raised areas to reveal the underlying primer or wood. This creates a naturally worn appearance.
- Dry Brushing Technique: Dip a dry brush lightly into a contrasting paint color (e.g., gray, brown, or black) and remove most of the paint onto a paper towel. Lightly brush across the surface of the cabinets, creating a subtle, weathered effect.
- Hitting Technique: Gently strike the cabinet surfaces with various tools, such as chains, hammers, or screwdrivers, to create dents and imperfections, simulating years of wear and tear. This technique should be used sparingly and carefully to avoid excessive damage.
- Waxing Technique: Apply a dark-colored wax to recessed areas and crevices, enhancing the aged appearance. Buff the wax to achieve the desired level of sheen.
Applying a Protective Topcoat (Optional)
A protective topcoat seals the distressed finish and enhances durability. This step is particularly important for high-traffic areas.
- Choose a Topcoat: Select a clear, water-based polyurethane or a specialized topcoat designed for chalk paint. A matte or satin finish will preserve the distressed look without adding excessive shine.
- Apply the Topcoat: Apply a thin, even coat of the topcoat, allowing it to dry completely according to the manufacturer's instructions. Multiple thin coats offer better protection than a single thick coat.
Reinstalling the Hardware
Once the distressed finish and topcoat (if used) are completely dry, reinstall the cabinet hardware. This completes the project and brings the distressed look together.
- Attach Hardware: Carefully attach the cabinet hardware, ensuring proper alignment and secure fastening. New hardware can further enhance the overall aesthetic.

Rescuing And Reviving A Glazed Distressed Kitchen Bella Tucker

Distressed Kitchen Cabinets How To Distress Your

Antique White Kitchen Cabinets Are What Many Homeowners Look For Gec Cabinet Depot

Distressed White Kitchen Cabinets For Paige Looks Great With The Marble Too Rustic

Old Oak Cabinets Painted White And Distressed Hometalk

Distressed Kitchen Cabinets Tips To Achieve This Antiquing Effect The Blog

20 Distressed Kitchen Cabinets You Have To See Hunker

How Distressed White Kitchen Cabinets Can Increase Your Profit Modern Diy Renovation

Rescuing And Reviving A Glazed Distressed Kitchen Bella Tucker

Veryyyyyyyyyyry Distressed Cabinets Jennifer Allwood Home
Related Posts


