How to Finish Chalk Paint on Kitchen Cabinets: A Comprehensive Guide to Achieving a Durable and Stylish Finish
Chalk paint has become increasingly popular for its versatility and ability to transform furniture and cabinetry, giving them a unique and matte finish. Kitchen cabinets, in particular, can benefit from a chalk paint makeover, as it can revive their appearance and add a touch of charm and elegance to the kitchen. However, to ensure a durable and long-lasting finish, proper application and finishing techniques are crucial.
Here is a comprehensive guide on how to finish chalk paint on kitchen cabinets, covering essential steps, materials, and tips for achieving a professional-looking result:
1. Preparation
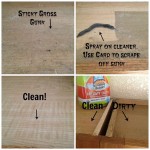
Thoroughly clean the cabinet surfaces with a degreaser to remove any dirt, grime, or grease. Sand the surfaces lightly with fine-grit sandpaper to create a slightly rough texture for better paint adhesion. Remove any dust or debris after sanding.
2. Prime (Optional)
For bare wood or highly porous surfaces, applying a primer can help ensure even paint coverage and prevent the wood from absorbing too much paint. Use a primer specifically designed for chalk paint.
3. Paint Application
Stir the chalk paint thoroughly before using. Apply thin, even coats of paint using a brush or a foam roller, allowing each coat to dry completely before applying the next. Use light, gentle strokes and avoid overworking the paint.
4. Distress (Optional)
If you want to achieve a distressed or antiqued look, lightly sand the painted surfaces once they are completely dry. Focus on the edges and areas that would naturally show wear and tear, such as corners and raised details.
5. Sealant
To protect the painted finish from wear, moisture, and stains, it is essential to apply a clear sealant. Choose a sealant specifically designed for chalk paint, such as a polyurethane or a wax-based sealant. Apply two to three thin coats of sealant, allowing each coat to dry completely before applying the next.
Types of Sealants:
- Polyurethane: Provides a durable, waterproof finish, but may yellow over time.
- Wax-based: Creates a soft, matte finish, but requires more frequent reapplication for protection.
6. Hardware
After the sealant has dried completely, reattach the cabinet hardware. If necessary, clean or update the hardware to complement the painted finish.
Tips for a Professional Finish:
- Use high-quality chalk paint and sealant for best results.
- Allow ample drying time between each step.
- Applying multiple thin coats is better than one thick coat.
- Test the paint and sealant on an inconspicuous area first.
- If using a brush, use a soft, natural-bristle brush.
- For a smooth finish, sand lightly between coats with fine-grit sandpaper.
Conclusion
By following these steps and tips, you can achieve a beautiful and long-lasting chalk paint finish on your kitchen cabinets. Chalk paint offers a versatile and stylish solution for updating your kitchen, adding a touch of personality and charm to your home.

Painting Kitchen Cabinets With Chalk Paint Simply Today Life

Chalk Painted Kitchen Cabinets 2 Years Later Our Storied Home

How To Paint A Kitchen With Chalk Maison De Pax

Chalk Painted Kitchen Cabinets 2 Years Later Our Storied Home

Chalk Paint Kitchen Cabinets 2 Amazing Before Afters And How To The Interiors Addict

Why I Repainted My Chalk Painted Cabinets Sincerely Sara D Home Decor Diy Projects

Step By Kitchen Cabinet Painting With Annie Sloan Chalk Paint Jeanne Oliver

Why I Repainted My Chalk Painted Cabinets Sincerely Sara D Home Decor Diy Projects

Painting Kitchen Cabinets With Chalk Paint Simply Today Life

Chalk Painted Kitchen Cabinets 2 Years Later Our Storied Home
Related Posts

