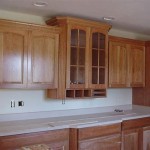
How To Finish the Underside of Wall Cabinets
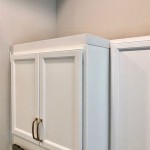
Wall cabinets, while offering valuable storage space in kitchens, bathrooms, and laundry rooms, often have an unfinished underside. This exposed area can detract from the overall aesthetic of the room, collect dust, and potentially be susceptible to moisture damage. Finishing the underside of wall cabinets provides a clean, professional look, enhances durability, and improves the value of the installed cabinetry. This article details various methods and considerations for effectively finishing the underside of wall cabinets.
Before commencing any finishing project, meticulous preparation is essential. This stage involves gathering necessary tools and materials, thoroughly cleaning the cabinet underside, and properly protecting the surrounding areas. Neglecting this initial phase can lead to unsatisfactory results and potentially damage the existing cabinet structure or adjacent surfaces.
Effective surface preparation begins with a thorough cleaning. Use a vacuum cleaner with a brush attachment to remove loose dust, debris, and cobwebs. Following the vacuuming, wipe down the underside with a damp cloth and a mild detergent solution. Ensure the surface is completely dry before proceeding. This removes any residual grime or grease that might interfere with the adhesion of primers or finishes.
Protect the surrounding surfaces by covering countertops, appliances, and flooring with drop cloths or plastic sheeting. Secure the protective coverings with painter's tape to prevent them from shifting during the finishing process. This step is crucial to avoid accidental spills or stains on unintended surfaces. Adequate protection reduces the amount of cleanup required after the project completion.
Consider the existing finish of the cabinets when choosing a finishing method for the underside. Matching the finish will create a cohesive look, particularly if the cabinet interiors are visible. If a contrasting look is desired, carefully select a finish that complements the overall design of the room. The finish should also be durable and easy to clean, especially in areas prone to grease or moisture.
Key Point 1: Choosing the Right Finishing Method and Materials
Several methods are available for finishing the underside of wall cabinets, each with its own advantages and disadvantages. The choice depends on factors such as budget, desired aesthetic, skill level, and the existing cabinet materials. Popular options include painting, staining with a clear coat, applying veneer, and using pre-finished panels.
Painting is a versatile and cost-effective option. Latex paint is suitable for primed surfaces, while oil-based paint offers greater durability and resistance to moisture. However, oil-based paints require more ventilation and longer drying times. Choose a paint color that matches the surrounding cabinets or complements the overall room decor. Consider using a paint with a satin or semi-gloss finish, which is easier to clean than matte finishes.
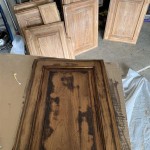
Staining with a clear coat provides a natural wood look while adding protection. This method is suitable for cabinets made of high-quality wood where the grain and texture are desirable to display. The staining process involves applying stain evenly to achieve the desired color depth, followed by a clear coat of polyurethane or varnish to seal the wood and protect it from moisture and wear.
Applying veneer involves adhering a thin layer of wood or other material to the underside of the cabinet. This method is ideal for covering up imperfections or creating a consistent surface appearance. Veneer comes in various wood species and finishes, allowing for a wide range of design options. Proper adhesion requires careful application and clamping to ensure a strong and lasting bond.
Pre-finished panels offer a convenient and time-saving solution. These panels are available in various colors, textures, and materials, and they can be easily cut to size and attached to the cabinet underside. Pre-finished panels are particularly useful for covering large areas quickly and efficiently. The installation typically involves using construction adhesive or screws to secure the panels to the cabinet frame.
When selecting materials, prioritize quality and durability. Use primers designed for the specific type of paint or stain being used. Choose high-quality adhesives and fasteners to ensure a secure and long-lasting installation. Consider the environmental impact of the materials and opt for low-VOC (volatile organic compounds) options whenever possible.
In addition to the primary finishing material, gather the necessary tools, including paintbrushes, rollers, sandpaper, putty knives, measuring tapes, and safety glasses. Having all the tools readily available will streamline the finishing process and minimize disruptions.
Key Point 2: The Application Process – Achieving a Professional Finish
The application process varies depending on the chosen finishing method. Regardless of the method, meticulous preparation and attention to detail are crucial for achieving a professional-looking finish. Each step must be executed with precision to minimize flaws and ensure a durable and aesthetically pleasing result.
If painting, start by applying a primer to the cabinet underside. Primer provides a smooth, uniform surface for the paint to adhere to and helps to block stains and prevent bleed-through. Apply the primer in thin, even coats using a brush or roller. Allow the primer to dry completely before proceeding to the next step. Sand the primed surface lightly with fine-grit sandpaper to remove any imperfections and create a smooth surface for painting.
Apply the paint in thin, even coats, allowing each coat to dry completely before applying the next. Use a high-quality brush or roller to minimize brush marks and ensure a smooth, uniform finish. Avoid applying too much paint at once, as this can lead to drips and runs. If using a sprayer, follow the manufacturer's instructions carefully and wear appropriate safety gear, including a respirator.
For staining, apply the stain evenly to the cabinet underside using a brush, cloth, or sponge. Allow the stain to penetrate the wood for the recommended time, and then wipe off any excess stain with a clean cloth. The longer the stain remains on the wood, the darker the color will be. Allow the stain to dry completely before applying the clear coat. Apply the clear coat in thin, even coats using a brush or sprayer. Allow each coat to dry completely before applying the next. Sand lightly between coats to remove any imperfections and ensure a smooth, glossy finish.
When applying veneer, measure and cut the veneer to size, allowing for a slight overlap. Apply adhesive to both the cabinet underside and the back of the veneer. Position the veneer carefully and press it firmly onto the cabinet underside. Use a veneer hammer or roller to ensure a strong and uniform bond. Trim any excess veneer with a sharp utility knife or veneer trimmer. Consider adding edge banding for a cleaner look.
For pre-finished panels, measure and cut the panels to size using a saw. Apply construction adhesive to the back of the panels and press them firmly onto the cabinet underside. Use screws or nails to secure the panels in place while the adhesive dries. Cover the fastener heads with a compatible filler if necessary.
Throughout the application process, maintain a clean and organized workspace. Remove any drips or spills immediately to prevent them from drying and becoming permanent. Use adequate ventilation to minimize exposure to fumes from paints, stains, and adhesives.
Key Point 3: Addressing Common Problems and Enhancing Durability
Even with careful planning and execution, certain problems can arise during the finishing process. Addressing these issues promptly and effectively is essential for achieving a satisfactory and long-lasting result. Furthermore, taking steps to enhance the durability of the finish will protect the cabinet underside from damage and extend its lifespan.
One common problem is the appearance of air bubbles or brush marks in the finish. To minimize these issues, use high-quality brushes and rollers and apply the finish in thin, even coats. If air bubbles appear, gently smooth them out with a brush or roller while the finish is still wet. If brush marks are visible, sand the finish lightly with fine-grit sandpaper and apply another coat.
Another potential problem is uneven color or staining. To avoid this, apply the stain evenly and wipe off any excess stain thoroughly. If the color is too light, apply another coat of stain. If the color is too dark, sand the stained surface lightly and reapply the stain. Consider practicing on a scrap piece of wood to test the stain color and application technique before applying it to the cabinet underside.
Peeling paint or veneer can occur if the surface is not properly prepared or if the adhesive is not strong enough. To prevent this, ensure the surface is clean, dry, and free of any loose or flaking material. Use a high-quality primer to improve adhesion. Apply adhesive liberally and press the veneer or paint firmly onto the surface. Use clamps or weights to hold the veneer in place while the adhesive dries.
To enhance the durability of the finish, apply multiple coats of clear coat or varnish. This will provide additional protection against moisture, scratches, and wear. Consider using a polyurethane finish, which is highly resistant to abrasion and chemicals. Reapply the finish periodically to maintain its protective properties.
In areas prone to moisture, such as above the sink or dishwasher, consider using a moisture-resistant paint or sealant. These products will help to prevent water damage and extend the lifespan of the cabinet underside. Regularly inspect the finish for any signs of damage and repair any cracks or chips promptly.
Finally, consider adding a light rail to the underside of the cabinets. A light rail is a decorative molding that conceals under-cabinet lighting and protects the cabinet underside from splashes and spills. Light rails are available in various styles and finishes to complement the existing cabinet design.

How To Easily Cover Cabinet Bottoms Onegirlmanyideas

How To Easily Cover Cabinet Bottoms Onegirlmanyideas

Finished Bottom Option Rta Cabinet Options

How To Easily Cover Cabinet Bottoms Onegirlmanyideas

Under Cabinet Lighting Concealment Options Superior Cabinets

Diy Cabinet End Panels With Shaker Style Trim Average But Inspired

Diy Cabinet End Panels With Shaker Style Trim Average But Inspired

Raised Kitchen Cabinet Makeover Sawdust 2 Stitches

Adding Moldings To Your Kitchen Cabinets Remodelando La Casa

Diy Light Rails Hiding Under Cabinet Lighting Thrifty Decor And Organizing
Related Posts