How to Fit a Kitchen Cornice
A cornice is a decorative molding that runs along the top of a wall, often adding a touch of elegance and sophistication to a room. In kitchens, cornices can be especially effective at disguising awkward spaces, concealing unsightly pipes or wires, and creating a visually appealing finish to the cabinetry. Installing a kitchen cornice can seem daunting, but with the right tools and a little know-how, it's a project that even DIY enthusiasts can tackle. This guide outlines the steps involved, from preparation to finishing, helping you achieve a professional-looking result.
Preparation: Getting Ready for Installation
Before you start fitting the cornice, it's essential to prepare the area thoroughly. This involves cleaning the surfaces, measuring accurately, and gathering the necessary tools and materials.
- Clean the surfaces: Ensure the wall and ceiling where the cornice will be installed are clean and free of dust, grease, or any other debris. This will ensure proper adhesion for the cornice.
- Measure and mark: Accurately measure the length and width of the area where the cornice will be installed. Use a pencil to mark the position on the wall and ceiling where the cornice will sit. It is vital to ensure a consistent level and straight line for a polished appearance.
- Gather tools and materials: You will need a saw, miter box, level, tape measure, pencil, miter saw (optional), a drill, screws, construction adhesive, wood filler, sandpaper, primer, and paint, matching the desired color of the cornice.
Installation: Cutting, Attaching, and Finishing the Cornice
Once the preparation is complete, it's time to install the cornice. This process involves cutting the cornice pieces to size, attaching them to the wall and ceiling, and filling any gaps or imperfections.
- Cut the cornice to size: Use a miter saw or miter box and saw to cut the cornice pieces to fit the dimensions of the room and the placement of corners. Ensure precise, clean cuts for a neat finished product.
- Attach the cornice to the wall: Apply construction adhesive to the back of each cornice piece. Use a level to ensure the cornice is positioned correctly and press firmly into place. Secure the cornice by drilling pilot holes and screwing into the wall or ceiling. Use screws of appropriate length for the wall material and the cornice thickness.
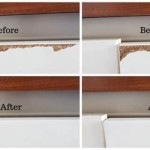
- Fill gaps and imperfections: Once the cornice is attached, use wood filler to fill any gaps or imperfections between the cornice and the wall. Allow the filler to dry completely before sanding smooth.
Finishing: Achieving a Polished Look
The final stage of fitting a kitchen cornice involves sanding, priming, and painting to create a professional finish.
- Sand the cornice: After the wood filler dries, sand the entire cornice surface with fine-grit sandpaper to create a smooth, even surface. Ensure all rough edges are removed for a polished look.
- Prime the cornice: Apply a coat of primer to all surfaces of the cornice. This will provide a smooth, even base for the paint and help the paint adhere more readily. Allow the primer to dry completely before moving on to the next step.
- Paint the cornice: Choose a paint color that complements the kitchen décor. Apply two coats of paint to the cornice, allowing each coat to dry completely before applying the next. A high-quality paint will provide a durable and attractive finish to the cornice.

Wren Kitchens How To Fit A Kitchen Cornice Installation Guide

How To Fit A Plinth Cornice And Pelmet Ideas Advice Diy At B Q

How To Fit Cornice And Lighting Pelmet For A Kitchen

How To Pick And Install Cornices Pelmets In Solid Wood Kitchens Kitchen Cabinets Information Guides

How To Pick And Install Cornices Pelmets In Solid Wood Kitchens Kitchen Cabinets Information Guides

How To Fit Cornices Or Pelmets On Kitchen Units

Fit Cornice Pelmet Or Plinth Per Length Ml Building Direct

How To Pick And Install Cornices Pelmets In Solid Wood Kitchens Kitchen Cabinets Information Guides

What Is A Kitchen Cornice Everything You Need To Know

Solid Oak Cornices Pelmets L Kitchen Wood Cabinets Cornice
Related Posts

