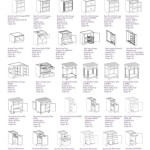
How to Fit Handles to Kitchen Cupboards
Kitchen cupboard handles are more than just functional elements; they can significantly influence the overall aesthetic of your kitchen. Choosing the right handles and installing them correctly can make a world of difference. This guide will provide a step-by-step explanation of how to fit handles to kitchen cupboards, equipping you with the knowledge and skills to complete this task efficiently and effectively.
Planning and Preparation
Careful planning is crucial for a successful handle installation. Before commencing, consider the following:
- Handle Style and Size: Choose handles that complement the style of your kitchen and are the appropriate size for your cupboards. Consider the depth of the cupboard door and the overall design aesthetic.
- Handle Placement: Determine the best position for each handle. Generally, handles are positioned centrally on the cupboard door, but you can adjust the placement for a specific effect. Mark the desired handle location with a pencil.
- Tools and Materials: Ensure you have all the necessary tools, including a drill, drill bits, screws, screwdriver, pencil, measuring tape, and a level. You may also need a countersinking bit if the handle screws are designed to be recessed.
Drilling Pilot Holes
Drilling pilot holes is essential for accurate and controlled screw insertion. This step prevents the wood from splitting and ensures the screws go in straight.
- Measure and Mark: Using the handle as a guide, measure the distance between the mounting holes and mark the positions on the cupboard door with a pencil.
- Select the Drill Bit: Choose a drill bit slightly smaller than the diameter of the screw. This will create a pilot hole that facilitates smooth screw insertion.
- Drill the Holes: Carefully drill pilot holes at the marked points, ensuring the drill bit is perpendicular to the surface.
Installing the Handles
Once the pilot holes are drilled, you can proceed with handle installation. This process requires careful alignment and secure fastening.
- Attach the Handle: Position the handle over the pilot holes, aligning it with the marked position. Secure the handle using the appropriate screws.
- Tighten the Screws: Tighten the screws gently, ensuring not to overtighten, as this can damage the wood.
- Check Alignment: After securing the handle, double-check its alignment and adjust if necessary. Ensure the handle is level and sits flush with the cupboard door.
Countersinking (Optional)
Countersinking is often used for handles with screws designed to be recessed. This creates a cleaner and more polished look.
- Countersinking Bit: Select a countersinking bit that matches the screw head size.
- Create Countersinks: Use the countersinking bit to create a small recess around each pilot hole. This creates a space for the screw head to sit below the surface of the door.
- Screw Insertion: Secure the handle with the screws, ensuring they sit flush within the countersinking.
Tips and Considerations
Here are some additional tips and considerations for successful handle installation:
- Practice: If you are unsure, practice on a scrap piece of wood before working on your kitchen cupboards.
- Use a Level: Use a level to ensure handle alignment and prevent an uneven look.
- Cleaning: Clean any dust or debris from the cupboard door surfaces after installation.
- Finishing Touches: Depending on the handle material, you may need to apply a protective finish to prevent rust or corrosion.
How To Install Cabinet Handles Straight Without Losing Your Mind
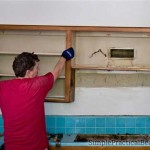
How To Fit A Cupboard Handle
How To Install Kitchen Cabinet Handles Easy Diy
How To Install Cabinet Handles The Home Depot
How To Install Cabinet Handles Straight Without Losing Your Mind
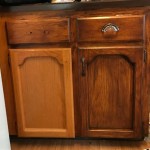
How To Install Cabinet Door And Drawer Handles Knobs Pulls
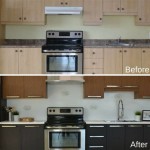
How To Install Hardware Like A Pro Kitchen Renovation House Of Hepworths
How To Install Cabinet Handles Straight Without Losing Your Mind
How To Install Cabinet Handles The Home Depot
How To Install Cabinet Hardware In 7 Steps
Related Posts