How To Fit Handles To Kitchen Cupboards and Cabinets
Upgrading the hardware on kitchen cupboards and cabinets is a cost-effective and relatively straightforward way to refresh the look of a kitchen. Replacing existing handles or adding handles to previously handle-less units can dramatically alter the style, from a modern minimalist aesthetic to a more traditional or ornate design. This article provides a comprehensive guide on how to fit handles to kitchen cupboards and cabinets, covering the necessary tools, preparation steps, and installation techniques.
Before commencing the installation process, it is crucial to select the appropriate handles. Considerations should include the overall style of the kitchen, the size and weight of the cabinet doors or drawers, and the desired aesthetic. Handles are available in a wide range of materials, finishes, and designs, including knobs, pulls, and bar handles. The existing hole spacing should also be taken into account if replacing existing handles. It is also essential to check if the thickness of the cabinet door or drawer is suitable for the length of the screws provided with the handles.
Once the handles are selected, gathering the necessary tools is the next step. Having the right tools on hand will ensure a smooth and efficient installation process. These typically include:
- A drill with a variety of drill bits (including a pilot drill bit and bits appropriate for the handle screws)
- A screwdriver (matching the screw heads of the handles)
- A measuring tape or ruler
- A pencil
- A level
- A drill guide or template (optional, but highly recommended for accurate placement)
- Safety glasses
- A dust mask
- Masking tape
- A countersinking bit (optional, used for creating a flush finish)
Key Point 1: Preparing the Cabinet Doors and Drawers
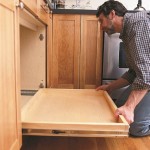
The initial stage involves preparing the cabinet doors and drawers for handle installation. This process ensures accuracy and prevents damage to the cabinet surfaces. Whether installing handles on new cabinets or replacing existing ones, this step is crucial. The first consideration is determining the precise location for the handles.
For new cabinets, the placement of handles is a matter of personal preference, but consistency is key. Common placement guidelines include:
- Cabinet doors: Handles are typically positioned along the vertical stile of the door, either near the top corner for upper cabinets or near the bottom corner for lower cabinets. A consistent distance from the edge is desirable, usually between 2 to 4 inches.
- Drawer fronts: Handles can be centered horizontally on the drawer front or placed closer to the top edge. For wider drawers, two handles can be used, placed symmetrically on either side of the center line.
To ensure uniformity, measure and mark the desired location for each handle with a pencil. Use a measuring tape and level to guarantee that the marks are consistent and aligned. For drawers, find the center by measuring the width of the drawer front and dividing by two. For cabinet doors, measure from the top or bottom edge to the desired handle position.
Once the locations are marked, using a drill guide or template is highly recommended. These templates provide pre-drilled holes or guide lines that ensure accurate and consistent placement of the handles across all cabinets. Templates are particularly useful when installing multiple handles, as they minimize the risk of errors and ensure a professional-looking result. Templates are available for purchase or can be custom-made from cardboard or thin wood. When using a template, align it with the pencil marks and secure it to the cabinet door or drawer front using masking tape.
Before drilling, apply masking tape to the area around the marked locations. This helps to prevent the drill bit from chipping or scratching the cabinet surface, especially on laminated or painted finishes. The tape also provides a better surface for the drill bit to grip, reducing the likelihood of the bit wandering.
Key Point 2: Drilling the Pilot Holes
Drilling pilot holes is an essential step in installing handles to kitchen cabinets and cupboards. It prevents splitting or cracking of the wood and makes it easier to drive the screws in straight and securely. Using the correct size drill bit is crucial for achieving the best results.
Select a drill bit that is slightly smaller in diameter than the screw thread of the handle screws. If the screw thread measures, for example, 3mm in diameter, the pilot hole drill bit should be slightly smaller, perhaps 2.5mm. This ensures that the screws have enough material to grip onto, without being too tight and risking stripping the screw head or damaging the cabinet material.
Place the tip of the drill bit on the marked location, or within the pre-drilled hole of the drill guide or template. Apply firm, even pressure and drill straight through the cabinet door or drawer front. Maintain a consistent speed and avoid pressing too hard, as this can cause the drill bit to wander or break. Drill slowly and deliberately, especially when working with delicate materials such as veneer or laminate.
For thicker cabinet doors or drawers, it is helpful to drill a pilot hole from both sides. This ensures that the holes are aligned correctly and prevents tear-out on the back side of the cabinet. Drill halfway through from one side, then flip the cabinet and drill the remaining distance from the other side, using the initial hole as a guide. This technique is particularly useful when working with hardwoods or materials that are prone to splintering.
Once the pilot holes are drilled, using a countersinking bit is optional, but it can improve the overall appearance and functionality of the handle installation. A countersinking bit creates a small recess around the top of the pilot hole, allowing the screw head to sit flush with the surface of the cabinet. This prevents the screw head from protruding and creating a potential snag point. To use a countersinking bit, attach it to the drill and carefully drill a shallow recess around the pilot hole, ensuring that the screw head will sit flush when tightened.
Key Point 3: Attaching the Handles
After preparing the cabinet doors and drawers and drilling the pilot holes, the final step is attaching the handles. This involves aligning the handles with the pilot holes and securing them with the provided screws. Ensuring the handles are properly aligned and tightened is crucial for both aesthetics and functionality.
Align the handle with the pilot holes, ensuring that the screw holes in the handle base line up perfectly with the drilled holes in the cabinet door or drawer. If necessary, adjust the position of the handle slightly to ensure a perfect fit. Insert the screws through the handle base and into the pilot holes. Use a screwdriver that matches the screw head type (e.g., Phillips head or flat head). Turn the screws clockwise to tighten them, but avoid overtightening.
Tighten the screws until they are snug and the handle is firmly attached to the cabinet door or drawer. Be careful not to overtighten the screws, as this can strip the screw heads or damage the cabinet material. Overtightening can also cause the handle to rotate or become misaligned over time.
After installing each handle, check its alignment and stability. Ensure that the handle is straight and level and that it does not wobble or move when pulled. Make any necessary adjustments to ensure that the handle is securely attached and properly aligned. Repeat the process for all remaining handles, taking care to maintain consistency in placement and tightness.
For larger or heavier handles, consider using longer screws to provide additional support. This is especially important for drawers that are frequently used or that contain heavy items. Longer screws will grip deeper into the cabinet material, reducing the risk of the handle becoming loose over time. Ensure that the longer screws do not protrude through the back of the cabinet door or drawer.
If any screws strip or become damaged during the installation process, replace them with new screws of the same size and type. Stripped screws will not provide adequate support and can cause the handle to become loose or fall off. Using high-quality screws can also help to prevent stripping and ensure a more secure and durable installation.
Once all handles have been installed, inspect the cabinet doors and drawers to ensure that they open and close smoothly without any obstruction. The handles should not interfere with any adjacent cabinets or drawers. Make any necessary adjustments to the cabinet hinges or drawer slides to ensure proper alignment and smooth operation.
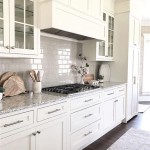
Finally, clean the cabinet doors and drawers with a soft cloth to remove any fingerprints, dust, or debris accumulated during the installation process. Use a mild detergent or cleaner if necessary, but avoid using harsh chemicals that may damage the cabinet finish. The newly installed handles should complement the overall aesthetic of the kitchen and provide a functional and stylish upgrade to the cabinets.
How To Install Cabinet Handles Straight Without Losing Your Mind
How To Install Cabinet Handles The Home Depot
How To Install Cabinet Handles Straight Without Losing Your Mind
How To Install Cabinet Door And Drawer Handles Knobs Pulls
How To Install Hardware Like A Pro Kitchen Renovation House Of Hepworths
How To Install Kitchen Cabinet Handles Easy Diy
How To Install Cabinet Handles The Home Depot
How To Install Cabinet Handles Straight Without Losing Your Mind
How To Install Cabinet Hardware Love Renovations
How To Fit A Cupboard Handle
Related Posts