How to Address Common Issues at the Bottom of Cabinets
Kitchen and bathroom cabinets are indispensable parts of any modern home, providing essential storage and contributing significantly to the overall aesthetic. However, the bottoms of these cabinets are frequently subjected to moisture, spills, and general wear and tear, leading to various problems that require attention. Addressing these issues promptly can prevent further damage, extend the lifespan of the cabinets, and maintain the hygiene and appearance of the space. This article explores common problems encountered at the bottom of cabinets and offers practical solutions for resolving them.
Addressing Water Damage and Moisture Issues
Water damage is one of the most prevalent problems affecting the bottom of cabinets, particularly in areas near sinks and dishwashers. Leaks, spills, and condensation can seep into the cabinet's base, leading to swelling, warping, and even mold growth. Identifying the source of the water is the first crucial step in mitigating the damage. Check plumbing connections, including faucets, supply lines, and drainpipes, for any signs of leaks. Inspect the dishwasher's seals and connections if the damage is near the dishwasher. Condensation can occur if the cabinet is not adequately ventilated or if cold water pipes run close to the cabinet's surface.
Once the water source is identified, remediation can begin. Thoroughly dry the affected area using towels, fans, or a dehumidifier. Remove any standing water or moisture. If the damage is extensive and the wood is severely warped or rotten, replacement of the affected section or the entire cabinet may be necessary. However, if the damage is minor, simple repairs can often suffice. For slightly swollen wood, allow it to dry completely, then sand the surface smooth. Apply a wood filler to fill any cracks or imperfections, and then sand it again to create a seamless finish. Apply a sealant or paint to protect the wood from future moisture exposure.
Preventative measures are crucial in avoiding future water damage. Consider installing a moisture sensor alarm under the sink to detect leaks early. Apply a waterproof sealant along the edges of the cabinet where it meets the floor or wall. Use drip trays under sinks to catch any minor leaks or spills. Ensure adequate ventilation inside the cabinets to prevent condensation buildup. Regular inspection of plumbing connections and cabinet surfaces can help identify and address potential problems before they escalate.
Mold growth is a significant concern when dealing with water damage. If mold is present, it is essential to address it immediately to prevent health problems and further damage to the cabinet. Use a mold cleaner specifically formulated for wood surfaces, following the manufacturer's instructions carefully. Wear appropriate protective gear, including gloves, a mask, and eye protection, during the cleaning process. For severe mold infestations, professional mold remediation services may be required. After cleaning, ensure the area is thoroughly dried and properly ventilated to prevent mold from returning.
Repairing Scratches, Scuffs, and Surface Imperfections
The bottom of cabinets is often subjected to scratches, scuffs, and other surface imperfections due to foot traffic, cleaning supplies, and general use. These blemishes can detract from the overall appearance of the cabinets and the room. Fortunately, many of these imperfections can be easily repaired with readily available materials.
For minor scratches, a furniture touch-up marker or wax crayon that matches the cabinet's color can effectively conceal the damage. Simply apply the marker or crayon to the scratch, filling it in and blending it with the surrounding surface. Wipe away any excess with a clean, soft cloth. For deeper scratches, a wood filler may be necessary. Apply the wood filler to the scratch, slightly overfilling it. Allow it to dry completely, and then sand it smooth to create a seamless finish. Paint or stain the repaired area to match the surrounding surface.
Scuffs and surface marks can often be removed with a gentle cleaning solution and a soft cloth. Avoid using abrasive cleaners or scouring pads, as these can further damage the finish. For stubborn scuffs, try using a melamine sponge, such as a Magic Eraser, with a small amount of water. Gently rub the scuff mark until it disappears. Be careful not to apply too much pressure, as this can dull the finish. After cleaning, apply a furniture polish or wax to protect the surface and restore its shine.
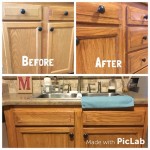
In some cases, the finish on the bottom of the cabinet may be severely worn or damaged, requiring a more extensive repair. This may involve stripping the old finish, sanding the surface smooth, and applying a new coat of paint or stain. This process can be time-consuming and requires some skill, but it can significantly improve the appearance of the cabinets. If you are not comfortable performing this type of repair yourself, consider hiring a professional painter or carpenter.
Preventative measures can also help minimize scratches and scuffs. Consider placing mats or rugs in front of cabinets in high-traffic areas. Use furniture pads under appliances or cleaning supplies that are stored in the cabinets to prevent them from scratching the surface. Regularly clean the bottom of the cabinets with a gentle cleaning solution and a soft cloth to remove dirt and grime that can contribute to surface damage.
Addressing Structural Issues and Stability
Structural problems at the bottom of cabinets can compromise their stability and functionality. These issues can include loose hinges, broken supports, and damaged or rotting wood. Addressing these problems promptly is crucial to prevent further damage and ensure the safety and usability of the cabinets.
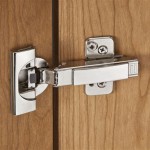
Loose hinges are a common problem, particularly with heavily used cabinets. Over time, the screws that hold the hinges in place can loosen, causing the doors to sag or wobble. In some cases, simply tightening the screws may be sufficient to resolve the issue. However, if the screw holes are stripped, a more substantial repair may be necessary. One option is to insert wood glue and small wooden dowels into the stripped screw holes, allowing the glue to dry completely before re-drilling the holes and reattaching the hinges. Alternatively, you can use longer screws or screws with a larger diameter to provide a more secure hold.
Broken supports or legs can also compromise the stability of the cabinets. If a support or leg is cracked or broken, it should be repaired or replaced immediately. Small cracks can sometimes be repaired with wood glue and clamps. Apply the glue to the crack, clamp the pieces together, and allow the glue to dry completely. For more severe damage, the support or leg may need to be replaced entirely. Measure the existing support or leg carefully and purchase a replacement that is the same size and shape. Attach the new support or leg using wood screws and glue.
Damaged or rotting wood at the bottom of the cabinets can be a sign of significant water damage or pest infestation. If the damage is extensive, the affected section of the cabinet may need to be replaced. Cut out the damaged section using a saw, being careful not to damage the surrounding wood. Measure the opening and cut a new piece of wood to fit. Attach the new piece of wood using wood screws and glue. Fill any gaps or imperfections with wood filler, sand the surface smooth, and paint or stain to match the surrounding area.
Ensuring proper leveling of the cabinets is essential for maintaining their stability. If the cabinets are not level, they can wobble or rock, putting stress on the hinges and supports. Use shims to level the cabinets, placing them under the legs or base of the cabinets until they are level. Once the cabinets are level, secure them to the wall using screws. This will help prevent them from tipping or moving.
Regular inspection and maintenance can help prevent structural problems from developing. Check the hinges, supports, and legs of the cabinets regularly for signs of damage or wear. Tighten any loose screws and repair any cracks or breaks promptly. By addressing these issues early, you can prevent them from escalating and compromising the stability and functionality of your cabinets.

How To Replace A Rotten Cabinet Bottom

Base Cabinet Repair

Under Sink Cabinet Repair Our Bright Road

Easy And Inexpensive Cabinet Updates The 15 Minute Fix Adding Trim To Bottom Of Cabinets Rozy Home

How To Replace A Rotten Kitchen Cabinet Floor 8 Simple Steps

How To Replace Water Damaged Cabinet Bottom

Rotted Sink Cabinet Floor How To Replace

Easy And Inexpensive Cabinet Updates The 15 Minute Fix Adding Trim To Bottom Of Cabinets Rozy Home

Water Damage Repair Wood Under The Kicthen Sink Cabinet

How To Upgrade The End Of Builder Grade Cabinets Thrifty Decor Diy And Organizing
Related Posts

