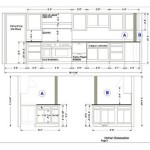
How to Fix Corner Kitchen Cupboard Problems
Corner kitchen cupboards, designed to maximize storage in often-underutilized spaces, can present unique challenges. Their intricate designs and often-awkward access points can lead to a variety of issues, ranging from simple door misalignment to complex internal mechanism failures. Addressing these problems requires a systematic approach, combining practical knowledge with the appropriate tools and materials. This article provides guidance on diagnosing and resolving common issues encountered in corner kitchen cupboards.
Addressing Door Misalignment
One of the most frequent problems with corner kitchen cupboards is door misalignment. This can manifest as doors rubbing against each other, failing to close properly, or appearing uneven. Misalignment not only affects the aesthetic appeal of the kitchen but can also cause damage to the cupboard doors and frames over time. The primary causes of door misalignment include loose hinges, warped doors, and an unlevel cabinet frame. Addressing these issues requires careful assessment and targeted adjustments.
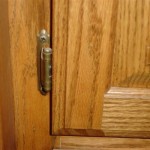
The first step is to inspect the hinges thoroughly. Examine each hinge for signs of looseness, wear, or damage. Loose screws are a common culprit and can often be remedied by simply tightening them. However, if the screw holes are stripped, a more involved repair is necessary. Options include using wood glue and slivers of wood or toothpicks to fill the holes before re-inserting the screws. Alternatively, larger screws can be used to grip fresh wood. If the hinges themselves are damaged or excessively worn, replacement is the best course of action. Ensure the new hinges match the existing ones in size and type for a seamless replacement.
If tightening or replacing the hinges does not resolve the misalignment, the problem may lie with the frame of the cupboard. Use a level to check the cabinet frame for any signs of unlevelness. If the cabinet is not level, shims can be used underneath the base to correct the issue. Inserting shims between the cabinet and the floor will raise the lower side, bringing the frame back into alignment. Once the cabinet is level, re-check the door alignment to see if this adjustment has resolved the problem. It is crucial to secure the shims in place to prevent them from shifting over time. This can be achieved by applying a bead of silicone caulk between the shims and the floor.
In some cases, the door itself may be warped. This is more common in older cupboards or those exposed to high humidity levels. While minor warping can sometimes be corrected by applying weights to the door over a period of time, significant warping may necessitate door replacement. When replacing a door, ensure the new door matches the existing doors in style, size, and finish. This will maintain the overall aesthetic consistency of the kitchen.
Repairing Damaged Lazy Susan Mechanisms
Many corner kitchen cupboards utilize a lazy Susan mechanism to provide easy access to items stored deep within the cabinet. These mechanisms, while convenient, are prone to wear and tear. Common problems include sticky rotation, broken shelves, and complete mechanism failure. Addressing these issues requires a careful examination of the mechanism and targeted repairs.
The first step is to identify the source of the problem. If the lazy Susan is difficult to rotate, the issue may be due to dirt, debris, or dried-out lubricant. Begin by cleaning the mechanism thoroughly. Use a vacuum cleaner to remove any loose debris, followed by a damp cloth to wipe down the surfaces. Once the mechanism is clean, apply a lubricant specifically designed for rotating mechanisms. Silicone-based lubricants are generally recommended as they do not attract dust and provide long-lasting lubrication. Apply the lubricant sparingly to the rotating components, such as the bearings and axles.
If the shelves of the lazy Susan are broken or cracked, they can often be repaired or replaced. Minor cracks can be repaired with wood glue and clamps. Apply the glue to the cracked surfaces, clamp the shelf securely, and allow the glue to dry completely before removing the clamps. For more significant damage, it may be necessary to replace the entire shelf. Measure the dimensions of the existing shelf carefully and purchase a replacement shelf of the same size and material. Ensure the replacement shelf is compatible with the lazy Susan mechanism.
In some cases, the entire lazy Susan mechanism may need to be replaced. This is usually necessary if the bearings are severely damaged or the rotating components are broken beyond repair. Replacing the mechanism involves removing the old mechanism from the cabinet, installing the new mechanism, and attaching the shelves. Follow the manufacturer's instructions carefully when installing the new mechanism. Ensure all components are securely fastened and that the mechanism rotates smoothly before loading it with items.
Troubleshooting Blind Corner Cabinet Hardware
Blind corner cabinets, characterized by their deep, inaccessible corners, often utilize specialized hardware to maximize storage and accessibility. These systems, such as pull-out shelves and swing-out units, can be complex and prone to mechanical failures. Common problems include sticking mechanisms, damaged hardware, and difficulty in opening and closing the units. Addressing these issues requires a methodical approach to identify and resolve the underlying causes.
The initial step is to inspect the hardware for any signs of damage or obstruction. Examine the tracks, hinges, and rollers for any bends, breaks, or loose screws. If any components are damaged, they should be replaced immediately. Ensure the replacement parts are compatible with the existing hardware system. Loose screws should be tightened to prevent further damage and ensure smooth operation.
If the mechanism is sticking or difficult to move, the issue may be due to a lack of lubrication. Apply a silicone-based lubricant to all moving parts, including the tracks, hinges, and rollers. Ensure the lubricant is applied evenly and sparingly. Avoid using oil-based lubricants, as they can attract dust and debris, which can further impede the mechanism's operation. After applying the lubricant, test the mechanism to ensure it moves smoothly and without resistance.
Another common problem is that the pull-out or swing-out unit may be improperly aligned. This can cause the unit to rub against the cabinet frame or other components, making it difficult to open and close. To correct this, carefully adjust the alignment of the unit. Most units have adjustable screws or bolts that can be used to fine-tune the alignment. Consult the manufacturer's instructions for guidance on how to adjust the alignment properly. Ensure the unit is properly aligned in all directions to prevent rubbing or binding.
If the pull-out or swing-out unit is overloaded with items, it may become difficult to operate. Reduce the load on the unit by removing some of the items. Distribute the remaining items evenly across the shelves to prevent uneven weight distribution. Overloading the unit can strain the hardware and cause it to fail prematurely.
Finally, ensure the cabinet is properly installed and level. An unlevel cabinet can cause the pull-out or swing-out unit to bind or stick. Use a level to check the cabinet's levelness and adjust the shims as needed to bring the cabinet into alignment. A properly installed and level cabinet will ensure the smooth and reliable operation of the blind corner cabinet hardware.

How To Solve The Kitchen Corner Storage Problem

How To Fix An Awkward Corner Cabinet In 5 Easy Steps Kitchen Solutions Blind

How To Solve The Kitchen Corner Storage Problem

How To Fix An Awkward Corner Cabinet In 5 Easy Steps

6 Of The Best Solutions For Kitchen Corner Units Fitzgerald Kitchens

Foolproof Storage Solutions For Corner Kitchen Cabinets

6 Of The Best Solutions For Kitchen Corner Units Fitzgerald Kitchens

How To Organize Corner Kitchen Cabinets The Homes I Have Made

Kitchen Corner Cabinet Ideas For Your Home Designcafe

5 Solutions For Your Kitchen Corner Cabinet Storage Needs
Related Posts

