How to Fix Scratches on White Kitchen Cabinets
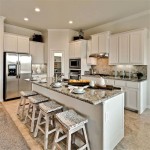
White kitchen cabinets offer a clean, bright aesthetic and are a popular choice for many homeowners. However, their pristine surface can easily reveal even the smallest scratches, detracting from their overall appeal. Addressing these imperfections promptly can maintain the beauty and longevity of the cabinetry. Several methods can be employed to repair scratches on white kitchen cabinets, ranging from simple touch-ups to more involved refinishing techniques. The choice of method depends on the severity and extent of the scratch, the type of paint or finish used on the cabinets, and the desired outcome.
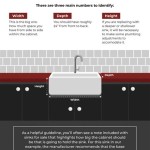
Before commencing any repair work, it is crucial to identify the type of finish applied to the kitchen cabinets. Common finishes include paint, lacquer, and laminate. Painted cabinets are typically the easiest to repair, followed by lacquered cabinets. Laminate cabinets might require more specialized techniques or replacement of the damaged section, depending on the extent of the damage. Understanding the finish will ensure that the correct materials and methods are used, preventing further damage and achieving a seamless repair.
A clean workspace is essential for a successful repair. Clear the area around the cabinets of any clutter and cover countertops and flooring with drop cloths or protective sheeting to prevent accidental damage from spills or sanding dust. Adequate lighting is also crucial for accurately assessing the scratch and ensuring proper application of repair materials. With proper preparation, the repair process can be streamlined and effective.
Key Point 1: Addressing Minor Scratches with Touch-Up Paint
For superficial scratches that only affect the outermost layer of paint or finish, touch-up paint is often the most effective and straightforward solution. This method is particularly suitable for hairline scratches or small nicks that do not penetrate deeply into the cabinet surface.
The first step is to acquire touch-up paint that matches the exact color and finish of the cabinets. Many cabinet manufacturers offer touch-up paint specifically formulated for their products. If the original paint is no longer available, a paint store can typically color-match a sample from the cabinet door. It's essential to specify the sheen (matte, semi-gloss, or gloss) to ensure a seamless blend. A small amount of paint is usually sufficient for minor repairs, so a sample-sized container is often adequate.
Before applying the touch-up paint, thoroughly clean the scratched area. Use a mild detergent and water solution, followed by a clean, damp cloth to remove any dirt, grease, or debris. Allow the area to dry completely before proceeding. This step is crucial to ensure proper adhesion of the touch-up paint.
Apply the touch-up paint sparingly using a fine-tipped artist's brush or a toothpick for very small scratches. Avoid applying too much paint at once, as this can create a noticeable buildup. Instead, apply thin layers, allowing each layer to dry completely before applying the next. This technique ensures a smooth, even finish.
Once the touch-up paint has completely dried (follow the manufacturer's instructions for drying time), lightly buff the area with a soft, lint-free cloth. This helps to blend the repaired area with the surrounding finish. For a more seamless finish, consider using a very fine-grit sanding sponge (3000-grit or higher) to gently smooth the surface before buffing. Be careful not to sand too aggressively, as this can remove the touch-up paint and damage the surrounding finish.
If the touch-up paint creates a slightly raised area, consider using a leveling compound designed for paint repairs. Apply a small amount of the compound to the repaired area, following the manufacturer's instructions. Allow it to dry completely, and then gently sand it smooth with a fine-grit sanding sponge before buffing.
For cabinets with a clear topcoat, apply a thin layer of clear coat over the touch-up paint after it has dried. This will further protect the repaired area and help to blend it with the surrounding finish. Be sure to use a clear coat that is compatible with the existing finish.
Key Point 2: Repairing Deeper Scratches with Wood Filler
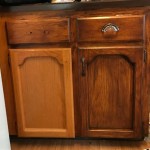
Deeper scratches that penetrate through the paint or finish and into the underlying wood require a more substantial repair. In these cases, wood filler can be used to fill the scratch, creating a smooth surface for painting.
Choose a wood filler that is specifically designed for use on painted surfaces. Look for a product that is paintable, sandable, and shrink-resistant. Epoxy-based wood fillers are generally more durable and water-resistant than other types of wood fillers, making them a good choice for kitchen cabinets.
Prepare the scratched area by cleaning it thoroughly with a mild detergent and water solution, followed by a clean, damp cloth. Allow the area to dry completely. Then, use a sharp utility knife or scraper to carefully remove any loose or splintered wood from the scratch. This will create a clean, stable surface for the wood filler to adhere to.
Apply the wood filler to the scratch using a putty knife or a small spatula. Press the filler firmly into the scratch, ensuring that it fills the entire void. Overfill the scratch slightly, as the filler will shrink as it dries. Remove any excess filler from the surrounding area with the putty knife, leaving a smooth, even surface.
Allow the wood filler to dry completely, following the manufacturer's instructions for drying time. This may take several hours or even overnight, depending on the type of filler and the depth of the scratch.
Once the wood filler has dried, sand it smooth with a fine-grit sanding sponge (220-grit or higher). Start with a slightly coarser grit if necessary to remove any large imperfections, but finish with a fine grit to create a smooth, paintable surface. Be careful not to sand too aggressively, as this can damage the surrounding finish.
After sanding, clean the area with a tack cloth to remove any sanding dust. Then, apply a primer specifically designed for use on wood. The primer will help to seal the wood filler and provide a smooth, even surface for the paint to adhere to. Allow the primer to dry completely before proceeding.
Finally, apply touch-up paint that matches the color and finish of the cabinets. Apply thin layers, allowing each layer to dry completely before applying the next. Lightly buff the area with a soft, lint-free cloth to blend the repaired area with the surrounding finish. Apply a clear topcoat, if applicable, for added protection.
Key Point 3: Addressing More Widespread Damage Through Refinishing
When dealing with numerous scratches, deep gouges, or significant wear and tear across multiple cabinet surfaces, refinishing may be the most effective solution. Refinishing involves stripping the existing finish, repairing imperfections, and applying a new coat of paint or finish. This method provides a comprehensive restoration, resulting in a like-new appearance.
Before starting the refinishing process, remove all hardware from the cabinets, including knobs, pulls, and hinges. This will prevent damage to the hardware and allow for a more uniform finish. Label each piece of hardware and its corresponding cabinet door or drawer to ensure easy reassembly.
Clean the cabinets thoroughly with a degreasing cleaner to remove any dirt, grease, or grime. This is a crucial step to ensure proper adhesion of the primer and paint. Rinse the cabinets with clean water and allow them to dry completely.
Sand the cabinet surfaces with a medium-grit sandpaper (120-grit to 180-grit) to create a slightly rough surface for the primer to adhere to. Pay particular attention to areas with existing scratches or imperfections. Sand in the direction of the wood grain to avoid creating new scratches. For cabinets with a glossy finish, sanding is essential to dull the surface and allow the primer to grip properly. Once sanded, remove all sanding dust with a tack cloth.
Apply a coat of primer specifically designed for use on kitchen cabinets. Choose a primer that is compatible with the type of paint you will be using. Apply the primer evenly, using a brush, roller, or paint sprayer. Allow the primer to dry completely, following the manufacturer's instructions for drying time. Priming is crucial for creating a uniform base, ensuring proper adhesion of the paint, and preventing bleed-through of stains or previous finishes.
Once the primer has dried, lightly sand the cabinet surfaces with a fine-grit sandpaper (220-grit or higher) to smooth out any imperfections and create a smooth, even surface for the paint. Remove all sanding dust with a tack cloth.
Apply two or more coats of paint to the cabinets, allowing each coat to dry completely before applying the next. Use a high-quality paint specifically designed for use on kitchen cabinets. Choose a paint that is durable, washable, and resistant to chipping and staining. Apply the paint evenly, using a brush, roller, or paint sprayer. For a professional-looking finish, consider using a paint sprayer to achieve a smooth, even coat with minimal brush strokes.
After the final coat of paint has dried completely, apply a clear topcoat for added protection. Choose a topcoat that is compatible with the type of paint you used. Apply the topcoat evenly, using a brush, roller, or paint sprayer. This clear coat will act as a barrier against moisture, scratches, and everyday wear and tear, significantly extending the life and beauty of the newly refinished cabinets.
Once the topcoat has dried completely, reattach the hardware to the cabinets. Be careful not to scratch the new finish during reassembly. Clean the hardware before reattaching it, if necessary. With proper care and maintenance, refinished kitchen cabinets can provide years of beauty and functionality.

How To Fix Scratched Kitchen Cabinets Infinity

How To Touch Up Chipped Cabinet Paint

How To Touch Up Chipped Cabinets With A Paint Pen Exquisitely Unremarkable

How To Touch Up Chipped Cabinets With A Paint Pen Exquisitely Unremarkable

How To Touch Up Chipped Cabinet Paint

How To Touch Up Chipped Cabinet Paint

How To Fix Minor And Deeper Scratches On A Wooden Kitchen Cabinet

How To Touch Up Chipped Cabinet Paint

Scratched And Chipped Kitchen Cabinet Doors Refinishing Touch

Scratched Cabinets Can You Fix Them Mountain State Kitchen Bath
Related Posts