Gel Staining Kitchen Cabinets Espresso: A Comprehensive Guide
Transforming your kitchen with a rich, espresso-hued gel stain is an achievable project that can revitalize the heart of your home. Embrace the professional-looking results by following our step-by-step guide, complete with essential considerations to ensure a flawless finish.
1. Preparation: The Foundation for Success
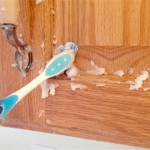
Preparing your cabinets is paramount. Remove all hardware, including hinges, handles, and doors. Clean them thoroughly with TSP cleaner or a degreaser to remove any dirt or grime that could interfere with the stain's adhesion. Lightly sand the surface of the cabinets with sandpaper to create a slightly rough texture, allowing the gel stain to adhere better.
2. Choose the Right Gel Stain
Quality gel stains can elevate the project's outcome. Opt for a high-quality gel stain specifically formulated for kitchen cabinets. Espresso gel stain is known for its deep, rich color that enhances the natural beauty of wood grains.
3. Application: The Art of Precision
Using a brush or sponge, apply the gel stain evenly over the prepared surfaces. Work in small sections to maintain control. Apply thin coats, allowing each coat to dry completely before applying the next. Multiple thin coats yield a more uniform and durable finish compared to one thick coat.
4. Drying Time: Patience is Key
After applying the final coat, allow ample time for thorough drying. Most gel stains require around 12-24 hours to cure fully. Avoid touching or using the cabinets until they are completely dry to prevent smudging or compromising the finish.
5. Sealant: The Protective Barrier
To protect the newly stained cabinets from wear and spills, apply a clear polyurethane sealant. Choose a product specifically designed for kitchen cabinetry and use a brush or roller to apply it liberally over the entire surface. Allow the sealant to dry completely before using the cabinets again.
Additional Tips for Success
To enhance the overall outcome, consider these additional tips:
- Test the gel stain on an inconspicuous area to ensure satisfaction with the color and finish.
- Use a soft cloth to wipe away any excess gel stain during application.
- Allow ample drying time between coats and before applying the sealant.
- Protect the surrounding area from potential spills or drips with drop cloths or plastic sheeting.
- Consider using a respirator and gloves for protection while working with gel stain and sealant.
Conclusion
Gel staining kitchen cabinets espresso is a rewarding project that can transform your kitchen into a sophisticated and inviting space. By following the steps and tips outlined in this guide, you can achieve a professional-looking finish that will enhance your home's aesthetic appeal for years to come.

Staining Oak Cabinets An Espresso Color Diy Tutorial Monica Benavidez

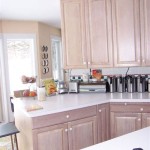
Gel Stained Cabinets In Espresso Before And After Kitchen Building Home Kitchens

Test Staining Oak Cabinets Espresso Brown Merrypad

Test Staining Oak Cabinets Espresso Brown Merrypad

Test Staining Oak Cabinets Espresso Brown Merrypad

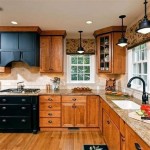
Which Types Of Wood Look Best With Espresso Stain

Staining Oak Cabinets An Espresso Finish Faq S Monica Benavidez

Staining Your Wood Cabinets Darker Young House Love

Gel Stain Cabinets How To Use The Best For Diy Projects

Staining Oak Cabinets An Espresso Finish Faq S Monica Benavidez
Related Posts


