How To Hang Kitchen Wall Units On Plasterboard
Hanging kitchen wall units on plasterboard walls presents a unique challenge compared to solid brick or concrete. Plasterboard, also known as drywall, is a relatively weak material that can easily crumble or fail under significant weight. However, with the right tools, techniques, and appropriate fixings, it is entirely possible to securely mount kitchen units on plasterboard.
This article provides a comprehensive guide to safely and effectively hanging kitchen wall units on plasterboard, focusing on load distribution, appropriate fixings, and essential installation practices. Understanding the limitations of plasterboard and employing suitable methods are crucial for a successful and long-lasting installation.
Understanding the Limitations of Plasterboard
Plasterboard is typically composed of a gypsum core sandwiched between two layers of paper. Its inherent strength relies on this composite structure. However, plasterboard's load-bearing capacity is significantly lower than that of solid masonry. Directly screwing into plasterboard without appropriate fixings will almost certainly result in the screws pulling out under the weight of a fully loaded kitchen unit.
The thickness of the plasterboard also plays a crucial role. Standard plasterboard encountered in domestic settings is usually 12.5mm thick. Thinner boards, often found in older properties or less critical areas, offer even less support. It is important to ascertain the plasterboard thickness before commencing any work, as this will influence the choice of fixings.
Furthermore, the presence of services, such as electrical wiring and plumbing, concealed within the wall cavity poses a risk. Before drilling, it is essential to identify the location of these services to avoid accidental damage. Cable and pipe detectors can be invaluable tools in this regard. Working blind can lead to potentially dangerous and costly consequences.
Finally, consider the condition of the plasterboard itself. If the plasterboard is damp, damaged, or crumbling, it will provide a significantly weaker base for fixings. In such cases, repairing or replacing the damaged sections of plasterboard may be necessary before attempting to hang the kitchen units.
Essential Tools and Materials
Before starting the installation, assemble all the necessary tools and materials. This will ensure a smooth and efficient process. The following is a list of essential items:
- Stud Finder: To locate wall studs behind the plasterboard.
- Cable and Pipe Detector: To identify hidden services within the wall.
- Spirit Level: To ensure the units are perfectly level.
- Drill with Various Drill Bits: Including drill bits suitable for plasterboard and pilot drill bits for wood studs.
- Screwdriver or Drill with Screwdriver Bits: To drive in screws.
- Measuring Tape: For accurate measurements.
- Pencil: For marking positions.
- Safety Glasses: To protect eyes from debris.
- Work Gloves: To protect hands.
- Appropriate Plasterboard Fixings: Such as hollow wall anchors, self-drilling plasterboard anchors, or toggle bolts.
- Wood Screws: For securing units to wall studs.
- Wood Shims: For leveling units if necessary.
- Kitchen Wall Units: Of course.
- Ladder or Step Stool: For reaching the desired height.
- Helper (Optional but Recommended): To assist with lifting and holding the units.
Selecting the right fixings is paramount for a secure installation. Different types of plasterboard fixings offer varying levels of load-bearing capacity. It is crucial to choose fixings that can adequately support the weight of the kitchen units, both empty and fully loaded.
Choosing the Right Plasterboard Fixings
There are several types of plasterboard fixings available, each with its own advantages and disadvantages. The selection should be based on the expected load and the type of plasterboard being used.
Hollow Wall Anchors (Molly Bolts): These anchors are designed for moderate to heavy loads. They consist of a screw and a sleeve that expands behind the plasterboard when the screw is tightened. Hollow wall anchors provide a strong and reliable fixing, but they require a specific setting tool for proper installation. Over-tightening can damage the plasterboard.
Self-Drilling Plasterboard Anchors: These anchors, often made of metal or nylon, drill directly into the plasterboard and create their own threads. They are suitable for light to moderate loads and are relatively easy to install. However, they may not be strong enough for heavier kitchen units containing items such as plates or large pans.
Toggle Bolts: These anchors are among the strongest fixings available for plasterboard. They consist of a bolt and a wing-like toggle that folds flat to pass through a pre-drilled hole. Once behind the plasterboard, the toggle springs open, providing a large bearing surface. Toggle bolts offer excellent load-bearing capacity, but they require a larger hole in the plasterboard than other types of fixings.
Using Wall Studs: The most secure method is to screw directly into the wall studs behind the plasterboard. This requires locating the studs using a stud finder and positioning the kitchen units so that the fixing points align with the studs. Wood screws of appropriate length should be used to penetrate the stud securely. When possible, prioritize securing the units directly to the studs. This will provide the strongest and most reliable support.
In some cases, a combination of methods may be necessary. For example, securing the unit to a stud at one point and using hollow wall anchors or toggle bolts at other points for additional support. This approach can provide a balanced and secure installation.
Installation Steps
Follow these steps for a secure and level installation:
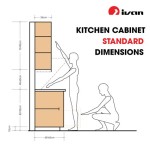
- Planning and Measurement: Determine the desired location for the kitchen wall units. Use a measuring tape and spirit level to mark the position of the top and bottom of the units on the wall. Consider the height of the countertop and the spacing between the countertop and the bottom of the wall units. Accurately mark the positions for the fixing points.
- Locating Studs and Services: Use a stud finder to locate the wall studs behind the plasterboard. Mark the location of the studs clearly. Use a cable and pipe detector to identify any hidden services within the wall. Avoid drilling in areas where services are present.
- Preparing the Wall: Drill pilot holes at the marked fixing points. If using plasterboard fixings other than self-drilling anchors, drill holes of the appropriate size for the chosen fixings based on the manufacturer's instructions.
- Installing Fixings: Install the chosen plasterboard fixings according to the manufacturer's instructions. Ensure that the fixings are properly secured and tightened. If screwing into wall studs, use wood screws of appropriate length to penetrate the stud securely.
- Mounting the Units: With the help of a helper, carefully lift the kitchen wall unit into position. Align the fixing points on the unit with the fixings on the wall. Secure the unit to the wall by tightening the screws. Do not overtighten the screws, as this can damage the plasterboard.
- Leveling the Units: Use a spirit level to check that the unit is perfectly level. If necessary, use wood shims to adjust the level. Place the shims behind the unit at the fixing points.
- Securing Adjacent Units: If installing multiple wall units, secure them together using screws or bolts. This will provide additional stability and prevent the units from shifting.
- Final Check: Once all the units are installed, perform a final check to ensure that they are level, secure, and properly aligned. Test the stability of the units by gently pushing and pulling on them. If any units are loose or unstable, re-tighten the fixings or add additional support.
Remember to prioritize safety throughout the installation process. Wear safety glasses and work gloves to protect eyes and hands. If working at height, use a stable ladder or step stool. If unsure about any aspect of the installation, consult a professional.
By carefully following these steps and employing appropriate fixings, it is possible to securely and safely hang kitchen wall units on plasterboard walls.

Wall Unit Fitting Adjustments Diy Kitchens Advice
Fitting Kitchen Units To Plasterboard And Stud Wall Work

How To Hang A Cabinet On One Stud With Drywall Anchors That Homeschool Gal

This Is How You Should Fix Heavy Cabinets To Plasterboard Wall

How To Install Kitchen Cabinets The Wall And Floor With Ease

Kitchen Cases On The Walls Of Plasterboard

How To Install Kitchen Cabinets The Wall And Floor With Ease

How To Install Kitchen Cabinets The Wall And Floor With Ease

Fitting Kitchen Units On Uneven Walls Has Never Been Easier

Kitchen Cases On The Walls Of Plasterboard
Related Posts


