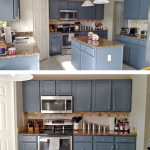
How to Install Beadboard on Kitchen Cabinets
Transforming your kitchen cabinets with beadboard is an excellent way to add a timeless and classic touch. It is a versatile material that complements various design styles, from traditional to modern. While hiring a professional is always an option, installing beadboard on kitchen cabinets is a manageable DIY project with the right preparation and a few essential steps. Here's a step-by-step guide to help you achieve stunning results:
Materials Required:
- Beadboard sheets
- Panel adhesive
- Nails or brads
- Brad nailer or hammer
- Caulk
- Paint or stain (optional)
Step 1: Prepare the Cabinets
Start by removing all cabinet doors and hardware. Clean the cabinet surfaces with a degreaser to ensure proper adhesion. If necessary, lightly sand the surfaces to smooth out any imperfections.
Step 2: Cut the Beadboard
Measure the cabinet doors and frames and cut the beadboard sheets accordingly. Use a sharp utility knife or a circular saw for precise cuts. Make sure to account for any gaps or overlaps as needed.
Step 3: Apply Adhesive
Apply a generous layer of panel adhesive to the back of the beadboard. Use a notched trowel to create even ridges and prevent pooling. Carefully align the beadboard with the cabinet surface and press it firmly into place.
Step 4: Secure the Beadboard
To ensure a secure hold, use a brad nailer or hammer to drive nails or brads through the beadboard and into the cabinet frame. Spacing the nails or brads evenly will help prevent buckling or warping.
Step 5: Caulk the Gaps
Once the beadboard is secure, use paintable caulk to fill any gaps or seams between the beadboard panels and the cabinet frame. This will help seal the surface and create a smooth finish.
Step 6: Finish the Beadboard
If desired, you can paint or stain the beadboard to match your kitchen's décor. Allow the finish to dry completely before reattaching the cabinet doors and hardware.
Tips for Success:
- Use high-quality beadboard sheets for durability and a polished look.
- Pay attention to grain direction when cutting the beadboard for a seamless appearance.
- Allow sufficient drying time for the adhesive and finish to ensure a strong bond.
- If you encounter any challenging areas, don't hesitate to seek professional assistance.
Installing beadboard on kitchen cabinets is a rewarding and transformative project that can enhance the style and functionality of your kitchen. By following these steps and using the right materials, you can achieve professional-looking results that will last for years to come.

Diy Beadboard On Our White Painted Kitchen Cabinets Project Goble

Diy Beadboard On Our White Painted Kitchen Cabinets Project Goble

Adding Beadboard To The Bar Southern Hospitality

Diy Beadboard Kitchen Cabinets Project The House On Silverado

Kitchen Island Makeover With Beadboard Confessions Of A Serial Do It Yourselfer

Beadboard Kitchen Cabinets Everything To Know

Add Beadboard Paneling To Cabinet Sides Sawdust Girl

Adding Beadboard To The Bar Southern Hospitality

Beadboard Kitchen Cabinets Everything To Know

Beadboard Cabinet Doors For Your Kitchen Cabinetdoors Com
Related Posts

