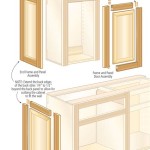
How To Install Crown Molding On KraftMaid Kitchen Cabinets
Installing crown molding adds a touch of elegance and sophistication to any kitchen. While KraftMaid cabinets are known for their quality construction, installing crown molding requires careful planning and execution. This article provides a comprehensive guide on how to install crown molding on KraftMaid kitchen cabinets, resulting in a professional and polished look.
Planning and Preparation
Before beginning the installation process, thorough planning and preparation are crucial. Accurate measurements of the cabinet layout are essential for determining the required length of molding. Measure the total linear feet of cabinets where the molding will be installed, adding extra material for cuts and potential mistakes. It's recommended to add 10% extra to account for waste and complex angles.
Next, select the appropriate crown molding style. Consider the existing kitchen design and choose a profile that complements the cabinet style and overall aesthetic. KraftMaid offers a variety of molding options, ensuring a cohesive look. Once the style is chosen, purchase the required amount of molding, along with necessary supplies such as wood glue, finishing nails, a miter saw, a coping saw, safety glasses, and a nail gun.
Preparing the cabinets and the molding is the next step. Ensure the cabinet tops are clean, level, and free of obstructions. If necessary, use shims to level uneven surfaces. It's recommended to pre-paint or stain the molding before installation, simplifying the finishing process and minimizing touch-ups after installation.
Cutting and Fitting the Crown Molding
Cutting crown molding accurately is fundamental for a seamless installation. Begin by understanding the spring angle, which is the angle the molding sits at relative to the wall and ceiling. This angle determines how the molding will meet at inside and outside corners. Practice cuts on scrap pieces of molding to ensure accuracy before cutting the actual molding. A miter saw is essential for achieving precise angles.
For inside corners, use the miter saw to cut opposing 45-degree angles on the two pieces of molding that will meet at the corner. Ensuring that the cuts are oriented correctly is critical for a tight fit. Test the fit dry before applying any adhesive.
Outside corners typically require a mitered cut as well. However, depending on the specific molding profile and the angle of the corner, slight adjustments may be needed for a perfect fit. Cope joints, where one piece of molding is shaped to fit the profile of the other, are sometimes utilized on outside corners for a seamless appearance, particularly if walls are not perfectly plumb.
Installing the Crown Molding
Once the molding is cut and fitted, the installation process can begin. Apply a bead of wood glue to the back of the molding where it will contact the cabinet and the ceiling or wall. Carefully position the molding, aligning it with the marked layout lines. Use a nail gun to secure the molding to the cabinets and framing. Select finishing nails that are long enough to penetrate the framing but not so long as to protrude through the surface of the molding. Space nails approximately every 16 inches.
For inside corners, ensure a tight fit between the two pieces. If necessary, use a small amount of wood filler to close any gaps. Smooth the filler with a damp cloth before it dries.
For outside corners, ensure the mitered joint is tight and flush. Again, use wood filler to fill any small gaps. Caulk the joints where the molding meets the ceiling and the cabinets to provide a seamless finish and prevent moisture intrusion.
Finishing Touches
Once the molding is installed, fill all nail holes with wood filler and allow it to dry completely. Lightly sand the filled areas smooth and apply touch-up paint or stain as needed. The final step involves cleaning the installed molding, removing any dust or debris accumulated during the installation process. Use a soft cloth and a mild cleaning solution to restore the molding’s luster and complete the project.
Safety Precautions
Safety should be a primary concern throughout the installation process. Always wear safety glasses when operating power tools such as miter saws and nail guns. Follow manufacturer instructions carefully for the safe operation of all tools and equipment. Use caution when working with sharp tools and materials. A stable work surface and proper lighting are also essential for safe and efficient installation.

How To Install Kraftmaid Crown Molding Hunker

Crown Molding Installation Instruction

Kraftmaid 056 Molding Roberts Company Inc

Diy Design Fanatic How To Install Crown Molding On Full Overlay Cabinets

How To Install Crown Molding On Full Overlay Cabinets Kitchen Cabinet

Medium Crown Moulding Kitchen Craft Cabinetry In 2024 Molding Cabinet Cabinets Trim

Kitchen And Bath Blab Modern Supply S Lighting Trends

Kraftmaid Momentum Cotton Standard Bellamy Crown Moulding Common 96 In X 3 187 2 312 Actual At Com

Customize Your Cabinetry Creating Kitchen With Kraftmaid
Related Posts

