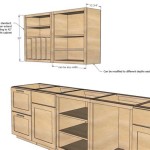
How to Install Glass on Kitchen Cabinet Door
Upgrading the look of your kitchen cabinets with glass inserts is a popular and stylish choice. Whether you're installing glass for the first time or replacing existing inserts, following these step-by-step instructions will ensure a professional-looking finish.
Step 1: Gather Materials and Tools
Before you start, gather the following materials and tools:
- Cabinet doors
- Glass inserts
- Glazing points (small metal clips)
- Glazier's putty knife
- Putty gun
- Silicone caulk
- Caulk gun
- Measuring tape
- Pencil
- Hammer (optional)
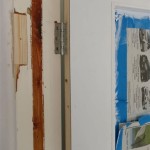
Step 2: Remove Doors and Existing Glass (if applicable)
Start by removing the cabinet doors from the hinges. If there is existing glass installed, carefully remove it using a glazier's putty knife.
Step 3: Clean Surfaces
Ensure that the inside of the cabinet door and the edges of the glass insert are clean and free of any dust or debris. This will help the glazing points adhere properly.
Step 4: Measure and Mark for Glazing Points
Measure the inside of the cabinet door and the glass insert to determine the spacing for the glazing points. Mark the locations with a pencil.
Step 5: Install Glazing Points
Using a glazier's putty knife, insert the glazing points into the marked locations along the inside of the cabinet door.
Step 6: Set the Glass Insert
Carefully place the glass insert into the cabinet door, ensuring that it rests on the glazing points. Use a hammer (if necessary) to tap in the corners of the glass gently and secure it in place.
Step 7: Apply Glazier's Putty
Load a putty gun with glazier's putty and apply it around the edges of the glass insert, covering the glazing points. Use your finger to smooth out the putty and create a seal.
Step 8: Clean Excess Putty
Once the putty is applied, use a damp cloth to wipe away any excess from the glass and cabinet door.
Step 9: Apply Silicone Caulk
For an additional seal, apply a bead of silicone caulk around the edges of the glass insert, both inside and outside the cabinet door.
Step 10: Clean and Dry
Wipe away any excess caulk and allow it to dry according to the manufacturer's instructions.
Step 11: Reinstall Doors
Once the caulk is dry, reinstall the cabinet doors on the hinges. Ensure that they are securely fastened.
Tips

How To Add Glass Cabinet Doors Confessions Of A Serial Do It Yourselfer

How To Add Glass Cabinet Doors Confessions Of A Serial Do It Yourselfer

How Do I Install Glass In Cabinet Doors

How To Put Glass In Cabinet Doors Pkb Cabinetry

How To Put Glass In Cabinet Doors

How To Add Glass Inserts Into Your Kitchen Cabinets

How To Add Glass Cabinet Doors Confessions Of A Serial Do It Yourselfer

How To Add Glass Kitchen Cabinet Doors Tylynn M

How To Put Glass In Cabinet Doors Kitchen Cabinets Makeover Door

How To Add Glass Cabinet Doors Honeybear Lane
Related Posts