How To Install Old Kitchen Cabinets In Your Garage
Repurposing old kitchen cabinets for garage storage is a practical and cost-effective way to organize tools, supplies, and equipment. Installing these cabinets requires careful planning, preparation, and execution to ensure they are securely mounted and function effectively in the garage environment. This article provides a detailed guide on how to install old kitchen cabinets in your garage, covering essential steps from assessing cabinet condition to final mounting.
Before commencing the installation, a thorough evaluation of the existing cabinets is crucial. This assessment will determine the scope of the project and identify any necessary repairs or modifications. The structural integrity of the cabinets, the condition of the doors and drawers, and the overall dimensions must be considered. Address any damage, such as water damage, warping, or loose joints, before proceeding with installation. Clean the cabinets thoroughly, removing any grease, dirt, or old hardware.
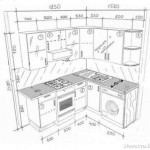
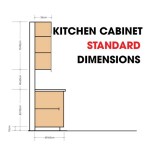
Furthermore, consider the layout and intended use of the garage space. Determine the optimal location for the cabinets, taking into account factors such as accessibility, proximity to work areas, and existing fixtures (electrical outlets, plumbing, etc.). Measure the available space accurately to ensure the cabinets will fit comfortably and allow for sufficient clearance around vehicles and other equipment. Create a detailed plan that outlines the placement of each cabinet and any modifications that may be required to accommodate the garage's configuration.
Key Preparations Before Installation
Several key preparations are necessary before physically installing the old kitchen cabinets into the garage. These steps are essential for a safe, efficient, and structurally sound installation.
Firstly, prepare the garage walls. Garages often have unfinished walls, which may consist of bare studs or concrete. If the walls are unfinished, consider framing the area where the cabinets will be installed. This provides a solid surface for attaching the cabinets and ensures they are properly supported. Use pressure-treated lumber for framing, especially if the garage is prone to moisture. Ensure the framing is level and plumb, using a spirit level and shims as needed.
Secondly, locate and mark the wall studs. The studs are the vertical framing members within the wall that provide structural support. Cabinets must be securely fastened to the studs to prevent them from pulling away from the wall. Use a stud finder to locate the studs behind the drywall or concrete. Mark the location of each stud clearly with a pencil or marker. If the walls are concrete, use a hammer drill to create pilot holes for concrete screws or anchors.
Thirdly, gather all necessary tools and materials. Having the right tools on hand will streamline the installation process and minimize frustration. Essential tools include a drill, screwdriver (both Phillips and flathead), stud finder, level, measuring tape, pencil, safety glasses, work gloves, shims, construction adhesive, and appropriate screws (wood screws for framed walls, concrete screws for concrete walls). Consider using a laser level for accurate horizontal alignment, especially when installing multiple cabinets.
Ensure you have enough screws of appropriate length and gauge. The length will depend on the thickness of the cabinet backing and the wall framing material. The gauge should be sufficient to securely hold the cabinet's weight. Pre-drilling pilot holes before inserting screws can prevent wood splitting and make the installation easier.
Installation Procedure: Step-by-Step Guide
The following outlines a detailed, step-by-step guide for installing the old kitchen cabinets into the garage.
Start with the base cabinets. Position the first base cabinet in its designated location according to the planning layout. Use shims to level the cabinet, ensuring it is perfectly horizontal. A level placed on top of the cabinet can help verify this. Once leveled, use construction adhesive on the back of the cabinet where it will contact the wall framing. Secure the cabinet to the wall studs using appropriate screws. Drive the screws through the cabinet backing and into the studs. Ensure the screws are long enough to penetrate the studs adequately.
Repeat this process for each subsequent base cabinet, ensuring they are level and aligned with each other. Use clamps to hold the cabinets together while attaching them to each other. This creates a more stable and unified structure. Drill pilot holes through the cabinet frames before driving screws to prevent splitting. Check the overall levelness and alignment of the base cabinets frequently throughout the installation process.
Next, install the upper cabinets. Upper cabinets are typically heavier and require more support than base cabinets. Use a temporary support system, such as a ledger board, to hold the upper cabinets in place while they are being mounted. The ledger board should be securely attached to the wall studs and positioned at the desired height for the bottom of the upper cabinets.
Lift the first upper cabinet onto the ledger board. Level the cabinet and secure it to the wall studs using appropriate screws. As with the base cabinets, apply construction adhesive to the back of the cabinet where it will contact the wall framing. Repeat this process for each subsequent upper cabinet, ensuring they are level and aligned with each other. Use clamps to hold the cabinets together while attaching them to each other. Check the overall levelness and alignment of the upper cabinets frequently throughout the installation process. After the cabinets are secured, remove the ledger board.
Consider using cabinet connectors to join adjacent cabinets together securely. These connectors provide a stronger and more aesthetically pleasing connection than simply screwing the cabinets together. Install the connectors according to the manufacturer's instructions.
Addressing Common Installation Challenges
During the installation process, several common challenges may arise. Addressing these challenges effectively is crucial for a successful outcome.
Uneven garage floors are a frequent problem. Garages often have floors that are not perfectly level. This can make it difficult to install base cabinets properly. Use shims to compensate for any unevenness in the floor. Place the shims under the cabinet feet until the cabinet is level. Check the levelness of the cabinet in multiple directions to ensure it is perfectly horizontal.
Another common challenge is dealing with concrete walls. Attaching cabinets to concrete walls requires specialized techniques. Use a hammer drill to create pilot holes in the concrete. Insert concrete anchors into the pilot holes and secure the cabinets to the anchors using appropriate screws. Ensure the anchors are rated to support the weight of the cabinets and their contents.
Additionally, dealing with existing pipes and wiring can be troublesome. Garages often have pipes and wiring running along the walls. Avoid drilling or screwing into these elements. If necessary, relocate the pipes or wiring before installing the cabinets. Consult with a qualified electrician or plumber if you are unsure how to safely relocate these elements.
Finally, improper alignment can lead to problems. Ensure cabinets are aligned both vertically and horizontally. Use a laser level to verify alignment. If cabinets are not properly aligned, they may not function correctly, and the overall appearance will be compromised.
After the cabinets are securely mounted, install any remaining hardware, such as door handles, knobs, and shelf supports. Adjust the hinges and latches to ensure the doors and drawers open and close smoothly. Caulk any gaps between the cabinets and the wall to prevent moisture from entering and to create a more finished look. Consider adding a countertop to the base cabinets to provide a work surface. Choose a countertop material that is durable and easy to clean, such as laminate or stainless steel. Install lighting under the upper cabinets to improve visibility and make it easier to work in the garage.
By following these steps carefully, old kitchen cabinets can be successfully repurposed and installed in a garage, providing valuable storage space and enhancing the functionality of the area. A well-planned and executed installation will result in a durable and aesthetically pleasing storage solution that will serve for years to come.

What To Do With Old Kitchen Cabinets

Happy Father S Day Garage Renovation For My Dad Simply Organized

Diy Garage Cabinets And Miter Saw Station Jenna Sue Design

Using Old Kitchen Cabinets In The Garage Is Alwasy A Good Idea Kingman Az Homes Corner Storage Shelves

Garage Cabinets Why You Should Avoid These 5 Types

Diy Garage Cabinets The Navage Patch

How To Build Diy Rolling Garage Storage Cabinets With Shelves Dengarden

Diy Garage Cabinets And Miter Saw Station Jenna Sue Design

Happy Father S Day Garage Renovation For My Dad Simply Organized

5 Diy Garage Cabinets Modular Storage System Fixthisbuildthat
Related Posts