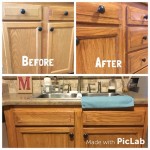
How to Install Self-Closing Kitchen Cabinet Hinges
Upgrading your kitchen cabinets with self-closing hinges can add a touch of luxury and convenience to your daily routine. These hinges automatically pull the cabinet door shut, preventing accidental slams and ensuring a smooth, quiet closure. While installing self-closing hinges might seem daunting, the process is relatively straightforward with the right tools and instructions. This article provides a comprehensive guide to help you successfully install these functional and stylish additions to your kitchen.
1. Choosing the Right Hinges
The first step in installing self-closing hinges is selecting the appropriate type for your cabinets. There are various hinge styles available, each with its own unique features and benefits. The most common type are clip-on hinges, which are easy to install and readily available. These hinges typically come in three sizes: standard, full overlay, and semi-overlay. Standard hinges are best for cabinets with a 1/4" reveal, while full overlays have a 0" reveal and semi-overlays have a 1/8" reveal.
Consider the existing hinges on your cabinets to determine the appropriate size and type of self-closing hinges. If you are replacing old hinges, ensure the new hinges have the same hole spacing and mounting plate dimensions for a seamless installation. You also need to consider the size of your cabinet doors. Larger doors may require heavier-duty hinges to support their weight and ensure smooth operation.
2. Essential Tools and Materials
Before you begin the installation process, gather the necessary tools and materials. This will ensure a smooth and efficient operation. Here's a list of what you'll need:
- Self-closing hinges
- Screwdriver or drill with a Phillips bit
- Level
- Pencil or marker
- Measuring tape
- Optional: Hinge template for precise placement
- Optional: Cabinet door and hinge removal tool
Having the right tools readily available will make the installation process significantly easier. Using a screwdriver or drill with a Phillips bit will help you tighten and loosen screws effectively. A level will ensure that your doors are hung straight and symmetrical, while a pencil or marker will allow you to mark the hinge locations precisely. A measuring tape will be essential for ensuring accurate measurements, and a hinge template can help you to achieve professional-looking results.
3. Installation Process
Now that you have chosen the right hinges and gathered the necessary tools and materials, it's time to tackle the installation process. Follow these steps for a successful installation:
- Remove the old hinges: If you are replacing existing hinges, carefully remove them from the cabinet door and cabinet frame using a screwdriver or a dedicated cabinet door and hinge removal tool. Make sure to note the position of the old hinges and any associated screws.
- Position the new hinges: Using the hinge template or the old hinges as a guide, mark the location of the new hinges on the cabinet door and the cabinet frame with a pencil or marker. Ensure that the hinges are positioned at the same height and distance from the top and bottom of the door.
- Attach the hinges to the cabinet door: Align the hinge cup to the marked location on the cabinet door and secure it with the provided screws, using a screwdriver or drill. Ensure that the hinge cup is flush with the door surface.
- Attach the hinges to the cabinet frame: Repeat the process for the other side of the hinge, attaching the hinge arm to the cabinet frame using the provided screws. Make sure that the hinge arm is positioned at the same height as the hinge cup on the cabinet door.
- Adjust the hinges: Once the hinges are securely attached to both the door and the frame, open and close the cabinet door several times to ensure a smooth and even opening. You may need to adjust the hinge screws to fine-tune the door's alignment and ensure that it closes completely and quietly.
- Test the hinges: Once your installation is complete, take the time to test the self-closing feature of the new hinges. Open and close your cabinet doors several times to ensure they close smoothly and automatically without any hesitation. You can also adjust the closing speed by turning a small screw on the hinge arm.
Remember to use even pressure when tightening the screws to avoid overtightening and damaging the hinges. If you are having trouble with the installation process, consult a professional contractor for assistance.

How Do I Retrofit Cabinets With Soft Close Hardware Wood

Replacing Cabinet Hinges With Overlay Self Closing The Palette Muse

How To Install Cabinet Hinges A Step By Guide

How To Add Soft Close Any Cabinet Porch Daydreamer

How To Adjust Self Closing Kitchen Cabinet Hinges Maintenance

The Ultimate Guide To Kitchen Cabinet Hinges

Benefits Of Soft Close Self Closing Hinges For Your Kitchen

3 8 Inch Face Mount Self Closing Inset Black Kitchen Door Cabinet Hinges 50 Pack 25 Pairs

How To Install Soft Close Hinges In Cabinets

Rless Self Closing Overlay Hinges Satin Nickel 2 Pk Canadian Tire
Related Posts


