Essential Aspects of Crafting Floating Shelves for a Functional Kitchen
Floating shelves are a stylish and practical storage solution that can enhance the aesthetics and functionality of any kitchen. Here are the fundamental aspects to consider when crafting floating shelves that will seamlessly complement your space:
1. Choosing the Right Material:
The material you select for your shelves will impact their durability, style, and overall functionality. Popular materials include:
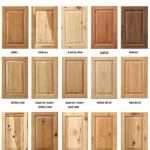
- Wood: Natural, versatile, and available in various finishes to complement any kitchen decor.
- Metal: Industrial-chic, durable, and easy to clean, suitable for modern or minimalist styles.
- Glass: Transparent and light, creating a sense of openness and showcasing collectibles or artwork.
- Laminate: Affordable, versatile, and moisture-resistant, ideal for high-traffic areas.
2. Determining the Shelf Dimensions:
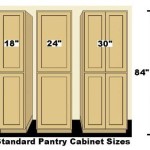
The dimensions of your shelves should be proportional to the size of your kitchen and the items you intend to store. Consider the height, width, and depth of each shelf to ensure they accommodate your specific needs:
- Height: Should be sufficient to fit taller items without causing visual clutter or obstruction.
- Width: Determine the width based on the items you want to display or store and the available wall space.
- Depth: Choose a depth that allows for easy access to stored items without compromising stability.
3. Supporting the Shelves:
Floating shelves require proper support to prevent sagging or collapse. There are two main methods to achieve this:
- Hidden Brackets: Metal brackets that attach to the underside of the shelves and conceal the hardware for a clean, floating appearance.
- Exposed Supports: Decorative brackets or struts that provide visible support while adding a unique design element to your shelves.
4. Installing the Shelves:
Proper installation is crucial for the safety and longevity of your floating shelves. Follow these steps carefully:
- Mark the Locations: Use a level to determine the exact placement of the shelves and mark their locations on the wall.
- Drill Pilot Holes: Create small pilot holes to guide the screws and prevent splitting.
- Install the Brackets: Attach the brackets to the wall according to the manufacturer's instructions.
- Hang the Shelves: Carefully lift the shelves and slide them onto the brackets until they are fully supported.
5. Styling the Shelves:
Once your floating shelves are installed, you can customize them to match your kitchen decor. Consider various styling ideas:
- Display Artwork: Showcase framed prints, paintings, or sculptures to add color and personality.
- Store Kitchen Essentials: Organize spices, cookbooks, or frequently used utensils within easy reach.
- Create a Mini Herb Garden: Plant fresh herbs on your shelves to bring nature and fragrance into your kitchen.
- Decorate with Greenery: Add potted plants or trailing vines to create a sense of freshness and vibrancy.
By following these essential aspects, you can craft functional and visually appealing floating shelves that will elevate the aesthetics and functionality of your kitchen.

Diy Kitchen Floating Shelves Lessons Learned Angela Marie Made

20 Diy Floating Shelves Kitchen Remodel

How To Install Diy Floating Shelves We The Dreamers

Diy Kitchen Floating Shelves Lessons Learned Angela Marie Made

How To Install Diy Floating Shelves We The Dreamers

Kitchen Floating Live Edge Shelves

Kitchen Chronicles Diy Floating Rustic Shelves Jenna Sue Design

Diy Floating Corner Shelves In Kitchen Designed Simple

Diy Open Shelving For Our Kitchen Lemon Thistle

Kitchen Floating Live Edge Shelves
Related Posts


