How to Make Kitchen Cabinet Doors
Kitchen cabinet doors are a crucial element in defining the style and functionality of a kitchen. Whether aiming to refresh an existing kitchen or undertaking a complete remodel, constructing cabinet doors offers a customized solution that aligns with specific design preferences and budgetary considerations. This article provides a comprehensive guide on how to make kitchen cabinet doors, encompassing various design options, material selection, and step-by-step construction processes.
Before initiating the project, careful planning is essential. This involves accurately measuring the existing cabinet openings to determine the precise dimensions for the new doors. Identifying the desired style, such as Shaker, raised panel, or slab, will guide the subsequent material selection and construction techniques. Finally, establishing a budget will help determine the most appropriate materials and hardware to use.
Choosing the Right Materials
The selection of materials significantly impacts the durability, appearance, and cost of the cabinet doors. Several options are available, each with its own advantages and disadvantages.
Solid Wood: Solid wood offers a timeless aesthetic and exceptional durability. Common choices include maple, oak, cherry, and walnut. Maple is a versatile and readily available option known for its smooth grain and ability to accept paint or stain evenly. Oak is a robust hardwood with a distinctive grain pattern, suitable for traditional and rustic kitchen designs. Cherry offers a rich, reddish-brown hue and a fine grain, adding elegance to any kitchen. Walnut is a premium hardwood with a dark, luxurious color and striking grain, perfect for creating a sophisticated atmosphere.
When selecting solid wood, it’s imperative to ensure it is kiln-dried to minimize warping or cracking due to moisture fluctuations. The grade of the wood also matters; higher grades have fewer knots and imperfections, resulting in a cleaner, more uniform appearance. Consider the cost implications, as premium hardwoods can significantly increase the overall project expense.
Plywood: Plywood offers a cost-effective alternative to solid wood, providing good stability and resistance to warping. It consists of multiple layers of wood veneer glued together, with the grain of each layer running perpendicular to the next, enhancing strength and dimensional stability. For cabinet doors, cabinet-grade plywood is recommended, typically featuring a hardwood veneer on one or both sides. Popular choices include birch, maple, and oak plywood. When using plywood, it is critical to ensure the edges are properly finished with edge banding to conceal the exposed plies and create a smooth, professional surface.
Medium-Density Fiberboard (MDF): MDF is an engineered wood product made from wood fibers compressed with resin. It is a smooth, consistent material that is ideal for painting. MDF is less prone to warping and splitting than solid wood, making it a suitable choice for painted cabinet doors. However, MDF is more susceptible to damage from moisture, so it is important to protect it with a durable finish. It's also relatively heavy compared to solid wood or plywood, which can impact the choice of hinges and hardware.
Thermofoil: Thermofoil doors consist of an MDF core wrapped in a thin layer of vinyl. They are available in a variety of colors and finishes, including wood grain patterns. Thermofoil doors are relatively inexpensive and easy to clean. However, they are less resistant to heat than other materials and may peel or bubble over time, particularly near heat sources like ovens and dishwashers. While not typically made from scratch, understanding this option provides context for renovation considerations.
Constructing Different Door Styles
The design of the cabinet door determines the construction method. Common styles include Shaker, raised panel, and slab doors, each requiring specific techniques.
Shaker Doors: Shaker doors are characterized by their simple, clean lines and recessed panel. They typically consist of four frame pieces (two stiles and two rails) joined together with a recessed panel. The frame can be constructed using mortise-and-tenon joints, cope-and-stick joints, or pocket-hole screws. Mortise-and-tenon joints offer superior strength and durability but require specialized tools and skills. Cope-and-stick joints are easier to create using a router table with specialized cutters. Pocket-hole screws provide a quick and efficient method for assembling the frame, although the joints may not be as strong as mortise-and-tenon or cope-and-stick joints.
The recessed panel is typically made from plywood or MDF and is fitted into a groove cut into the inside edge of the frame. The panel can be glued and clamped in place or allowed to float freely within the frame to accommodate seasonal wood movement. It is important to ensure the panel is perfectly flat and square to achieve a professional appearance.
Raised Panel Doors: Raised panel doors feature a central panel that is raised above the surrounding frame. This design adds depth and dimension to the cabinet doors, creating a more traditional and formal look. The raised panel can be created using a router table with a raised panel cutter or by purchasing pre-made raised panels. The frame is typically constructed using mortise-and-tenon joints or cope-and-stick joints.
When using a router table to create the raised panel, it is important to use a featherboard to hold the workpiece firmly against the fence and ensure a smooth, consistent cut. Multiple passes may be necessary to achieve the desired profile. The panel is then fitted into a groove cut into the inside edge of the frame and secured with glue and clamps. Allowing for wood movement is also key with this style.
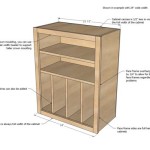
Slab Doors: Slab doors are the simplest design, consisting of a single piece of material, typically plywood, MDF, or solid wood. They offer a minimalist and contemporary look, ideal for modern kitchens. Slab doors are easy to construct and can be finished with paint, stain, or laminate. Edge banding is typically applied to conceal the edges of the material and create a clean, finished appearance. Slab doors can be installed with concealed hinges for a seamless, frameless look.
Step-by-Step Construction Process
The following outlines a general construction process applicable to the aforementioned door styles. Specific steps may vary depending on the chosen design and joinery methods.
1. Prepare the Materials: Begin by cutting the lumber or plywood to the required dimensions for the frame and panel. Use a table saw or circular saw to ensure accurate and consistent cuts. For frame pieces, ensure all edges are square and straight. For panels, verify dimensions align with frame openings, accounting for any necessary grooves.
2. Create the Frame Joints: Depending on the chosen joinery method, proceed with creating the mortise-and-tenon joints, cope-and-stick joints, or pocket-hole screw connections. For mortise-and-tenon joints, use a mortising machine or chisel to create the mortises in the stiles and the tenons on the rails. For cope-and-stick joints, use a router table with specialized cutters to create the cope and stick profiles on the stiles and rails. For pocket-hole screw connections, drill pocket holes on the inside face of the rails and stiles.
3. Assemble the Frame: Apply glue to the joints and clamp the frame pieces together. Ensure the frame is square and level before tightening the clamps. If using pocket-hole screws, drive the screws into the pocket holes to secure the frame. Allow the glue to dry completely before proceeding to the next step. Remove clamps once the glue has cured.
4. Prepare the Panel: For Shaker and raised panel doors, prepare the panel to fit within the frame. If using plywood or MDF for the panel, cut it to the required dimensions. For raised panel doors, create the raised panel profile using a router table with a raised panel cutter. Sand the panel smooth to ensure a uniform surface finish.
5. Install the Panel: Insert the panel into the groove on the inside edge of the frame. For Shaker doors, the panel can be glued and clamped in place or allowed to float freely within the frame. For raised panel doors, the panel is typically glued and clamped in place. Ensure the panel is centered within the frame and that all edges are aligned. Re-clamp the entire assembly and allow the glue to dry completely.
6. Sand and Finish the Door: Once the glue has dried, sand the entire door smooth using progressively finer grits of sandpaper. Pay particular attention to the joints and edges to ensure a seamless transition. Remove all dust and debris before applying the finish. Apply the desired finish, such as paint, stain, or varnish, following the manufacturer's instructions. Multiple coats may be necessary to achieve the desired level of protection and appearance. Allow each coat to dry completely before applying the next.
7. Install Hardware: Install the hinges and any other desired hardware, such as knobs or pulls. Choose hinges that are appropriate for the weight and thickness of the door. Concealed hinges offer a clean, frameless look, while surface-mounted hinges are easier to install. Position the hinges according to the manufacturer's instructions and secure them with screws. Align the door with the cabinet opening and adjust the hinges as necessary to ensure a proper fit and smooth operation.
By following these steps, one can construct custom kitchen cabinet doors that are both functional and aesthetically pleasing, enhancing the overall look and feel of the kitchen.

How To Make Diy Cabinet Doors Without Fancy Router Bits

How To Build Rustic Cabinet Doors

Kitchen Diy Shaker Style Cabinets Cherished Bliss

How To Make Your Own Cabinet Doors Beneath My Heart

How To Make Kitchen Cabinet Doors The Happy Housewife Home Management

Mudroom Update Diy Shaker Cabinet Doors Faux Remodelando La Casa

How To Make Diy Cabinet Doors

Diy Fluted Cabinet Doors Jenna Sue Design

Make New Doors For Kitchen Cabinets

Diy Shaker Cabinet Doors How To Make Your Own For Less Farmhouseish
Related Posts