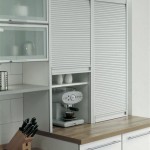
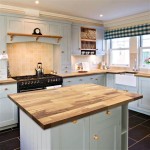
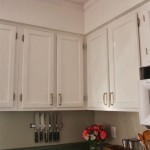
How To Make Kitchen Cupboard Doors: A Step-by-Step Guide
Are you looking to update your kitchen without breaking the bank? Making your own kitchen cupboard doors is a great way to save money and add a personal touch to your home. Although it may seem like a daunting task, making kitchen cupboard doors is easier than you think with the right tools and materials. In this guide, we will take you through all the steps involved in making kitchen cupboard doors, from measuring and cutting the wood to assembling and finishing the doors.
Materials You'll Need
- Wood (1/2-inch thick plywood or MDF is a good choice)
- Measuring tape
- Pencil
- Circular saw
- Drill
- Countersink bit
- Wood screws
- Wood filler
- Sandpaper
- Paint or stain (optional)
Step 1: Measure and Cut the Wood
The first step is to measure and cut the wood for your cupboard doors. To do this, you will need to know the size of your cabinet openings. Once you have the measurements, use a pencil to mark the cuts on the wood. Then, use a circular saw to cut the wood to size.
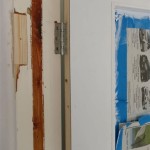
Step 2: Drill the Holes for the Hinges
Once the wood is cut, you will need to drill the holes for the hinges. To do this, use a drill and countersink bit to create a countersunk hole for each hinge. The countersink hole will help to hide the screw heads when the hinges are installed.
Step 3: Attach the Hinges
Now you can attach the hinges to the cupboard doors. To do this, use wood screws to secure the hinges in place. Make sure that the hinges are aligned properly so that the doors will open and close smoothly.
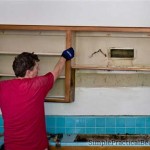
Step 4: Attach the Doors to the Cabinet
Once the hinges are attached, you can hang the doors on the cabinet. To do this, simply lift the doors into place and align them with the cabinet opening. Then, use wood screws to secure the doors in place.
Step 5: Fill and Sand the Holes
Once the doors are hung, you will need to fill and sand the screw holes. To do this, use wood filler to fill the holes. Then, use sandpaper to sand the filled holes smooth.
Step 6: Paint or Stain the Doors (Optional)
If you want, you can now paint or stain the doors. To do this, use a brush or roller to apply the paint or stain. Allow the paint or stain to dry completely before using the doors.
Step 7: Enjoy Your New Kitchen Cupboard Doors!
Congratulations! You have now successfully made your own kitchen cupboard doors. With a little time and effort, you can update your kitchen without breaking the bank. Enjoy your new cupboard doors!

Making Great Looking Cabinet Doors From Rough Lumber Woodworking

Diy Shaker Cabinet Doors The Easy Way Mimzy Company

How To Make Diy Cabinet Doors Without Fancy Router Bits

Diy Inset Cabinet Doors A Beginner S Way Remodelando La Casa

How To Build Rustic Cabinet Doors Concord Carpenter

17 Easy Diy Cabinet Door Ideas On A Budget The Handyman S Daughter

Diy Rustic Industrial Cabinet Doors Tutorial Cherished Bliss

How To Build A Wall Cabinet And Door Angela Marie Made

Diy Inset Cabinet Doors A Beginner S Way Remodelando La Casa

Diy Fluted Cabinet Doors Jenna Sue Design
Related Posts