How to Make Your Kitchen Cabinets Look New
Kitchen cabinets, often the focal point of the room, endure significant wear and tear. Splatters, grease, fingerprints, and the simple passage of time can leave them looking dull and outdated. Restoring cabinets to their former glory is a project that can drastically enhance the overall aesthetic of a kitchen without the expense of a complete remodel. This undertaking requires careful planning, the right materials, and a methodical approach. This article outlines several methods for revitalizing kitchen cabinets, ranging from simple cleaning techniques to more involved refinishing projects. Choosing the appropriate method depends on the current condition of the cabinets, the desired outcome, and the individual's skill level.
Before embarking on any cabinet revitalization project, a thorough assessment of their current state is crucial. Identify areas of damage, such as scratches, chips, water stains, or peeling paint or varnish. This evaluation will determine the best course of action. For cabinets in relatively good condition, a deep clean and minor touch-ups may suffice. However, cabinets with significant damage may require more extensive refinishing or even replacement of certain components.
Deep Cleaning and Degreasing
The first step in making kitchen cabinets look new, regardless of the subsequent steps, is a comprehensive cleaning. Over time, cabinets accumulate grease, dust, and food particles, which can dull their appearance and make even minor imperfections more noticeable. A gentle yet effective cleaning solution is essential to avoid damaging the cabinet finish.
Begin by emptying the cabinets completely. This allows for unrestricted access to all surfaces and prevents cleaning products from contaminating food items or kitchenware. Next, prepare a cleaning solution. A mixture of warm water and dish soap is often sufficient for removing everyday grime. For more stubborn grease, consider adding a small amount of white vinegar or baking soda to the solution. Commercial degreasers specifically designed for kitchen surfaces are also available, but always test them on an inconspicuous area first to ensure they do not damage the finish.
Using a soft cloth or sponge, apply the cleaning solution to the cabinet surfaces. Avoid using abrasive scrub brushes or scouring pads, as these can scratch or dull the finish. Pay particular attention to areas around the handles and knobs, as these tend to accumulate the most grime. For intricate detailing, a soft-bristled brush, such as an old toothbrush, can be helpful.
After cleaning, thoroughly rinse the cabinets with clean water to remove any soap residue. Use a clean, dry cloth to wipe down the surfaces and prevent water spots. Allow the cabinets to air dry completely before replacing the contents.
For cabinets with stubborn stains or discoloration, consider using a mild bleach solution. However, exercise extreme caution when working with bleach, as it can damage certain finishes and discolor fabrics. Always wear gloves and eye protection, and ensure adequate ventilation. Test the bleach solution on an inconspicuous area before applying it to the entire cabinet.
Wood cabinets may benefit from a wood cleaner specifically designed for kitchen cabinets. These cleaners often contain oils that help to restore the wood's natural luster. Follow the manufacturer's instructions carefully when using these products.
Touch-Up and Repair
After cleaning, address any minor damage to the cabinets, such as scratches, chips, or dents. These imperfections can detract from the overall appearance of the cabinets, but they are often relatively easy to repair.
For minor scratches, a touch-up marker or crayon that matches the cabinet finish can be used. Simply apply the marker or crayon to the scratch and blend it in with a soft cloth. For deeper scratches, a wood filler or putty may be necessary. Apply the filler to the scratch, allow it to dry completely, and then sand it smooth before painting or staining to match the surrounding area.
Chips and dents can be repaired using wood filler or epoxy. Apply the filler to the damaged area, allow it to dry completely, and then sand it smooth. Prime the repaired area and then paint or stain it to match the surrounding area. For larger chips or dents, it may be necessary to remove the damaged section of the cabinet and replace it with a new piece of wood.
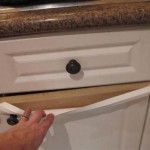
Loose or damaged hinges and knobs should be tightened or replaced. Loose hinges can cause the cabinet doors to sag or not close properly. Replacing damaged knobs can instantly update the look of the cabinets. Consider replacing all of the knobs and pulls with new ones to create a more cohesive and modern look.
If the cabinet doors are warped or damaged beyond repair, consider replacing them entirely. Many companies offer replacement cabinet doors in a variety of styles and finishes. This can be a more cost-effective option than replacing the entire cabinet.
Refacing and Refinishing
For cabinets that are severely worn or outdated, refacing or refinishing may be necessary. Refacing involves replacing the cabinet doors and drawer fronts with new ones, while refinishing involves stripping the existing finish and applying a new one. Both of these options can dramatically change the appearance of the cabinets.
Refacing is a good option for cabinets with solid frames that are in good condition. The existing cabinet boxes are left in place, and new doors and drawer fronts are installed over them. This can be a less expensive and less disruptive option than replacing the entire cabinets. When refacing, it's important to choose doors and drawer fronts that match the style of the kitchen and complement the existing countertops and appliances.
Refinishing is a more involved process that requires stripping the existing finish, sanding the cabinets smooth, and then applying a new finish. This can be a time-consuming and labor-intensive process, but it can also be very rewarding. The first step in refinishing is to remove all of the hardware from the cabinets, including handles, knobs, and hinges. Then, the cabinets must be thoroughly cleaned and degreased.
Next, the existing finish must be stripped off. There are several ways to remove the finish, including using a chemical stripper, sanding, or heat gun. Whichever method is chosen, it is important to follow the manufacturer's instructions carefully and to wear appropriate safety gear, such as gloves, eye protection, and a respirator. After the finish has been removed, the cabinets must be sanded smooth. Start with a coarse-grit sandpaper and gradually work the sandpaper to a finer grit.
Once the cabinets are sanded smooth, they are ready to be finished. There are many different types of finishes that can be used, including paint, stain, varnish, and lacquer. The choice of finish will depend on the desired look and the type of wood. Apply the finish in thin, even coats, allowing each coat to dry completely before applying the next. Once the final coat of finish has dried, the hardware can be reinstalled and the cabinets can be put back together.
Regardless of the method used, thorough preparation is key to achieving a professional-looking result. This includes cleaning, sanding, and priming the cabinets before applying any finish. It is also important to use high-quality materials and to follow the manufacturer's instructions carefully.
By following these steps, it is possible to make kitchen cabinets look new and improve the overall aesthetic of the kitchen without the expense of a complete remodel. A well-maintained and updated kitchen can significantly enhance the value and enjoyment of a home.

How To Make Old Cabinets Look New With Paint

25 Easy Ways To Update Kitchen Cabinets

25 Easy Ways To Update Kitchen Cabinets

25 Easy Ways To Update Kitchen Cabinets

How To Make Old Cabinets Look New With Paint

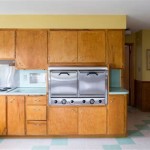
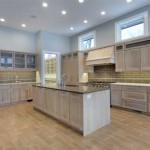
Make An Old Kitchen Look New Again By Refinishing The Cabinets Seattle Times

How To Paint Kitchen Cabinets In 7 Simple Steps

10 Simple Ideas To Update Your Kitchen Cabinets Jenna Sue Design

How To Update Your Kitchen Cabinets Without Replacing Them Real Estate U S News

Distressed Kitchen Cabinets How To Distress Your