How to Mount Kitchen Base Cabinets
When it comes to kitchen remodeling, installing base cabinets is a crucial step that sets the foundation for the entire project. Proper mounting ensures that your cabinets are level, stable, and able to support the weight of your dishes, appliances, and countertop. Here's a comprehensive guide to help you mount your kitchen base cabinets like a pro:
Materials You'll Need:
- Base cabinets
- Cabinet leveling shims
- Drill or impact driver
- Screws (1-1/4 inch or 1-1/2 inch)
- Carpenter's level
- Clamps
- Pencil
- Measuring tape
Step 1: Prepare the Wall and Floor
Before you mount the cabinets, ensure that the wall and floor surfaces are level and plumb. Use a level to check the horizontal and vertical alignment and make any necessary adjustments.
Step 2: Determine the Cabinet Height
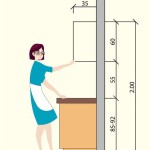
Measure the height from the floor to the desired countertop height (typically 36 inches). Mark this height on the wall at the corners where the cabinets will be installed.
Step 3: Install the Scribe Molding
If your floor is not perfectly level, you'll need to install a scribe molding along the bottom edge of the wall. This will create a flush surface for the cabinet toe kicks.
Step 4: Install the End Cabinets
Start by installing the end cabinets first. Place them against the wall and align them with the height marks. Use a level to ensure they are plumb both vertically and horizontally. Secure them to the wall with screws.
Step 5: Level the Cabinets
Insert cabinet leveling shims under the corners of the end cabinets to level them. Use a level to check the alignment and adjust the shims as needed. Secure the shims with screws.
Step 6: Install the Filler Strips
If there is a gap between the end cabinets and the adjacent walls, fill it with filler strips. Cut the strips to size and secure them to the cabinets with screws.
Step 7: Install the Remaining Cabinets
Place the remaining cabinets in sequence between the end cabinets. Align them with the previous cabinets and level them using the same process as the end cabinets. Secure them to the wall and to the adjacent cabinets.
Step 8: Secure the Cabinets to Each Other
Once the row of base cabinets is installed, connect them together with screws through the sides of the cabinets. This will provide additional stability.
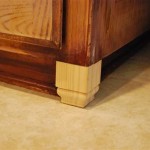
Step 9: Install the Toe Kicks
Attach the toe kicks to the bottom of the base cabinets to cover the gap between the cabinets and the floor.
Tips:
- Use a laser level for greater accuracy when aligning and leveling the cabinets.
- Countersink the screws slightly below the surface of the wood to create a seamless finish.
- Clamping the cabinets together while securing them ensures a tight fit.
- Double-check the level of the cabinets before securing them permanently.
- If the floor is uneven, consider using self-leveling compound to create a smooth surface for the cabinets.

How To Install Cabinets Like A Pro The Family Handyman

How To Install Kitchen Cabinets Diy Family Handyman

How To Install Kitchen Wall And Base Cabinets Builder Supply

How To Install Kitchen Cabinets Interiors

Blind Corner Cabinets Step By Guide On How To Install

How To Install Wall And Base Kitchen Cabinets Using The Best 14 Steps

6 Tips For Kitchen Cabinet Installation

How To Build Base Cabinets The Complete Guide Houseful Of Handmade

How To Install Kitchen Cabinets And Remove Them Remodel Pt 1 Crafted Work

How To Install Base Cabinets The Home Depot With This Old House
Related Posts


