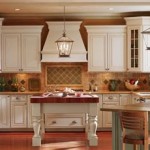
How to Paint Glaze on Kitchen Cabinets
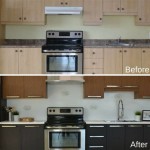
Painting and glazing kitchen cabinets can refresh their look and enhance the kitchen's overall design. However, the process requires careful preparation and meticulous execution. Here's a comprehensive guide on how to paint glaze on kitchen cabinets:
Materials:
- Clean rags or cloths
- Degreaser or TSP (trisodium phosphate)
- Sandpaper (120-grit and 220-grit)
- Primer
- Paint brush or roller
- Cabinet paint
- Glazing medium
- Glaze
- Soft cloth
- Polyurethane finish
Preparation:
1. Remove doors and hardware: Remove all cabinet doors, knobs, and handles for easy access.
2. Clean cabinets: Wipe down all cabinet surfaces thoroughly with a degreaser or TSP solution to remove grease and dirt.
3. Sand cabinets: Lightly sand the cabinet surfaces with 120-grit sandpaper to create a smooth surface for the primer and paint adhesion. Remove sanding dust with a cloth.
4. Prime cabinets: Apply a coat of primer to the cabinets to seal the surface and provide a better base for the paint. Allow the primer to dry completely.
Painting:
1. Apply first coat of paint: Choose a cabinet paint color and apply a thin, even coat using a brush or roller. Allow the paint to dry completely.
2. Apply second coat of paint: Apply a second coat of paint to ensure even coverage and durability.
Glazing:
1. Prepare glaze: Mix the glazing medium with the glaze according to the manufacturer's instructions. The consistency should be similar to heavy cream.
2. Apply glaze: Use a soft cloth to apply the glaze to the cabinet surfaces in circular motions. Focus on the raised or detailed areas to create depth and dimension.
3. Remove excess glaze: After applying the glaze, use a clean cloth to wipe away any excess glaze from the surfaces, leaving only a thin layer.
4. Allow glaze to dry: Allow the glaze to dry for several hours or overnight before applying the polyurethane finish.
Finishing:
1. Apply polyurethane finish: Apply a thin, even coat of polyurethane finish over the glazed cabinets. Use a brush or roller and allow the finish to dry completely.
2. Install doors and hardware: Once the polyurethane finish has dried, reattach the cabinet doors and install the hardware.
Tips:
- Use high-quality materials for best results.
- Allow ample drying time between each step.
- Test the glaze on an inconspicuous area before applying it to the entire cabinet.
- Practice applying the glaze on a scrap piece of wood or cardboard to get the desired effect.
- Apply the glaze sparingly to avoid creating a thick, uneven finish.

How To Glaze Kitchen Cabinets

How To Glaze Kitchen Cabinets Diyer S Guide Bob Vila

How To Glaze Cabinets At Home With The Barkers

Rescuing And Reviving A Glazed Distressed Kitchen Bella Tucker

How To Glaze Kitchen Cabinets Diy Network

How To Glaze Cabinets At Home With The Barkers

How To Glaze Kitchen Cabinets Diyer S Guide Bob Vila

Painting And Glazing Kitchen Cabinets

How To Glaze Cabinets At Home With The Barkers

3 Steps To Glaze Cabinets Correctly Painted Furniture Ideas Distressed Kitchen Chalk Paint Glazed
Related Posts

