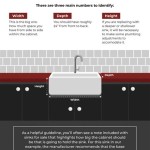
How To Paint Inside Old Kitchen Cabinets Without Sanding
Painting the interior of kitchen cabinets can revitalize a tired kitchen, brightening the space and providing a clean, fresh look. Often, homeowners are deterred from this project due to the perceived labor involved, particularly the sanding process. However, modern primers and paints offer viable alternatives that greatly reduce, or even eliminate, the need for sanding. This article will detail a comprehensive method for painting the inside of old kitchen cabinets without sanding, focusing on preparation, appropriate product selection, and application techniques.
Before beginning, it’s important to assess the existing condition of the cabinet interiors. Consider factors such as the type of material the cabinets are constructed from (wood, laminate, melamine), the presence of existing paint or varnish, and the level of grime or grease accumulation. This assessment will directly influence the choice of cleaning solutions, primers, and paints.
Preparation is Paramount: Cleaning and Degreasing
The absolute most crucial step in painting without sanding is meticulous cleaning. This process removes dirt, grease, and any residue that could prevent the paint from adhering properly. Skipping this step virtually guarantees a poor finish and potential peeling or chipping in the future. The goal is to create a completely clean and receptive surface for the primer to bind to.
Begin by removing all items from the cabinets. This includes dishes, cookware, food items, and any shelf liners. Thoroughly vacuum the inside of each cabinet to remove loose crumbs, dust, and debris. Use a vacuum attachment to reach into corners and crevices.
Next, prepare a cleaning solution. A mixture of warm water and a degreasing dish soap is typically effective for general cleaning. For cabinets with heavy grease buildup, a stronger solution such as trisodium phosphate (TSP) substitute should be considered. Always follow the manufacturer's instructions when using TSP substitute, and wear appropriate protective gear such as gloves and eye protection.
Using a clean sponge or microfiber cloth, thoroughly wash all interior surfaces of the cabinets. Pay particular attention to areas that are likely to accumulate grease and grime, such as shelves and the back walls of cabinets near the stove. Rinse the sponge or cloth frequently in clean water to avoid spreading the dirt around.
After washing, rinse the cabinets with clean water to remove any remaining soap residue. Use a separate clean sponge or cloth for rinsing. Once rinsed, allow the cabinets to dry completely before proceeding to the next step. This may take several hours, depending on the humidity and ventilation.
For particularly stubborn stains or residue, consider using a specialized cleaner designed for kitchen cabinets. These cleaners often contain stronger degreasing agents and may be necessary to effectively prepare the surface. Always test the cleaner in an inconspicuous area first to ensure it does not damage the existing finish.
If there are any areas with mold or mildew, address them specifically. Use a mold and mildew cleaner following the manufacturer's instructions carefully. Ensure the area is completely dry before moving on to priming and painting. Failure to properly address mold and mildew can lead to health problems and further damage to the cabinets.
Selecting the Right Primer and Paint
Choosing the appropriate primer and paint is essential for achieving a durable and aesthetically pleasing finish when painting without sanding. The primer serves as a bonding agent between the existing cabinet surface and the new paint, while the paint provides the desired color and finish.
For priming, a bonding primer or an adhesion promoter is the best choice. These primers are specifically designed to adhere to slick or non-porous surfaces without sanding. Look for primers that are labeled as "self-etching" or "formulated for difficult-to-adhere surfaces." Epoxy primers are also a strong contender for their inherent adhesion properties.
Consider the material of your cabinets when selecting the primer. For example, laminate cabinets may require a specialized primer designed for laminate surfaces. Read the product labels carefully to ensure the primer is compatible with your cabinet material.
When it comes to paint, choose a high-quality acrylic or latex paint specifically designed for interior use. These paints are durable, easy to clean, and available in a wide range of colors and finishes. Semi-gloss or satin finishes are typically recommended for kitchen cabinets, as they are more resistant to moisture and easier to wipe clean than matte finishes.
Consider using a paint that has a built-in primer. These paints, often referred to as "paint and primer in one," can simplify the painting process and potentially reduce the number of coats required. However, it is still essential to thoroughly clean and prepare the surface before applying the paint, even with a built-in primer.
Choose a paint color that complements your kitchen décor. Consider the existing colors of your countertops, backsplash, and appliances when selecting a paint color. Lighter colors can help to brighten up a dark kitchen, while darker colors can add drama and sophistication.
Before committing to a specific paint color, test it in an inconspicuous area of the cabinet interior. This will allow you to see how the color looks in your kitchen's lighting and ensure that you are happy with the final result. Obtain a small sample of the paint and apply it to a small area of the cabinet. Allow the paint to dry completely before making a decision.
Application Techniques for a Flawless Finish
The application of the primer and paint is just as important as the preparation and product selection. Proper application techniques can help to ensure a smooth, even, and durable finish.
Begin by applying a thin, even coat of primer to all interior surfaces of the cabinets. Use a high-quality paintbrush or a foam roller to apply the primer. A brush is often preferred for corners and tight spaces, while a roller can be used for larger surfaces.
Avoid applying the primer too thickly, as this can lead to drips and runs. Apply multiple thin coats of primer rather than one thick coat. Allow the primer to dry completely according to the manufacturer's instructions before proceeding to the next step.
Once the primer is dry, lightly inspect the surface for any imperfections. If necessary, use a fine-grit sanding sponge to smooth out any rough spots. Wipe away any dust with a clean, damp cloth before proceeding to paint.
Apply the first coat of paint in the same manner as the primer, using a thin, even coat. Avoid applying the paint too thickly, and allow it to dry completely before applying the second coat. Two coats of paint are typically sufficient for achieving full coverage and a durable finish.
For a particularly smooth finish, consider using a paint sprayer. Paint sprayers can provide a more even and consistent coat of paint than brushes or rollers. However, they also require more preparation and cleanup. If using a paint sprayer, be sure to mask off the surrounding areas to protect them from overspray.
When painting the shelves, consider painting them separately. This will allow you to paint all sides of the shelves at once and avoid having to reach into the cabinets to paint them. Place the shelves on a drop cloth or newspapers to protect your work surface.
Allow the paint to dry completely before replacing the shelves and placing items back into the cabinets. This may take several days, depending on the humidity and type of paint used. Rushing this process can lead to the paint being damaged or sticking to items placed in the cabinets.
Clean your brushes and rollers immediately after use. This will help to prolong their lifespan and ensure that they are ready for your next painting project. Use warm water and soap to clean acrylic or latex paints. Follow the manufacturer's instructions for cleaning other types of paints.
By following these steps, one can successfully paint the inside of old kitchen cabinets without sanding, resulting in a refreshed and updated kitchen space.

How To Paint Laminate Cabinets Without Sanding The Palette Muse

How To Paint Fake Wood Kitchen Cabinets Simple Made Pretty 2025

How To Paint Unfinished Cabinets Houseful Of Handmade

How To Paint Kitchen Cabinets Without Fancy Equipment

How To Paint Your Cabinets In A Weekend Without Sanding Them Chris Loves Julia

How I Updated My Oak Cabinets Without Paint By Using Briwax Easy Budget Kitchen Makeover Only 24

How To Paint Laminate Cabinets Without Sanding The Palette Muse

How To Paint Fake Wood Kitchen Cabinets Simple Made Pretty 2025

Do Your Kitchen Cabinets Look Tired The Purple Painted Lady

How To Repaint Painted Cabinets
Related Posts