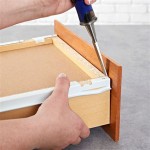
How to Paint Kitchen Cabinet Trim with Precision
Painting kitchen cabinet trim can elevate the aesthetics of your kitchen and provide a fresh, updated look. However, achieving a professional finish requires careful preparation and meticulous execution. By following these essential steps, you can transform your kitchen cabinet trim with ease. ### Preparation is Key 1.Clean and Degrease:
Remove dirt, grease, and stains from the trim using a cleaning solution. Wipe down the surfaces with a clean cloth to ensure a clean base for painting. 2.Mask Off Surroundings:
Protect surrounding areas from paint splatter by masking off countertops, backsplash, and appliances with painter's tape. 3.Sand and Repair:
Lightly sand the trim to create a smooth surface and remove any imperfections. Fill in any holes or cracks with wood filler and allow it to dry. ### Choosing the Right Paint and Brush 4.Select a High-Quality Paint:
Opt for a paint specifically designed for kitchen cabinets, as it provides enhanced durability and resistance to wear and tear. 5.Choose a Brush with Confidence:
A high-quality angled sash brush or a small roller is ideal for applying paint to trim. The angled bristles allow for precise control and even distribution. ### Applying the Paint 6.Prime the Trim:
Apply a thin layer of primer to the trim using a brush. Primer helps the paint adhere better and ensures a smooth finish. 7.Apply Thin Coats of Paint:
Dip the brush into the paint and gently tap off any excess. Apply thin, even coats of paint, allowing each coat to dry completely before applying the next. 8.Use a Roller for Smoothness:
For larger areas of trim, use a small roller to apply the paint. Roll over the surface with light pressure to achieve a smooth and even finish. 9.Cut in with a Brush:
Use a fine-tipped brush to paint the edges and corners of the trim where the roller cannot reach. This ensures a clean and precise finish. ### Finishing Touches 10.Sand and Touch Up:
Once the paint is completely dry, lightly sand the trim to remove any brush marks or imperfections. Touch up any areas that require additional coverage. 11.Remove Masking Tape:
Carefully remove the painter's tape while the paint is still slightly tacky. Avoid pulling the tape straight up to prevent peeling the paint. 12.Apply Polyurethane:
To protect the painted finish and enhance its durability, apply a thin layer of polyurethane using a brush. Allow it to dry according to the manufacturer's instructions. ### Tips for Success * Use a drop cloth to protect the floor from paint spills. * Open windows or use a fan to ventilate the area while painting. * Allow ample drying time between coats to ensure a durable finish. * Clean your brushes and rollers thoroughly after use to avoid paint buildup. * If you encounter any problems or have any questions, don't hesitate to consult a professional painter for guidance.
How To Add Trim And Paint Your Laminate Cabinets

How To Add Trim And Paint Your Laminate Cabinets

How To Paint Cabinets And A Contrasting Trim Within The Grove

Tips For Modernizing Your Home By Painting Kitchen Cabinets Crown Molding And Furniture

How To Paint Kitchen Cabinets A Step By Guide Confessions Of Serial Do It Yourselfer

Diy Kitchen Cabinet Upgrade With Paint And Crown Molding

How To Paint Cabinets And A Contrasting Trim Within The Grove

How To Paint Cabinets And A Contrasting Trim Within The Grove

How To Paint Kitchen Cabinets Without Fancy Equipment

Painting Crown Molding To Match Cabinets Is It A Good Idea
Related Posts


