How to Paint Kitchen Cabinets: A Comprehensive Guide
Painting kitchen cabinets is a transformative project that can revitalize a kitchen's aesthetic without the expense of a complete remodel. Careful preparation, proper techniques, and the selection of appropriate materials are crucial to achieving a professional and durable finish. This guide provides a detailed walkthrough of the process, covering everything from gathering supplies to applying the final coat of paint.
Essential Preparation: Cleaning, Sanding, and Priming
The foundation of a successful paint job lies in thorough preparation. This involves cleaning the cabinets to remove grease and grime, sanding to create a receptive surface, and priming to ensure proper adhesion and a uniform finish. Neglecting these steps can lead to paint chipping, peeling, or an uneven appearance.
Begin by completely emptying the cabinets and drawers. Remove all hardware, including knobs, pulls, hinges, and latches. Label each piece of hardware and the corresponding cabinet door or drawer to facilitate reassembly. Store the hardware in a safe place to prevent loss or damage.
Next, thoroughly clean the cabinet surfaces. Use a degreasing cleaner specifically designed for kitchens. A mixture of trisodium phosphate (TSP) and water is an effective option, but always wear gloves and eye protection when handling TSP. Scrub the cabinets with a non-abrasive sponge or cloth, paying close attention to areas prone to grease buildup, such as around the stove and sink. Rinse the cabinets thoroughly with clean water and allow them to dry completely.
Once the cabinets are dry, proceed with sanding. The purpose of sanding is not to strip the existing finish entirely but to create a slightly roughened surface that the primer can grip. Use a medium-grit sandpaper (around 120-grit) to lightly sand all surfaces. For intricate areas or corners, consider using a sanding sponge or detail sander. After sanding, remove all dust with a tack cloth or a vacuum with a brush attachment. A clean, dust-free surface is essential for optimal primer adhesion.
Priming is a critical step that should not be skipped. Primer provides a uniform base for the paint, helping to conceal imperfections and ensuring that the paint adheres properly. Choose a high-quality primer specifically designed for cabinets. Oil-based primers are known for their excellent adhesion and stain-blocking properties, but they require mineral spirits for cleanup and have a longer drying time. Water-based primers are easier to clean up and have a lower odor, but they may not be as effective at blocking stains. Apply the primer in thin, even coats, using a brush, roller, or sprayer. Allow the primer to dry completely according to the manufacturer's instructions. Once dry, lightly sand the primed surface with a fine-grit sandpaper (around 220-grit) to remove any imperfections and create an even smoother surface for painting. Remove all dust before proceeding.
Selecting the Right Paint and Applying it Effectively
Choosing the right paint and applying it using appropriate techniques are crucial for achieving a professional-looking and durable finish. Consider factors such as the type of paint, its sheen, and the application method when making your selections.
For kitchen cabinets, alkyd or acrylic enamel paints are generally recommended. Alkyd paints, also known as oil-based paints, are durable and provide a smooth, hard finish. However, they require mineral spirits for cleanup and have a longer drying time. Acrylic enamel paints are water-based, making them easier to clean up and having a lower odor. They are also durable and resistant to chipping and scratching. Consider a paint specifically formulated for cabinets and trim, as these paints are designed to withstand the rigors of a kitchen environment.
The paint sheen also affects the appearance and durability of the finish. A higher sheen, such as semi-gloss or gloss, is more durable and easier to clean but can also highlight imperfections. A lower sheen, such as satin or eggshell, is more forgiving but may not be as durable or easy to clean. A satin or semi-gloss finish is generally recommended for kitchen cabinets, balancing durability and aesthetics.
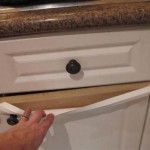
There are several methods for applying paint to kitchen cabinets: brush, roller, and sprayer. Brushing is the most common method for DIY projects, as it requires minimal equipment and provides good control. Use a high-quality brush with synthetic bristles for water-based paints and natural bristles for oil-based paints. Apply the paint in thin, even coats, using long, smooth strokes. Avoid applying too much paint at once, as this can lead to drips and runs.
Rolling is another option for applying paint to kitchen cabinets. Use a foam roller for a smooth finish. Apply the paint in thin, even coats, overlapping each stroke slightly. Rolling can be faster than brushing, but it may not be suitable for intricate areas or corners.
Spraying provides the most professional-looking finish, but it requires more equipment and skill. Use a high-volume, low-pressure (HVLP) sprayer for best results. Thin the paint according to the manufacturer's instructions and apply it in thin, even coats, overlapping each stroke slightly. Spraying requires proper ventilation and safety precautions, such as wearing a respirator and eye protection.
Regardless of the application method, apply at least two coats of paint, allowing each coat to dry completely according to the manufacturer's instructions. Lightly sand between coats with a fine-grit sandpaper (around 320-grit) to remove any imperfections and create an even smoother surface. Remove all dust before applying the next coat.
Reassembly and Final Touches: Ensuring a Professional Look
Once the paint has dried completely, the cabinets can be reassembled. This involves reinstalling the hardware, reattaching the doors and drawers, and making any necessary adjustments.
Begin by carefully reinstalling the hardware. Use the labels you created during disassembly to ensure that each piece of hardware is reattached to the correct cabinet door or drawer. Tighten the screws securely, but avoid over-tightening, as this can damage the cabinet or hardware.
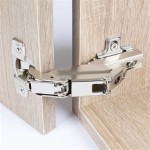
Next, reattach the doors and drawers. Make sure the hinges are properly aligned and that the doors and drawers open and close smoothly. Adjust the hinges as needed to achieve a perfect fit. If the hinges are old or worn, consider replacing them with new ones. New hinges can improve the functionality and appearance of the cabinets.
Once the cabinets are reassembled, inspect them carefully for any imperfections. Touch up any areas that need it with a small brush or artist's brush. Clean up any drips or runs with a razor blade or sandpaper. Apply a coat of clear polyurethane for added protection, especially in high-traffic areas. This will help to protect the paint from scratches and stains.
Finally, clean the surrounding area and dispose of any used paint, brushes, rollers, and other materials properly. Allow the painted cabinets to cure for several days before using them. This will allow the paint to fully harden and resist scratches and stains. During this time, avoid placing heavy objects on the shelves or slamming the doors and drawers.
By following these steps carefully, anyone can paint their kitchen cabinets and achieve a professional-looking and durable finish. The effort and time invested in proper preparation and application will be rewarded with a revitalized kitchen that enhances the overall aesthetic and value of the home.
Remember to always consult the manufacturer's instructions for specific products and materials. Safety precautions should always be prioritized. Good ventilation is critical when working with paints and solvents.
This comprehensive guide provides a detailed overview of how to paint kitchen cabinets. With careful planning, the right materials, and patient execution, this DIY project can transform a kitchen and provide lasting satisfaction.

How To Paint Kitchen Cabinets Like The Pros

How To Paint Kitchen Cabinets The Love Notes Blog

How To Paint Kitchen Cabinets In Four Easy Steps For Really Smooth Results Express Co

How To Paint Kitchen Cabinets Like The Pros

Extreme Diy Kitchen Makeover How To Paint Your Cabinets Before After

How To Paint Kitchen Cabinets Best Color Ideas Cost

7 Expert Tips For Flawless Kitchen Cabinet Painting

How To Paint Inside Kitchen Cabinets Let S Furniture

How To Paint Kitchen Cabinets The Right Way Created Home

How To Paint Kitchen Cabinets
Related Posts


