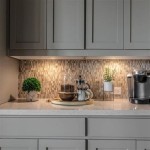
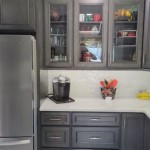
How to Paint Kitchen Cabinets Antique Glazed
Giving your kitchen cabinets a timeless antique glazed finish can transform their look, adding depth, warmth, and a touch of history. This technique involves applying a glaze over a base coat of paint, creating a subtle patina that enhances the overall aesthetic. The process itself is achievable for DIY enthusiasts with some patience and attention to detail. This article provides a comprehensive guide to painting kitchen cabinets with an antique glazed finish, covering the necessary materials, preparation steps, and application techniques.
1. Preparation: The Foundation for a Flawless Finish
As with any painting project, proper preparation is crucial to ensure a successful and long-lasting finish. Thoroughly cleaning and sanding the cabinets is essential to create a smooth surface for paint adhesion. Begin by removing all hardware, including cabinet doors, drawer fronts, hinges, and knobs. Clean the surfaces with a degreaser to remove any residue like grease or oils. Once dry, sand the cabinets with fine-grit sandpaper to smooth out any imperfections and create a good surface for the primer.
After sanding, wipe down the cabinets with a tack cloth to remove any dust particles. This step prevents debris from getting trapped in the paint, leading to a less than ideal finish. Now, you're ready to prime. A primer is recommended to create a uniform surface for your paint to adhere to. Choose a primer compatible with your chosen paint type, ensuring excellent adhesion and coverage. Apply the primer evenly using a brush or roller, following the manufacturer's instructions for drying time.
2. Choosing Your Colors: Base Coat and Glaze
Choosing the right colors is a vital step in achieving the desired antique glazed look. A base color serves as the foundation for the glaze to create a depth of tone and visual interest. For an antique feel, consider using a warm, neutral color like a creamy white, light beige, or soft gray. These colors provide a classic backdrop for the glaze to accentuate.
The glaze, applied over the base coat, is the key ingredient in creating the antique effect. It's a translucent paint that allows the base coat to show through, adding subtle depth and age. Popular glaze colors include dark brown, black, gray, and green. For a classic look, choose a glaze that complements or contrasts slightly with your base coat. Experiment with different glaze shades to discover what best suits your kitchen's design.
3. Application Techniques: Building the Antique Glaze Effect
With your base coat dry, you can start applying the glaze. Applying glaze over the base coat adds subtle depth and visual interest to your cabinets. You can achieve different effects depending on the application technique.
For a subtle antique glaze effect, use a brush or a sponge to apply a thin layer of glaze over the base coat. Depending on the desired intensity, you can apply multiple thin layers. Allow each layer to dry completely before applying the next. For a more dramatic effect, apply a thicker layer of glaze and then use a dry brush or rag to wipe away some of the glaze, revealing the base coat underneath.
Another technique is "dry brushing." This method involves using a dry brush with very little glaze on it to create subtle highlights and shadows. This technique is particularly effective at creating a vintage, distressed look. When using dry brushing, focus on highlighting the edges and corners of the cabinets for a more pronounced antique effect.
Finally, you can use a rag or a sponge to create a "distressed" look. Apply glaze to the cabinets with a rag or sponge, then use a dry rag to wipe away some of the glaze, creating a distressed, aged appearance. This technique is effective for creating a worn, vintage look.
Experiment with different techniques to see what works best for you. Remember to allow the glaze to dry completely before applying additional coats or proceeding to the next step.
4. Finishing Touches: Sealing and Hardware
Once your glaze has dried completely, it's time to seal the cabinets. A sealant protects the finish from moisture and wear and tear, ensuring its longevity. Choose a sealant compatible with your paint and glaze, and apply it evenly using a brush or roller. Allow the sealant to dry completely before restoring the hardware.
Reattach the cabinet hardware with care, ensuring proper alignment and functionality. Using high-quality hardware can elevate the overall look of your cabinets and complete the antique glazed transformation.
With the glaze dry and hardware secured, your kitchen cabinets will have a timeless and elegant antique glazed finish.

Cabinet Refinish Diy Simple Paint And Antique Glaze Kitchen Cabinets

How To Glaze Kitchen Cabinets Diyer S Guide Bob Vila

How To Glaze Kitchen Cabinets

Rescuing And Reviving A Glazed Distressed Kitchen Bella Tucker

How To Glaze Cabinets At Home With The Barkers

How To Glaze Cabinets At Home With The Barkers

How To Glaze Cabinets At Home With The Barkers

How To Glaze Kitchen Cabinets Diyer S Guide Bob Vila

Rescuing And Reviving A Glazed Distressed Kitchen Bella Tucker

How To Paint Antique White Kitchen Cabinets Rustic
Related Posts