How to Paint Kitchen Cabinets Light Grey
Transforming your kitchen cabinets from their current hue to a sophisticated and timeless light grey can breathe new life into your culinary space. Whether you prefer a matte or glossy finish, this beginner-friendly guide will walk you through each essential step of the painting process.
Materials You'll Need:
- Light grey cabinet paint
- Paint primer
- Sandpaper or sanding sponge (120-grit and 220-grit)
- Cleaning solution
- Rags or microfiber cloths
- Paintbrushes or paint roller
- Screwdriver or drill
- Plastic sheeting or drop cloths
Step 1: Preparation
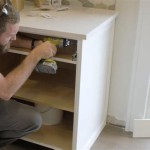
Before you start painting, it's crucial to prepare your cabinets thoroughly. Remove all hardware, such as knobs, handles, and hinges, using a screwdriver or drill. Clean the cabinet surfaces with a cleaning solution and let them dry completely. If your cabinets have a glossy finish, sand them lightly with 120-grit sandpaper to create some tooth for the paint to adhere to.
Step 2: Priming
Primer helps to seal the cabinet surface and ensure a smooth, even finish. Apply a coat of primer to all surfaces of the cabinets, including the doors, drawers, and frames. Let the primer dry completely before proceeding to the next step.
Step 3: First Coat of Paint
Once the primer is dry, it's time for the first coat of paint. Stir the paint thoroughly and apply it with a paintbrush or paint roller in even strokes. If you're using a paintbrush, work in small sections and overlap your strokes slightly. For a paint roller, use a light touch and roll in one direction. Let the first coat dry completely before moving on.
Step 4: Sanding Between Coats
To achieve a flawless finish, sand the first coat of paint lightly with 220-grit sandpaper. This will smooth out any brush strokes or imperfections. Wipe away any dust with a rag or microfiber cloth.
Step 5: Second Coat of Paint
Apply a second coat of paint, following the same technique as the first coat. Pay attention to any missed spots or areas that need more coverage. Let the second coat dry completely for the best results.
Step 6: Finishing Touches
Once the paint is completely dry, reattach the hardware. Plastic sheeting or drop cloths can be removed, and your newly painted light grey kitchen cabinets are ready to be admired. Enjoy the fresh and sophisticated look of your transformed kitchen.
Pro Tips:
- Use a high-quality paint brush or roller for a professional-looking finish.
- Apply thin, even coats of paint rather than thick, gloppy ones.
- Allow ample drying time between each step to prevent peeling or cracking.
- Consider a test area on an inconspicuous spot before painting the entire cabinet.
- If you're not comfortable painting yourself, hiring a professional painter is always an option.

Grey Kitchen Ideas 10 Ways To Style It Cash Carry Kitchens

These Gray Kitchen Cabinets Offer A Neutral Twist Bob Vila

How To Paint Kitchen Cabinets

How To Paint Kitchen Cabinets

The Six Best Paint Colors For Gray Kitchen Cabinets

Grey Kitchen Ideas 10 Ways To Style It Cash Carry Kitchens

20 Grey Kitchen Designs Showing Off Modern Cabinets

These Gray Kitchen Cabinets Offer A Neutral Twist Bob Vila

Gray Kitchen Cabinets Selection You Will Love 2024 Updated

20 Favorite Kitchen Cabinet Paint Colors According To Designers Blue Gray Cabinets Design Grey


