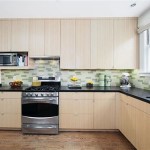
How To Paint Kitchen Cabinets White Distressed
Revamping your kitchen cabinets with a white distressed finish can add a touch of vintage charm and elegance to your space. Embarking on this DIY project requires careful preparation, the right materials, and a keen eye for detail. Follow these comprehensive steps to achieve a stunning white distressed cabinet makeover:
1. Gather Your Materials:
- White cabinet paint (choose a durable, high-quality option)
- Primer (specifically designed for kitchen cabinets)
- Sandpaper (different grits for various stages)
- Painter's tape
- Drop cloths or plastic sheeting
- Paintbrushes (a variety of sizes for different areas)
- Roller and roller cover (for larger surfaces)
- Sanding block or orbital sander
- Tack cloth
2. Prepare Your Kitchen Cabinets:
- Empty the cabinets and remove all hardware, such as knobs and handles.
- Thoroughly clean the cabinet surfaces with a degreaser to remove grease and grime.
- Apply painter's tape to protect areas you don't want to paint, such as countertops and walls.
- Lay down drop cloths or plastic sheeting to protect your floors.
3. Sand the Cabinet Surfaces:
- Start with a medium-grit sandpaper to scuff the cabinet surfaces and create a better bond for the primer and paint.
- Use a finer-grit sandpaper to smooth out any rough spots or imperfections.
- Pay particular attention to corners and detailed areas.
4. Apply Primer:
- Stir the primer thoroughly before use.
- Apply a thin, even coat of primer using a paintbrush or roller.
- Allow the primer to dry completely according to the manufacturer's instructions.
5. Paint the Cabinet Doors and Drawers:
- Stir the white cabinet paint thoroughly before use.
- Apply a thin, even coat of paint using a paintbrush or roller.
- Allow the paint to dry completely before applying additional coats.
- Sand lightly between coats to achieve a smooth finish.
6. Distress the Painted Surfaces:
- Once the final coat of paint is completely dry, start distressing the surfaces.
- Use a sanding block or orbital sander with a fine-grit sandpaper.
- Focus on the edges, corners, and raised areas to create a worn, aged look.
- Be subtle and avoid over-distressing the surfaces.
7. Protect the Finish:
- After distressing the paint, apply a clear coat sealant to protect the finish.
- Choose a sealant specifically designed for kitchen cabinets to withstand wear and tear.
8. Reattach Hardware:
- Once the sealant is dry, reattach the cabinet hardware, such as knobs and handles.
- Admire your newly distressed white kitchen cabinets!
Remember, if you're working with older cabinets or have complex designs, it's always advisable to seek professional assistance to ensure the best results.

Rescuing And Reviving A Glazed Distressed Kitchen Bella Tucker

Distressed Kitchen Cabinets How To Distress Your Our Fifth House

Old Oak Cabinets Painted White And Distressed Hometalk

Old White Distressed Kitchen By Agnieszka Krawczyk Annie Sloan

Distressed White Kitchen Cabinets For Paige Looks Great With The Marble Too Rustic

Rescuing And Reviving A Glazed Distressed Kitchen Bella Tucker

Painting Kitchen Cabinets With Chalk Paint Simply Today Life

Kitchen Makeover How To Paint Stylish Distressed Farmhouse Cabinets

Stress Less With Distressed Cabinets

Distressed And Antiqued Kitchen Cabinets
Related Posts

