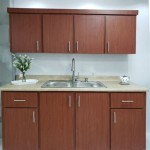
How to Paint Kitchen Units DIY
Revitalizing your kitchen cabinets with a fresh coat of paint can instantly revamp your home's aesthetics. While this DIY project may appear daunting, it's surprisingly manageable with careful planning and execution. Here's a comprehensive guide to painting kitchen units like a pro:
Materials You'll Need:
1. Kitchen cabinet paint 2. Primer 3. Sandpaper (150-grit and 220-grit) 4. Screwdriver 5. Painter's tape 6. Paintbrushes and rollers 7. Degreaser 8. Tack cloth
Preparation:
1. Remove hardware: Unscrew and set aside all cabinet doors, handles, and hinges. 2. Clean surfaces: Wipe down all surfaces with a degreaser to remove any grease or dirt. 3. Lightly sand: Use 150-grit sandpaper to lightly sand surfaces, removing any imperfections or previous paint. 4. Fill holes: If necessary, fill in any holes or gaps with wood filler. 5. Prime: Apply a coat of primer to all surfaces. Primer helps improve paint adhesion and creates a consistent base.
Painting:
1. Paint the insides: Paint the inside surfaces of the cabinets first, allowing the paint to dry before moving on to the fronts. 2. Paint the fronts: Apply two to three thin coats of kitchen cabinet paint to the front surfaces. Allow each coat to dry thoroughly before applying the next. 3. Brush or roll: Use a paintbrush for detailed areas and a roller for larger surfaces. 4. Paint edges: Pay special attention to edges and corners, ensuring even coverage. 5. Remove tape: Once the final coat is dry, carefully remove the painter's tape.
Reassembly:
1. Reattach hardware: Screw back on the cabinet doors, handles, and hinges. 2. Touch up: If needed, touch up any missed areas or imperfections. 3. Clean brushes: Thoroughly clean your paintbrushes and rollers. 4. Admire: Step back and admire your newly painted kitchen units.
Tips for Success:
1. Use high-quality paint: Invest in kitchen cabinet-specific paint for durability and adhesion. 2. Apply thin coats: Apply multiple thin coats rather than one thick coat to prevent dripping and unevenness. 3. Sand between coats: Lightly sand the surface between coats to remove any bumps or imperfections. 4. Protect surfaces: Cover countertops and floors with drop cloths to prevent paint spills. 5. Allow ample drying time: Follow the manufacturer's instructions and allow adequate drying time between coats. 6. Be patient: Painting kitchen units requires patience and attention to detail. Don't rush the process. 7. Enjoy the results: The end result will be a beautifully refreshed kitchen that you can enjoy for years to come.

How To Paint Kitchen Cabinets In 7 Simple Steps

A Diy Project Painting Kitchen Cabinets

Diy Painting Your Kitchen Cabinets The Right Way

20 Diy Painted Kichen Cabinet Ideas A Cultivated Nest

How To Paint Kitchen Cabinets Diy Makeover

Diy Painted Oak Kitchen Cabinets Makeover

How To Simply Update Your Cabinets With Paint In A Day This Is Our Bliss

How To Paint Kitchen Cabinets Without Sanding Or Priming

How To Paint Kitchen Cabinets Without Sanding Sustain My Craft Habit

How To Repaint Kitchen Cabinets Painted By Kayla Payne