How to Paint Old Timber Kitchen Cupboards
Giving old timber kitchen cupboards a new lease on life with a fresh coat of paint can dramatically transform the heart of your home. This project combines practicality with aesthetics, allowing you to update your kitchen while preserving the character of your existing cabinets. The process involves several steps, from careful preparation to meticulous application, ensuring a durable and beautiful finish.
Preparation is Key:
Before embarking on the painting process, proper preparation is crucial. This is the foundation for a successful and long-lasting outcome.
The first step is to empty the cupboards completely. Remove everything from the shelves and drawers, ensuring you have ample space to work. Once empty, carefully clean the cupboards. Use warm soapy water and a soft cloth to remove grease, grime, and any food residue. Pay close attention to the handles and hinges, as these areas tend to accumulate dirt.
After cleaning, allow the cupboards to dry thoroughly before proceeding to the next step. If you are dealing with stained timber, sanding is necessary. Start with a medium-grit sandpaper to remove any rough edges and imperfections. Once the surface is smooth, use a fine-grit sandpaper to create a uniform finish.
Before painting, fill any imperfections in the wood with a wood filler. This will create a smooth and even surface for the paint to adhere to. Once the filler has dried, sand it down to create a smooth, seamless transition with the rest of the cabinet.
Prepping for Paint:
After the sanding and filling stages, you'll need to take steps to prepare the cupboards for painting. It is essential to tape off any areas that you do not wish to paint. This includes the surrounding walls, countertops, and the backs of the cupboards. Use painter's tape for this purpose, as it is designed to peel away cleanly without damaging surfaces.
The next stage is to prime the cabinets. Primer is a crucial element in the painting process, acting as a barrier between the wood and the paint. It ensures better adhesion and prevents the wood's tannins from bleeding through the paint, potentially affecting the final color.
Choose a primer specifically designed for wood. Apply a thin, even coat with a brush or roller. Allow the primer to dry completely before moving on to the next step.
Choosing the Right Paint:
Selecting the right paint is a crucial step in this process. The type of paint you choose will affect the final look and durability of your cabinets. Consider the following factors:
-
Finish:
Choose a paint finish that complements the style of your kitchen. A high-gloss finish will create a sleek and modern look, while a satin or eggshell finish provides a softer, more traditional feel. -
Durability:
Kitchen cupboards experience constant use, making it essential to choose a paint that is durable and resistant to scratches and chips. Look for a paint specifically designed for kitchen use. -
Color:
Select a color that complements your existing kitchen decor. Consider the overall mood you want to create and the color scheme of your countertops, backsplash, and appliances.
Painting with Precision:
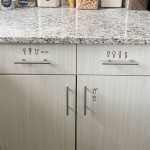
Now comes the most satisfying part: applying the paint. Begin by carefully applying the paint. Thin coats are better than thick coats, and multiple thin coats will create a smoother and more durable finish. Use a high-quality brush or roller for a professional result.
Start by painting the edges and corners of the cupboards. Then work on the larger surface areas, using long, even strokes. Avoid using a brush for large areas, as this can leave brush marks.
Allow each coat of paint to dry completely before applying the next. This will ensure a smooth and even finish. It is recommended to apply at least two coats of paint to achieve the desired color depth and coverage.
Finishing Touches:
Once the paint has dried, you can remove the painter's tape. Carefully peel away the tape, ensuring you do not damage the freshly painted surface.
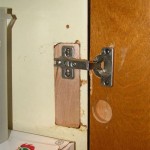
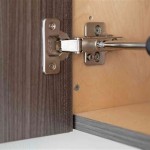
You might consider refinishing the handles and hinges of the cabinet doors. Sand them down, clean, and apply a coat of paint or a clear varnish to bring them back to life.
Finally, step back and admire your handiwork. With careful preparation and attention to detail, you have transformed your old timber kitchen cupboards into a beautiful and functional centerpiece in your kitchen.

How To Paint Kitchen Cabinets In 7 Simple Steps

Painting Wooden Kitchen Cupboards

How To Modernise Your Kitchen Without A Full Scale Renovation

Avoid These Mistakes How To Paint Cabinets That Are Already Painted Grace In My Space

Step By How To Paint Your Kitchen Cabinets

How To Paint Kitchen Cabinets Forbes Home

Kitchen Spray Painting The Facelift Company

How To Paint Veneer Cabinets For A Long Lasting Finish Anika S Diy Life

Tips And Ideas How To Update Oak Or Wood Cabinets Paint Stain More

How To Paint Kitchen Cabinets In 7 Simple Steps
Related Posts