How To Paint Old Wooden Cabinets: A Comprehensive Guide
Painting old wooden cabinets is a cost-effective and transformative way to update a kitchen or bathroom without the expense of replacing the entire cabinetry. The process, while not inherently complex, requires meticulous preparation and careful execution to achieve a durable and aesthetically pleasing finish. This guide provides a detailed, step-by-step approach to painting old wooden cabinets, ensuring a professional-looking result.
Before commencing any work, a thorough assessment of the existing cabinets is crucial. Identify any structural damage, such as loose hinges, warped doors, or rot. Addressing these issues prior to painting will ensure the longevity and stability of the finished product. Additionally, consider the existing finish. Is it a varnish, a lacquer, or a previous coat of paint? Knowing the existing finish will influence the choice of primers and paints used.
Gathering the necessary tools and materials is the next essential step. This includes, but is not limited to: degreaser, cleaning cloths, sandpaper (various grits), a sanding block or orbital sander, wood filler, a putty knife, painter's tape, a drop cloth or plastic sheeting, primer, paint, paintbrushes (both angled and flat), paint rollers (foam and microfiber), a paint tray, and potentially a respirator or face mask for protection against dust and fumes.
Step 1: Preparation is Key
The success of any paint job hinges on thorough preparation. This stage is arguably the most time-consuming but also the most critical. Begin by removing all cabinet doors and drawers. Label each door and drawer with a corresponding number or letter to ensure they are reinstalled in their original positions. This prevents alignment issues and ensures proper closure.
Remove all hardware, including hinges, knobs, and pulls. If the hardware is to be reused, clean it thoroughly with a degreaser and consider soaking it in vinegar to remove rust or tarnish. If the hardware is being replaced, now is the time to source the new components. Fill any existing hardware holes with wood filler if the new hardware requires a different hole placement. Let the wood filler dry completely according to the manufacturer's instructions and sand it smooth.
The next step is to thoroughly clean the cabinet doors, drawers, and frames. Use a strong degreaser to remove any grease, grime, or food residue. Kitchen cabinets, in particular, tend to accumulate grease over time, which can prevent paint from adhering properly. Rinse the surfaces thoroughly with clean water and allow them to dry completely. Avoid using excessive water, as this can damage the wood.
Once the cabinets are clean and dry, begin the sanding process. Sanding provides a "tooth" for the primer to adhere to, creating a stronger bond and preventing peeling. Start with a medium-grit sandpaper (around 120-grit) to remove any existing sheen or imperfections. For more stubborn finishes, a coarser grit (around 80-grit) may be necessary initially. After the initial sanding, switch to a finer-grit sandpaper (around 220-grit) to smooth the surface and remove any sanding marks. Sand in the direction of the wood grain whenever possible. Use a sanding block or orbital sander for larger, flat surfaces and a smaller sanding block for corners and edges. Remember to wear a respirator or face mask to protect against dust inhalation.
After sanding, thoroughly remove all sanding dust. Use a vacuum cleaner with a brush attachment to remove the majority of the dust, followed by a tack cloth to pick up any remaining residue. A tack cloth is a slightly sticky cloth that effectively removes fine dust particles. A clean and dust-free surface is essential for a smooth and even paint finish.
Inspect the cabinets for any imperfections, such as dents, scratches, or chips. Fill these imperfections with wood filler, applying it with a putty knife. Overfill slightly, as the wood filler will shrink as it dries. Once the filler is completely dry, sand it smooth, blending it seamlessly with the surrounding surface. Again, remove all sanding dust before proceeding.
Finally, protect the surrounding areas with painter's tape and drop cloths. Tape off any areas that should not be painted, such as countertops, walls, and appliance edges. Cover the floor with drop cloths or plastic sheeting to protect it from paint splatters. Proper protection will minimize cleanup time and prevent unwanted paint on surrounding surfaces.
Step 2: Priming the Cabinets
Priming is a crucial step in painting old wooden cabinets. Primer provides a uniform surface for the paint to adhere to, seals any stains or odors, and prevents the paint from soaking into the wood. Choose a high-quality primer that is compatible with the type of paint being used. Oil-based primers are generally recommended for cabinets that have been previously painted with oil-based paints, while latex primers are suitable for cabinets that have been previously painted with latex paints. Consult with a paint specialist at a local hardware store for personalized recommendations.
Apply the primer in thin, even coats using a brush or roller. A brush is typically used for corners, edges, and detailed areas, while a roller is used for larger, flat surfaces. When using a brush, apply the primer in the direction of the wood grain. When using a roller, work in small sections, overlapping each stroke slightly. Avoid applying too much primer at once, as this can lead to drips and runs. Multiple thin coats are always better than one thick coat.
Allow the primer to dry completely according to the manufacturer's instructions. Drying times can vary depending on the type of primer and the ambient temperature and humidity. Once the primer is dry, inspect the surface for any imperfections, such as drips, runs, or uneven areas. Sand these imperfections smooth with a fine-grit sandpaper (around 320-grit) and remove all sanding dust before proceeding. Applying a second coat of primer may be necessary, especially if the cabinets have a dark or heavily stained finish. Repeat the priming process, allowing the second coat to dry completely before moving on to the painting stage.
If tannin bleed-through is a concern (often occurring with certain wood types), utilize a stain-blocking primer. This type of primer prevents tannins from the wood from seeping through the paint, causing discoloration. Apply the stain-blocking primer as directed, ensuring thorough coverage.
Step 3: Painting the Cabinets
Once the primer is completely dry and the surface is smooth and dust-free, the cabinets are ready to be painted. Choose a high-quality paint that is specifically designed for cabinets and trim. These paints are typically more durable and resistant to scratches and stains than standard wall paints. Consider using a paint with a satin or semi-gloss finish, as these finishes are easier to clean than matte finishes. Again, consult with a paint specialist for recommendations on the best paint for the specific project.
Apply the paint in thin, even coats using a brush or roller, similar to the priming process. Use a brush for corners, edges, and detailed areas, and a roller for larger, flat surfaces. When using a brush, apply the paint in the direction of the wood grain. When using a roller, work in small sections, overlapping each stroke slightly. Avoid applying too much paint at once, as this can lead to drips and runs. Multiple thin coats are always better than one thick coat.
Allow the paint to dry completely according to the manufacturer's instructions. Drying times can vary depending on the type of paint and the ambient temperature and humidity. Once the paint is dry, inspect the surface for any imperfections, such as drips, runs, or uneven areas. Sand these imperfections smooth with a fine-grit sandpaper (around 320-grit) and remove all sanding dust before proceeding. Apply a second coat of paint, repeating the painting process, allowing the second coat to dry completely before moving on to the final stage.
Depending on the desired aesthetic and durability, a third coat of paint may be applied. Follow the same procedure as with the previous coats, ensuring proper drying and sanding between each application. The key to a professional-looking finish is patience and attention to detail.
After the final coat of paint has dried completely, carefully remove the painter's tape. Pull the tape away from the painted surface at a 45-degree angle to prevent the paint from chipping or peeling. If any paint does chip or peel, touch it up with a small brush.
Step 4: Reassembly and Finishing Touches
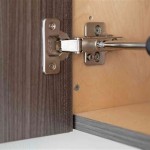
Once the paint is completely dry, reattach the hardware, including hinges, knobs, and pulls. Ensure that the hardware is properly aligned and securely fastened. If new hardware was installed, ensure the screws are the correct length to avoid damaging the cabinet doors or frames.
Reinstall the cabinet doors and drawers in their original positions, referring to the labeling system established during the removal process. Adjust the hinges as needed to ensure that the doors and drawers are properly aligned and close smoothly. Test all drawers and doors to confirm proper function. If any drawers or doors are sticking or rubbing, adjust the hinges or slides as necessary.
Thoroughly clean the surrounding area, removing all drop cloths, plastic sheeting, and painter's tape. Dispose of all waste materials properly. Inspect the finished cabinets for any imperfections or areas that need touch-up. Touch up any areas as needed with a small brush, using the same paint that was used for the main coats. Allow the touch-up paint to dry completely before using the cabinets.
Consider applying a clear coat or sealant to the painted cabinets for added protection and durability. A clear coat will protect the paint from scratches, stains, and wear and tear. Choose a clear coat that is compatible with the type of paint being used. Apply the clear coat in thin, even coats using a brush or roller, following the manufacturer's instructions. Allow the clear coat to dry completely before using the cabinets.
Finally, stand back and admire the newly painted cabinets. The transformation can be dramatic, breathing new life into an old kitchen or bathroom. With proper preparation and careful execution, painting old wooden cabinets can be a rewarding and cost-effective DIY project.

How To Paint Old Kitchen Cabinets Save Yourself 1 000s Builds By Maz

Exactly How To Paint Oak Cabinets Written By A Pro Painted Kayla Payne

How To Update Old Wood Kitchen Cabinets

The Best Way To Paint Kitchen Cabinets No Sanding Palette Muse

How To Paint Grainy Oak Cabinets And Get A Smooth Finish

Painting Kitchen Cabinets With A Sprayer Lemon Thistle

Diy Kitchen Cabinet Painting The Easy Way

Painting Oak Cabinets Transform Your Kitchen

A Step By Guide To Painting Kitchen Cabinets With Kilz Primer Blog

The Easy Way To Paint Your Kitchen Cabinets More Mrs E
Related Posts

