How to Paint Older Kitchen Cabinets: A Step-by-Step Guide to a Stunning Transformation
Tired of the outdated look of your kitchen cabinets but can't afford a complete replacement? Don't despair! Painting older cabinets is not as daunting as it may seem, and with a little elbow grease and the right techniques, you can transform them into a breathtaking focal point of your kitchen.
In this comprehensive guide, we will lead you through every step of the painting process, from preparation to finishing, ensuring a professional-looking and durable result.
Essential Steps for Painting Older Kitchen Cabinets
1. Preparation: The Key to Success
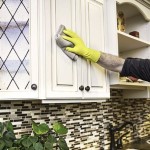
Start by thoroughly cleaning the cabinets with a degreasing cleaner. Remove all hardware, including knobs, handles, and hinges. Fill any dents or holes with wood filler and sand smooth when dry.
Protect the surrounding areas from paint splatter by covering them with drop cloths or plastic sheeting.
2. Sanding: Smoothing Out the Surfaces
For a smooth paint finish, sanding is crucial. Lightly sand the cabinets using 120-grit sandpaper to remove any imperfections and scuff up the surface for better paint adhesion.
Use a fine-grit sandpaper (220-grit) for a final sanding to create an ultra-smooth surface.
3. Priming: Creating a Solid Base
Priming provides a barrier between the old finish and the new paint, ensuring better adhesion and preventing stains from bleeding through.
Apply a high-quality primer specifically designed for kitchen cabinets. Allow the primer to dry thoroughly before painting.
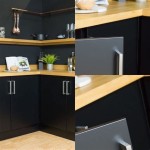
4. Choosing the Right Paint and Color
The choice of paint and color is a matter of personal preference. For a durable finish, opt for a cabinet-specific paint in a satin or semi-gloss finish.
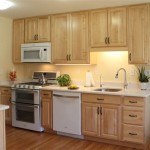
Consider the overall kitchen decor and lighting when selecting a color. Lighter colors can brighten a small kitchen, while darker colors can add depth and drama.
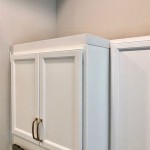
5. Painting: Applying the Color
Using a high-quality brush or roller, apply thin, even coats of paint to the cabinets. Allow each coat to dry completely before applying the next.
For a smoother finish, lightly sand the cabinets between coats using a fine-grit sandpaper.
6. Finishing Touches: Completing the Transformation
Once the paint is completely dry, reattach the hardware. If desired, add new knobs and handles for an updated look.
Apply a clear polycrylic topcoat for added protection and durability. This will protect the paint from scratches and spills.
7. Maintenance: Keeping the Cabinets Looking Their Best
To maintain the beauty of your painted cabinets, clean them regularly with a mild soap and water solution.
Avoid using harsh cleaners or abrasive sponges that may damage the finish. If necessary, touch up any scratches or chips with a matching paint color.

How To Paint Kitchen Cabinets In 7 Simple Steps

Avoid These Mistakes How To Paint Cabinets That Are Already Painted Grace In My Space

Budget Kitchen Renovation With Diy Shaker Painted Cabinets I

The Best Way To Paint Kitchen Cabinets No Sanding Palette Muse

My Painted Cabinets Two Years Later The Good Bad Ugly

How To Paint Kitchen Cabinets Forbes Home

How To Paint Kitchen Cabinets

How To Re Paint Your Yucky White Cabinets

How To Paint Your Cabinets In A Weekend Without Sanding Them Chris Loves Julia

How To Paint Fake Wood Kitchen Cabinets Simple Made Pretty 2024
Related Posts