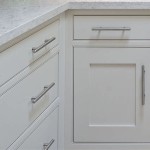
How to Paint Over Stained Kitchen Cabinets: A Comprehensive Guide
Revitalizing your kitchen with freshly painted cabinets can be a cost-effective and rewarding project, even if your existing cabinets are stained. Stained cabinets require a specific approach to ensure a durable and aesthetically pleasing finish. This guide will walk you through the essential steps of painting over stained kitchen cabinets, from cleaning and preparation to application and finishing.
1. Preparation and Cleaning
Thoroughly clean the cabinets to remove grease, dirt, and any existing paint residue. Use a degreasing cleaner and a sponge or cloth to wipe down the surfaces. Rinse the cabinets with clean water and allow them to dry completely.
Lightly sand the cabinets using fine-grit sandpaper (120 or higher) to remove any imperfections or glossy finish. This will help the paint adhere better. Wipe away any dust with a tack cloth.
2. Prime the Cabinets
Applying a primer is crucial for stained cabinets. It blocks stains, ensures better paint adhesion, and creates a uniform surface for painting. Choose a high-quality primer specifically designed for stained cabinets.
Use a paintbrush or roller to apply a thin, even coat of primer to all surfaces of the cabinets, including the doors, frames, and interiors. Allow the primer to dry completely.
3. Choose the Right Paint
For stained cabinets, oil-based or latex paint with a satin or semi-gloss finish is recommended. Oil-based paint is more durable and resistant to stains, while latex paint is easier to clean and apply.
Select a paint color that complements your kitchen decor and consider the overall style and ambiance you want to create.
4. Paint Application
Start by painting the edges and corners of the cabinets using a small brush. Use a roller to paint the larger surfaces in long, even strokes. Apply multiple thin coats, allowing each coat to dry before applying the next.
If using oil-based paint, allow at least 24 hours for drying between coats. For latex paint, allow 4-6 hours of drying time.
5. Sand and Finish
Once the final coat of paint has dried, lightly sand the cabinets with fine-grit sandpaper (220 or higher) to smooth any rough edges or brushstrokes. Wipe away any dust with a tack cloth.
Apply a clear polyurethane finish to protect the painted surface from wear and tear. Choose a finish with the desired sheen (gloss, semi-gloss, or satin) and apply it evenly using a brush or foam applicator.
Tips for Success
- Test the paint and primer on an inconspicuous area of the cabinet before applying it to the entire surface.
- Use high-quality materials and tools for best results.
- Allow ample drying time between coats and before using the cabinets.
- Ventilate the area well during painting and finishing.
- Apply paint and finish in thin, even coats to prevent drips and runs.
- Take your time and enjoy the process of transforming your kitchen.
By following these steps carefully, you can successfully paint over stained kitchen cabinets and give them a fresh, updated look that will enhance the style and functionality of your kitchen for years to come.

Steps In Painting Kitchen Cabinets That Are Stained Restoring

Cabinet Refinishing Guide

Can I Paint Over Stained Wood Williams Painting

How To Paint Kitchen Cabinets In 7 Simple Steps

How To Paint Kitchen Cabinets A Step By Guide Confessions Of Serial Do It Yourselfer

Avoid These Mistakes How To Paint Cabinets That Are Already Painted Grace In My Space

Can I Paint Over Stained Wood Williams Painting

Painted Vs Stained Cabinets Which One To Choose Sir Paints A Lot

How To Paint Veneer Cabinets For A Long Lasting Finish Anika S Diy Life

How To Paint Laminate Kitchen Cabinets Perfect Finish Tips
Related Posts


