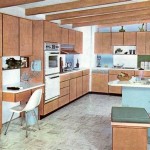
How To Paint Timber Kitchen Cabinets
Painting timber kitchen cabinets is a cost-effective way to update a kitchen's aesthetic without the expense of a full remodel. A fresh coat of paint can transform outdated or worn cabinets, breathing new life into the heart of the home. The process, while manageable for a DIY enthusiast, requires careful preparation, the right materials, and attention to detail to achieve a professional-looking finish. This article provides a comprehensive guide to painting timber kitchen cabinets, covering everything from initial preparation to the final coat of paint.
Preparation: The Foundation of a Successful Paint Job
Proper preparation is paramount for achieving a durable and aesthetically pleasing paint finish on timber kitchen cabinets. This stage often takes the longest but is crucial for ensuring the paint adheres correctly and the final result is long-lasting. Inadequate preparation can lead to peeling, chipping, and an overall unprofessional appearance.
1. Removing Cabinet Doors and Hardware: The first step is to remove all cabinet doors and drawers. This allows for easier access to all surfaces and prevents paint from getting on hinges, knobs, and pulls. Use a screwdriver to detach the hinges from the cabinet frame and the door. Carefully label each door and drawer with a corresponding number or letter that matches its location on the cabinet frame. This is essential for reassembling the cabinets correctly after painting. Store all hardware (hinges, knobs, pulls) in labeled bags to prevent loss or confusion. Consider replacing old hardware with new, updated pieces to further enhance the kitchen's new look.
2. Cleaning the Surfaces: Cabinets, especially those in the kitchen, accumulate grease, grime, and food splatters over time. These contaminants can prevent paint from adhering properly. Clean all cabinet doors, drawers, and frames thoroughly using a degreasing cleaner. Trisodium phosphate (TSP) is a powerful cleaner that effectively removes grease and dirt. However, TSP can be harsh, so it’s essential to wear gloves and eye protection. Alternatively, a commercially available kitchen cleaner designed for grease removal can be used. After cleaning, rinse all surfaces thoroughly with clean water and allow them to dry completely.
3. Sanding the Surfaces: Sanding is crucial for creating a textured surface that the primer and paint can grip onto. Use medium-grit sandpaper (around 120-grit) to lightly sand all surfaces. The goal is not to remove the existing finish entirely but to scuff it up to create a better bonding surface. For cabinets with a high-gloss finish, a more aggressive sanding may be necessary. After sanding, use a tack cloth to remove all sanding dust. A vacuum cleaner with a brush attachment can also be used to remove dust from crevices and hard-to-reach areas. Dust particles can interfere with the paint finish, resulting in a bumpy or uneven surface.
4. Repairing Imperfections: Examine the cabinets for any imperfections, such as dents, scratches, or cracks. Use wood filler to repair these imperfections. Apply the wood filler according to the manufacturer's instructions, allowing it to dry completely. Once dry, sand the filled areas smooth so they are flush with the surrounding surface. Remove any dust created during the sanding process.
5. Masking and Protecting: Protect the surrounding areas from paint splatters by using painter's tape and drop cloths. Cover countertops, floors, and appliances with drop cloths to prevent paint from getting on them. Use painter's tape to mask off areas that you don't want to paint, such as walls, backsplashes, and the inside edges of cabinet frames. Ensure the tape is applied firmly to prevent paint from seeping underneath.
Priming: Ensuring Adhesion and a Uniform Finish
Priming is an essential step in painting timber kitchen cabinets, as it creates a uniform surface for the paint to adhere to. Primer helps to block stains, seal the wood, and provide a smooth base for the topcoat. Choosing the right primer is crucial for achieving a professional-looking and durable finish.
1. Choosing the Right Primer: For timber cabinets, an oil-based or a high-quality stain-blocking primer is recommended. Oil-based primers provide excellent adhesion and stain-blocking properties. However, they require mineral spirits for cleanup and can have a strong odor. Water-based primers are a good alternative, especially for those concerned about VOCs (volatile organic compounds). Ensure the water-based primer is specifically formulated for stain-blocking and adhesion to glossy surfaces. Consult with a paint specialist at a local hardware store to determine the best primer for the specific type of wood and existing finish on the cabinets.
2. Applying the Primer: Apply the primer in thin, even coats using a brush, roller, or sprayer. A brush is ideal for painting smaller areas and intricate details, while a roller is best for larger, flat surfaces. A sprayer can provide the smoothest finish, but it requires more skill and preparation. If using a brush, choose a high-quality brush with synthetic bristles. If using a roller, choose a foam roller with a short nap. If using a sprayer, follow the manufacturer's instructions for diluting the primer and adjusting the spray settings. Apply at least two coats of primer, allowing each coat to dry completely before applying the next. Lightly sand the primed surface with fine-grit sandpaper (around 220-grit) to smooth out any imperfections and create an even better bonding surface for the paint.
3. Drying Time: Allow the primer to dry completely according to the manufacturer's instructions. Drying time can vary depending on the type of primer, the humidity, and the temperature. It is important to ensure the primer is fully dry before applying the paint, as this will prevent adhesion problems and ensure a durable finish.
Painting: Applying the Final Coat
The final stage is painting the cabinets, bringing the desired color and aesthetic to the kitchen. Choosing the right paint and applying it correctly are crucial for achieving a beautiful and long-lasting finish.
1. Choosing the Right Paint: For kitchen cabinets, a high-quality enamel paint is recommended. Enamel paints are durable, washable, and resistant to chipping and scratching. Choose a paint with a semi-gloss or gloss finish, as these finishes are easier to clean and more resistant to moisture. Consider the overall aesthetic of the kitchen when choosing the paint color. Lighter colors can brighten up a small kitchen, while darker colors can add drama and sophistication. Obtain paint samples and test them in different lighting conditions to ensure the color is suitable.
2. Applying the Paint: Apply the paint in thin, even coats using a brush, roller, or sprayer, similar to the priming process. A brush is suitable for detail work, while a roller is better for larger surfaces. A sprayer will provide the smoothest finish, but it requires practice and proper ventilation. Apply at least two coats of paint, allowing each coat to dry completely before applying the next. Lightly sand the painted surface with fine-grit sandpaper (around 320-grit) between coats to smooth out any imperfections and create a smooth, professional-looking finish. Ensure proper ventilation during painting and drying to minimize exposure to fumes.
3. Drying and Curing Time: Allow the paint to dry completely according to the manufacturer's instructions. Drying time can vary depending on the type of paint, the humidity, and the temperature. Once the paint is dry to the touch, allow it to cure for several days before reassembling the cabinets and using them. Curing allows the paint to harden and become more durable. Avoid placing heavy objects on the painted surfaces during the curing process.
4. Reassembling the Cabinets: Once the paint is fully cured, reassemble the cabinets by reattaching the hinges and hardware. Use the labels that were created during the disassembly process to ensure that each door and drawer is reinstalled in its original location. Clean the new or existing hardware before installation. Adjust the hinges as needed to ensure that the doors and drawers open and close smoothly. Touch up any imperfections with a small brush and paint if necessary.
By following these steps meticulously, homeowners can successfully paint their timber kitchen cabinets, creating a refreshed and revitalized kitchen space without incurring the significant costs associated with a complete cabinet replacement. Patience and attention to detail are key to achieving a professional-looking and durable finish.

How To Paint Kitchen Cabinets Forbes Home

How To Paint Kitchen Cupboard Doors The Hub

Painting Wooden Kitchen Cupboards

Tutorial Paint A Wooden Kitchen Cabinets Bathroom Ideas

Tips Tricks To Paint Honey Oak Kitchen Cabinets Cottage Living And Style

How To Paint Kitchen Cabinets

How To Paint Kitchen Cabinets In 7 Simple Steps

Cabinet Refinishing Guide

Avoid These Mistakes How To Paint Cabinets That Are Already Painted Grace In My Space

How To Modernise Your Kitchen Without A Full Scale Renovation


