How to Paint Your Old Kitchen Cabinets
Revitalizing old kitchen cabinets with a fresh coat of paint is a cost-effective way to transform the heart of your home. Painting cabinets not only enhances their appearance but also allows for customization and a new design aesthetic. This guide provides a comprehensive approach to painting kitchen cabinets, encompassing preparation, painting techniques, and finishing touches.
Preparation: The Foundation for Success
A meticulous preparation process is crucial for achieving a professional paint finish. It involves removing existing finishes, cleaning the surfaces, and ensuring smooth, even surfaces for paint application:
1.
Remove Hardware:
Carefully remove all cabinet doors, drawers, and hardware. This allows for thorough cleaning, sanding, and painting without obstruction.2.
Clean Surfaces:
Clean the cabinets thoroughly using a degreaser or TSP (trisodium phosphate) solution. This step removes grease, grime, and any residues, enabling the paint to adhere properly.3.
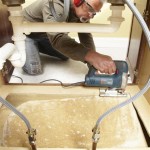
Sanding and Patching:
Sand all surfaces with fine-grit sandpaper to create a smooth, even surface. Use a putty knife to fill any cracks or holes with wood filler, allowing it to dry completely before sanding again.4.
Prime:
Apply a high-quality primer specifically designed for cabinets. This layer helps the paint adhere better, provides a uniform surface, and ensures a durable finish.Painting Techniques: Achieving a Professional Finish
Skillful painting techniques are essential for achieving a smooth, even coat of paint. Consider the following steps:
1.
Choose the Right Paint:
Select a high-quality cabinet paint formulated for durability, moisture resistance, and easy cleaning. Opt for a paint specifically intended for kitchen use, as these paints are generally more durable and resistant to scratches and stains.2.
Thin the Paint:
If using oil-based paint, thin it slightly with paint thinner to improve flow and prevent brush strokes. Water-based paint generally does not require thinning.3.
Brush/Roller Technique:
For smaller areas and detailed trim, use a high-quality angled brush. For larger surfaces, use a foam or microfiber roller. Ensure consistent strokes and avoid overloading the brush or roller to prevent drips or uneven coverage.4.
Multiple Coats:
Apply multiple thin coats of paint, allowing each coat to dry completely before applying the next. This method ensures a smooth, opaque finish.Finishing Touches: Adding a Touch of Perfection
Once the painting process is complete, a few finishing touches can elevate the overall appearance of the cabinets:
1.
Caulk and Trim:
Apply caulk to any gaps between the cabinets and walls, or between cabinet doors and frames. This creates a smooth, clean look and prevents dirt buildup.2.
Reinstall Hardware:
Carefully reinstall the cabinet hardware, ensuring it is properly secured and aligned.3.
Clean Up:
After the paint dries completely, clean any excess paint or spills using a damp cloth.With the right preparation, techniques, and finishing touches, painting your old kitchen cabinets can be an enjoyable and rewarding project. The transformation of your kitchen will be a testament to your effort and creativity.

Avoid These Mistakes How To Paint Cabinets That Are Already Painted Grace In My Space

How To Paint Kitchen Cabinets In 7 Simple Steps

How To Make Old Cabinets Look New With Paint

How To Paint Kitchen Cabinets A Step By Guide Confessions Of Serial Do It Yourselfer

My Painted Cabinets Two Years Later The Good Bad Ugly

How To Paint Your Kitchen Cabinets Houzz

How To Re Paint Your Yucky White Cabinets

Painting Your Kitchen Cabinets Is Easy Just Follow Our Step By Tutorial
How To Paint Kitchen Cabinets In 7 Simple Steps

Painted Kitchen Cabinets One Year Later The Palette Muse
Related Posts