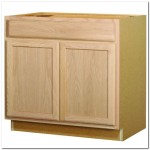
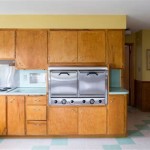
How to Prep Kitchen Cabinets for Staining: A Comprehensive Guide
Transforming kitchen cabinets with a fresh coat of stain is a worthwhile project that can dramatically enhance the look and feel of your kitchen. However, achieving a flawless finish requires proper preparation, and this guide will walk you through the essential steps to ensure your cabinets are ready for their makeover.
1. Cleaning the Cabinets
Begin by thoroughly cleaning the cabinet doors and frames to remove grease, dirt, and debris that may interfere with the stain's adhesion. Use a mild dishwashing detergent mixed with warm water and a non-abrasive sponge or cloth. Avoid using harsh chemicals or steel wool, as they can damage the wood surface.
2. Sanding the Surface
Sanding removes the old finish, creating a smooth, even surface for the stain to penetrate. Start with 120-grit sandpaper for initial sanding, then progress to 220-grit sandpaper for a finer finish. Use circular motions and apply even pressure throughout the sanding process.
3. Tacking the Surface
After sanding, wipe down the cabinets with a tack cloth to remove any remaining sanding dust. This ensures that the stain will adhere properly and prevents the dust from marring the finish.
4. Repairing Imperfections
Inspect the cabinets for any cracks, dents, or scratches. Fill in small imperfections with a wood filler that matches the cabinet color. Apply the filler with a putty knife and allow it to dry completely before sanding it down to match the surrounding surface.
5. Taping and Masking
Before applying the stain, protect areas that should not be stained, such as hardware, countertops, and adjacent walls. Use painter's tape to secure plastic wrap or tarps over these areas.
6. Staining the Cabinets
Apply the stain using a brush or foam applicator, following the manufacturer's instructions. Apply even, thin coats, allowing each coat to dry completely before adding the next. Sand lightly between coats with 220-grit sandpaper to smooth out any raised grain.
7. Sealing the Finish
Once the stain is dry, protect the finish with a clear topcoat, such as polyurethane or varnish. Apply two or more coats, allowing each coat to dry before adding the next. Use a smooth, even application to prevent brush marks or drips.
Additional Tips

Staining Your Wood Cabinets Darker Young House Love

How To Stain Wood Cabinets True Value

How To Refinish Wood Cabinets The Easy Way Love Remodeled

Diy Staining Oak Cabinets Eclectic Spark

How To Clean Prep Wood Kitchen Cabinets Before Painting Do Dodson Designs

Staining Kitchen Cabinets Pictures Ideas Tips From

How To Make Rustic Kitchen Cabinets By Refinishing Them The Best Stain Color Amanda Katherine

Gel Stain Kitchen Cabinets Without Sanding Fast Easy Diy

How To Refinish Wood Cabinets The Easy Way Love Remodeled

How To Stain Kitchen Cabinets Infinity