How to Put Crown Moulding on Kitchen Cabinets: A Comprehensive Guide
Elevate the aesthetics and functionality of your kitchen by adding crown moulding to your cabinets. This decorative and practical element can enhance the overall design while providing a seamless transition between cabinets and the ceiling.
Materials You'll Need:
- Crown moulding
- Miter saw
- Brad nailer or hammer and nails li>Measuring tape and pencil
- Wood filler
- Caulk
- Sandpaper
Step 1: Measure and Cut the Moulding
Use a measuring tape to determine the length of the crown moulding needed for each cabinet. Cut the moulding using a miter saw at a 45-degree angle for the corners.
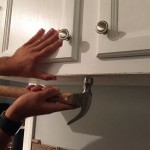
Step 2: Attach the Moulding
Place a bead of adhesive on the back of the moulding and position it against the top of the cabinet. Secure it using a brad nailer or hammer and nails. Start in the middle and work your way towards the corners.
Step 3: Miter the Corners
Hold the two pieces of moulding at a 45-degree angle and secure them with a miter clamp. Cut the ends at a 45-degree angle using a miter saw. Dry-fit the pieces to ensure they fit snugly.
Step 4: Install the Corner Moulding
Apply adhesive to the back of the corner moulding and insert it into the mitered joint. Secure it using brads or nails and wipe away any excess adhesive.
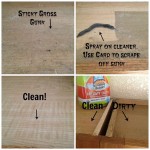
Step 5: Fill and Caulk
Fill any nail holes or gaps with wood filler. Allow it to dry and sand it smooth. Apply a thin bead of caulk along the seams and corners to seal any air leaks.
Step 6: Prime and Paint
If desired, prime the crown moulding and paint it to match the cabinets or ceiling. Allow it to dry thoroughly before reattaching any ornaments or decorations.
Tips for Success:
- Use a sharp saw blade for clean, precise cuts.
- Dry-fit all pieces before securing them to ensure proper alignment.
- Use a brad nailer with a depth adjustment to avoid damaging the moulding.
- Allow ample drying time for adhesives and finishes.
- Consider the height of the ceiling when choosing a moulding profile.
Conclusion
With careful planning and precision, adding crown moulding to kitchen cabinets can enhance the beauty and functionality of your kitchen space. By following these steps and tips, you can achieve a professional-looking finish that will elevate the overall design for years to come.

Adding Crown Molding To Kitchen Cabinets Young House Love

Adding Height To The Kitchen Cabinets Tempting Thyme

How To Add Crown Molding Kitchen Cabinets Abby Organizes

Diy Kitchen Cabinet Upgrade With Paint And Crown Molding

Adding Height To The Kitchen Cabinets Tempting Thyme

How To Install Kitchen Cabinets Crown Molding Zothex Flooring More

Cabinet Crown Molding

Adding Crown Moulding To Wall Kitchen Cabinets Momplex Vanilla Ana White

Diy Kitchen Cabinet Upgrade With Paint And Crown Molding

10 Steps To Install Crown Molding On Cabinets Fine Homebuilding
Related Posts